
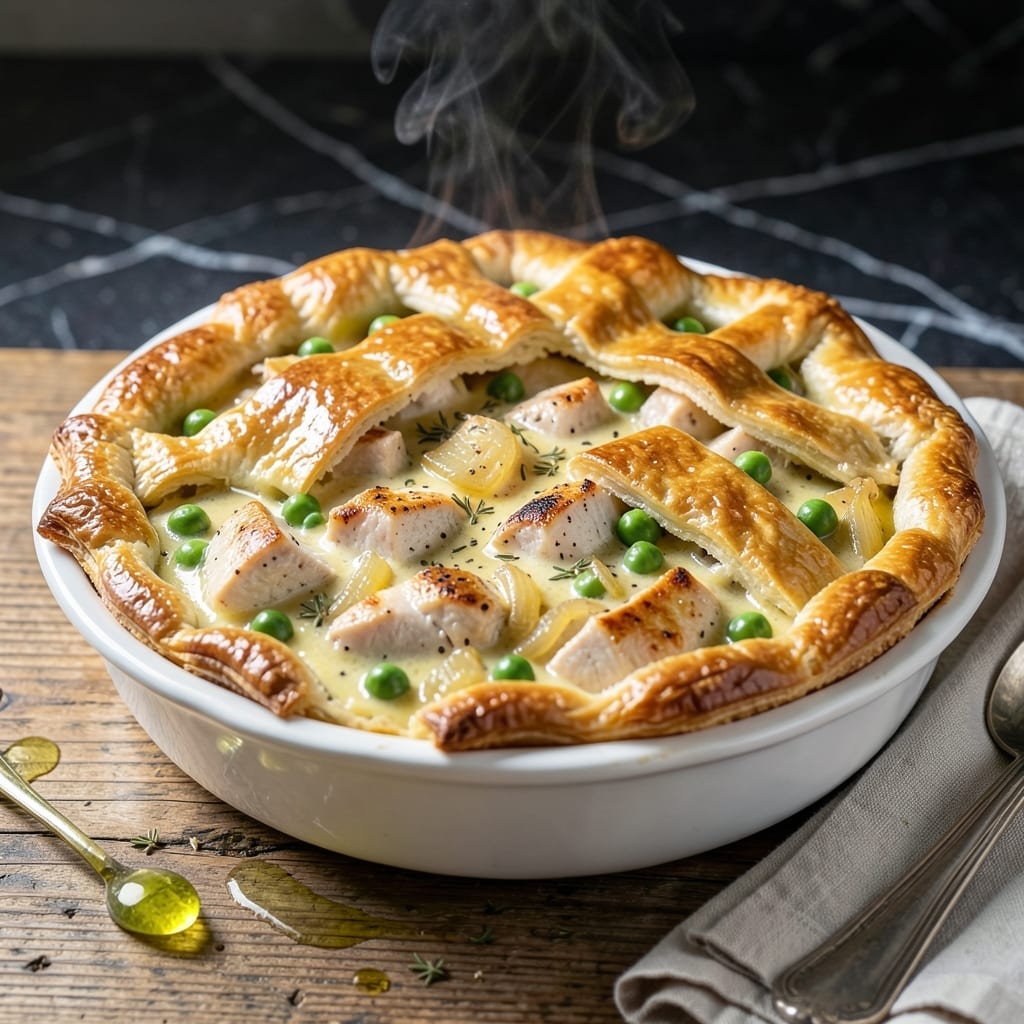
There’s something deeply satisfying about a well-made chicken pot pie, and this version adds a bright, citrusy dimension that elevates the classic comfort dish. The lemon infuses the creamy filling with vibrant flavor without overpowering the savory base.
I developed this recipe to bring new life to a familiar favorite. The secret is balancing the zesty lemon with rich, creamy chicken filling and flaky pastry. Every bite delivers that perfect harmony of tangy and comforting.
You’ll get a golden, buttery crust encasing tender chicken, vegetables, and a velvety sauce with just enough lemon to make it special. It’s the kind of dish that feels like a warm hug on a chilly evening.
This recipe stays true to tradition while offering something delightfully unexpected. Here’s how to make it.
Ingredients for Lemon Chicken Pot Pie
Bright lemon and cozy pot pie ingredients come together for a zesty, comforting classic.
| Ingredient | Amount | Notes |
|---|---|---|
| Chicken Breast 🍗 | 1 ½ lb | Boneless, skinless, cubed |
| Unsalted Butter 🧈 | ½ cup | Cubed, for roux |
| All-Purpose Flour 🌾 | ½ cup | For roux and thickening |
| Whole Milk 🥛 | 1 ½ cups | Full-fat for creaminess |
| Chicken Broth 🍲 | 1 ½ cups | Low-sodium preferred |
| Yellow Onion 🧅 | 1 whole | Medium-sized, diced |
| Carrots 🥕 | 2 whole | Peeled and diced |
| Celery Stalks 🌿 | 2 whole | Diced for base |
| Garlic Cloves 🧄 | 3 cloves | Minced for depth |
| Frozen Peas 🌱 | 1 cup | No need to thaw |
| Lemon Zest 🍋 | 1 tbsp | Freshly grated for brightness |
| Lemon Juice 🍋 | ¼ cup | Freshly squeezed for tang |
| Fresh Thyme Leaves 🍃 | 1 tbsp | Chopped for aroma |
| Pie Crust 🥧 | 2 sheets | Store-bought or homemade |
| Kosher Salt 🧂 | 1 tsp | Diamond Crystal preferred |
| Black Pepper 🌶️ | ½ tsp | Freshly ground for best flavor |
The chicken is the foundation—boneless, skinless breasts stay tender and cook evenly. I grab mine from Whole Foods or Costco (the air-chilled kind tastes cleaner). The crust is forgiving—Pillsbury sheets work great, but if you’re feeling fancy, make your own. For the lemon, fresh is non-negotiable—those bottled juices won’t give you that vibrant pop you need here.
No fresh thyme? Dried at one-third the amount works, but add it earlier so it rehydrates. Out of peas? Frozen corn or green beans can sub in. The milk can be whole or 2%—just avoid skim (you want that richness). If you’re worried about the lemon overpowering, start with half the zest and adjust to taste. The broth can be homemade or Better Than Bouillon—both work.
Assemble the pie right before baking for the flakiest crust. Leftovers keep 3-4 days in the fridge, but the crust softens—best eaten fresh. Freeze unbaked pies for up to 2 months (wrap tightly in foil). The filling thickens more as it cools, so let it sit 10 minutes after baking.
Why You’ll Love This Recipe
- One-Pan Magic: I throw everything in a single skillet—no extra bowls, no fuss. Honestly, cleanup takes less time than the pie bakes.
- Zesty Comfort: The lemon brightens the creamy chicken filling in a way that feels fresh yet cozy. That buttery crust soaks it all up perfectly.
- Weeknight Hero: Between us, this is my 6 PM lifesaver. It’s hearty enough for dinner but fancy enough for Sunday supper.
- Double Duty: Leftovers taste even better the next day. I’ll be real: I sometimes make two just to have extras for lunch.
Step-by-Step Instructions for Lemon Chicken Pot Pie
Here’s the method I swear by for that perfect balance of zesty brightness and cozy comfort.
Step 1: Sear the Chicken and Sauté the Aromatics
Pat the 1.5 lb Chicken Breast dry and season with 1 tsp Kosher Salt and 0.5 tsp Black Pepper. Heat a large skillet over medium-high heat and melt 2 tablespoons of the 0.5 cup Unsalted Butter. Add the chicken in a single layer and sear for 3-4 minutes per side until golden brown.
Remove the chicken and set it aside. In the same skillet, add the diced 1 whole Yellow Onion, 2 whole Carrots, and 2 whole Celery Stalks. Cook for 5 minutes until the vegetables begin to soften, stirring occasionally. Add the minced 3 cloves Garlic Cloves and cook for 30 seconds until fragrant.
Step 2: Create the Creamy Lemon-Infused Filling
Add the remaining 0.5 cup Unsalted Butter to the skillet and let it melt. Stir in the 0.5 cup All-Purpose Flour to form a roux and cook for 1-2 minutes until it just starts to turn light golden brown. This builds the base for your filling’s rich texture.
Gradually whisk in the 1.5 cups Whole Milk and 1.5 cups Chicken Broth, ensuring no lumps form. Bring the mixture to a simmer and cook for 5 minutes until it thickens enough to coat the back of a spoon. Stir in the 1 tbsp Lemon Zest, 0.25 cup Lemon Juice, and 1 tbsp Fresh Thyme Leaves for that signature citrusy brightness.
Step 3: Assemble the Filling and Add the Chicken
Shred the seared chicken into bite-sized pieces and add it back to the skillet. Stir in the 1 cup Frozen Peas—no need to thaw them first. Let the filling simmer for another 3-4 minutes to allow the flavors to meld together.
Taste and adjust the seasoning if needed, though the Kosher Salt and Black Pepper should already have it well-balanced. The filling should be thick, creamy, and brimming with vibrant lemony notes.
Step 4: Top with Pie Crust and Bake to Perfection
Preheat your oven to 375°F. Transfer the filling to a 9-inch pie dish or similar baking dish. Unfold the 2 sheets Pie Crust and place one sheet over the filling, pressing it gently to adhere. Cut a few slits in the top to allow steam to escape.
Bake for 30-35 minutes until the crust is deep golden brown and the filling is bubbling. If the edges of the crust start browning too quickly, tent them with foil. Let the pie rest for 10 minutes before serving to allow the filling to set slightly.
Pro Tips For Making Lemon Chicken Pot Pie
- Poach the Chicken: Simmer the chicken breast in the chicken broth for 12-15 minutes until just cooked through—this keeps it juicy and infuses the broth with extra flavor for the filling.
- Chill the Dough: If making your own crust, refrigerate the dough for at least 30 minutes before rolling it out; I learned this the hard way after my crust shrank in the oven.
- Thicken Gradually: Add the flour to the butter a little at a time, whisking constantly to prevent lumps in your roux—sounds tedious, but it actually changes the outcome.
- Zest Before Juicing: Grate the lemon zest first, then cut the lemon in half for juice; it’s easier and you’ll get more flavor without the bitterness from the pith.
Health Benefits of These Flavors
Protein Powerhouse
The chicken in this dish provides about 40 grams of protein per serving, supporting muscle repair and growth. Lean chicken breast is an excellent source of complete protein, containing all nine essential amino acids your body can’t produce on its own.
Vitamin C Boost
That bright lemon flavor isn’t just delicious—it delivers a healthy dose of vitamin C. One serving provides roughly 30% of your daily vitamin C needs, supporting immune function and skin health. 💪
Rich in B Vitamins
Chicken is packed with B vitamins, particularly B6 and B12, which are vital for energy metabolism and brain function. The milk in the creamy sauce adds additional B vitamins like riboflavin.
Antioxidant Protection
The carrots and celery in this recipe contribute beta-carotene and other antioxidants. These compounds help combat oxidative stress and support overall health. The thyme adds its own antioxidant properties too.
Comfort with Nutrition
Unlike many comfort foods, this dish balances indulgence with nutrition. The vegetables add fiber while the lemon provides flavor without extra calories. It’s comfort food you can feel good about eating. 🥗
Bone Health Support
The milk in the creamy sauce provides calcium and vitamin D, both essential for maintaining strong bones. One serving contributes about 20% of your daily calcium needs.
Nutrition Facts
Frequently Asked Questions
Can I use rotisserie chicken instead?
Yes! Shred 2 cups of rotisserie chicken and skip the searing step. Add it directly to the creamy filling in the last 5 minutes of cooking to warm through.
How do I prevent a soggy crust?
Brush the top crust with a beaten egg wash before baking for extra crispness. Also, let the pie rest for 10 minutes after baking to help the filling set and avoid a soggy bottom.
Can I make this ahead of time?
Assemble the pie up to the baking step and refrigerate for up to 24 hours. Bake straight from the fridge, adding 5-10 minutes to the cooking time.
What’s the best way to store leftovers?
Store in the fridge for up to 3-4 days in an airtight container. Reheat individual portions in the microwave or oven at 350°F until warmed through.

- 4C Bread Crumbs Meatballs Recipe: Crispy Crust and Juicy Centers - September 25, 2026
- 6 Oz Chocolate Chip Cookie Recipe: Perfectly Balanced Crispy Edges and Chewy Hearts - September 25, 2026
- 6-Inch Coffee Cake Recipe: Vanilla Bean Swirls and Buttery Streusel Topping - September 25, 2026