
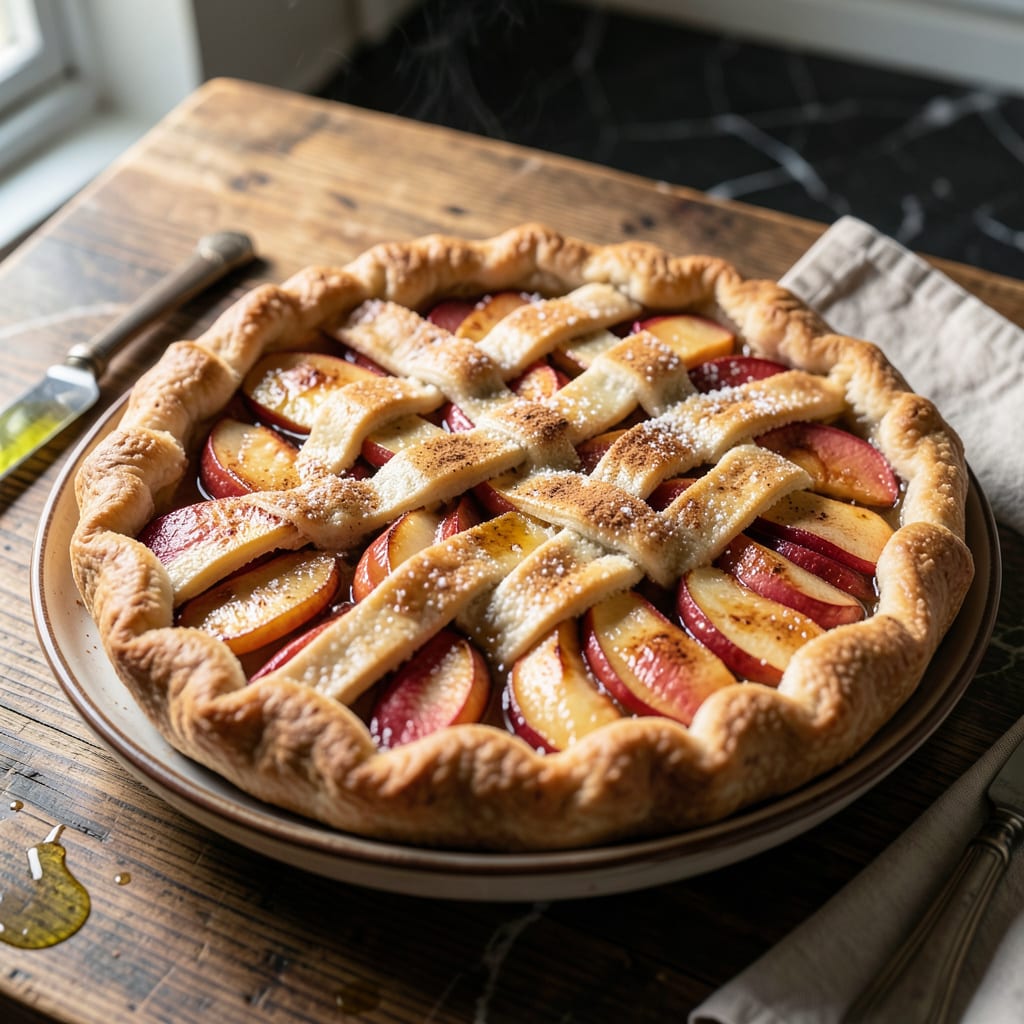
This apple pie delivers a flaky crust with significantly less fat by using smart ingredient substitutions. The result is just as satisfying as traditional versions.
I developed this recipe to prove that lighter desserts can still taste indulgent. The secret is in the crust technique and balanced filling that doesn’t compromise on texture or flavor.
Ingredients for Low Fat Apple Pie
Flaky crust meets sweet-tart filling with smart substitutions for a lighter take on classic pie.
| Ingredient | Amount | Notes |
|---|---|---|
| All-Purpose Flour 🌾 | 2 ½ cups | Plus extra for dusting surface |
| Cold Water 💧 | ½ cup | Ice cold for flaky texture |
| Unsalted Butter 🧈 | ½ cup | Chilled and cubed small |
| Granulated Sugar 🍚 | ¾ cup | Divided for crust and filling |
| Salt 🧂 | ½ tsp | Fine grain for even distribution |
| Apples 🍏 | 8 whole | Mixed varieties for texture contrast |
| Cornstarch 🌽 | 2 tbsp | Thickens filling naturally |
| Ground Cinnamon 🌿 | 1 ½ tsp | Freshly ground preferred |
| Lemon Juice 🍋 | 1 tbsp | Freshly squeezed for brightness |
| Vanilla Extract 🌿 | 1 tsp | Pure for best flavor |
| Low-Fat Greek Yogurt 🥛 | ½ cup | Replaces half the butter |
| Egg White 🥚 | 1 whole | For crust binding and shine |
The crust is the game-changer here. King Arthur Flour gives consistent results, and using cold, cubed butter is non-negotiable for those flaky layers. The Greek yogurt substitution (I prefer Fage 2%) replaces half the butter without sacrificing texture. For the apples, seek out a mix of sweet and tart varieties—Honeycrisp and Granny Smith work beautifully together at any Whole Foods or local farmers market.
No Greek yogurt? Low-fat sour cream works at a one-to-one ratio. For a fully plant-based crust, swap the butter for coconut oil (chilled solid) and the egg white for a flax egg. The cornstarch can be replaced with arrowroot powder at the same quantity, but don’t skip the thickener entirely. The cinnamon is essential, but apple pie spice (1:1) can stand in if that’s what you have.
Assemble the pie just before baking for the best texture. Leftovers keep at room temperature for 2 days or refrigerated for 4 days. The filled pie freezes beautifully for up to 3 months—bake from frozen, adding 10-15 minutes to the time. Always let it cool completely before slicing for clean portions.
Why You’ll Love This Recipe
- One Bowl Wonder: I mix the crust right in the bowl—no fancy equipment, just flour, butter, and water.
- Sweet & Light: The apples shine with just a touch of sugar, so it’s all the flavor without the guilt.
- Weekend or Wednesday: Honestly, I’ve served this at brunch and as a late-night snack—it works every time.
- Stays Fresh: Leftovers taste just as good the next day, and the crust stays flaky.
Step-by-Step Instructions for Low Fat Apple Pie
This method delivers a flaky crust with a perfectly set filling while keeping fat content in check.
Step 1: Prepare the Low Fat Crust
In a food processor, pulse the 2.5 cups all-purpose flour, 0.5 tsp salt, and 0.5 cup unsalted butter (chilled and cubed) until the mixture resembles coarse crumbs. The butter should be the size of small peas—this creates the flaky layers we’re after.
Add the 0.5 cup low-fat Greek yogurt and 0.5 cup cold water, then pulse just until the dough begins to come together. It will look shaggy, but resist the urge to overmix. Overworking develops gluten, which makes the crust tough instead of tender.
Turn the dough out onto a lightly floured surface and divide it in half. Shape each portion into a disk, wrap in plastic, and refrigerate for 1 hour. This chilling step relaxes the gluten and firms up the fat, ensuring a flaky texture.
Step 2: Make the Apple Filling
Peel, core, and thinly slice the 8 whole apples into uniform pieces—about ¼-inch thick. Uniform slices ensure even cooking. Toss them immediately with the 1 tbsp lemon juice to prevent browning and add a bright flavor.
In a large bowl, combine the apples with 0.5 cup granulated sugar (reserving 0.25 cup for the crust), 2 tbsp cornstarch, 1.5 tsp ground cinnamon, and 1 tsp vanilla extract. The cornstarch will thicken the natural juices released by the apples as they bake, creating a luscious filling.
Step 3: Assemble the Pie
On a floured surface, roll out one disk of dough to a 12-inch circle and transfer it to a 9-inch pie dish. Press it gently into the bottom and up the sides, trimming any excess dough to a ½-inch overhang. Brush the surface lightly with the 1 whole egg white—this creates a barrier to prevent sogginess.
Pour the apple filling into the crust, mounding it slightly in the center. Roll out the second disk of dough and place it over the filling. Trim the top crust to match the bottom, then crimp the edges together to seal. Cut 4-5 slits in the top crust to allow steam to escape during baking.
Step 4: Bake to Golden Perfection
Preheat your oven to 375°F. Brush the top crust with the remaining egg white and sprinkle with the reserved 0.25 cup granulated sugar. This creates a beautiful, glossy finish with a touch of sweetness.
Bake on the lower oven rack for 50-60 minutes until the crust is deep golden brown and the filling is bubbling. If the edges brown too quickly, cover them with foil. The pie is done when the juices bubble thickly through the vents—this indicates the cornstarch has fully activated.
Let the pie cool on a wire rack for at least 2 hours before slicing. This resting period allows the filling to set completely, ensuring clean slices with every serving.
Pro Tips For Making Low Fat Apple Pie
- Chill the Butter: Keep your unsalted butter ice cold until the last second—it creates flakier layers in the crust, which is crucial when you’re cutting back on fat.
- Cut Butter Small: Dice the cold butter into pea-sized pieces before mixing with flour—this ensures even distribution so you don’t need extra fat to get a tender crust.
- Skip Overworking: I learned this the hard way—handle the dough just until it comes together, or you’ll develop gluten and end up with a tough, dense pie shell.
- Use Cold Water: Sounds simple, but ice-cold water keeps the butter from melting prematurely, which is the thing that matters most for a low-fat crust that still holds its shape.
Common Mistakes When Making Great low fat apple pie
Overworking the Dough
When making the crust, pulse the food processor just until the dough starts to come together. Overmixing develops gluten, which makes the crust tough rather than flaky. I stop as soon as the butter is pea-sized and the dough looks shaggy. 💡
Skipping the Chill
Don’t rush the 1-hour chilling step for the dough. This relaxes the gluten and firms up the fat, ensuring those coveted flaky layers. I set a timer to avoid cutting this step short.
Uneven Apple Slices
Cut the apples into uniform ¼-inch thick slices for even cooking. Thick slices stay crisp, while thin ones turn mushy. A mandoline can help achieve consistency if you struggle with knife skills.
Overfilling the Crust
Mound the filling slightly in the center but avoid overfilling. Too many apples can cause the pie to burst or the filling to bubble out. I aim for about 6 cups of sliced fruit max.
Ignoring Steam Vents
Always cut 4-5 slits in the top crust to allow steam to escape. Without vents, the filling can’t thicken properly, and the crust may puff up. I use a sharp knife to make clean, decorative cuts.
This keeps the pie from becoming soggy or unevenly baked.
Slicing Too Soon
Let the pie cool for at least 2 hours before slicing. Cutting too early causes the filling to run out, leaving you with a messy, unappetizing dessert. I usually bake in the morning and serve later. 🍏
Nutrition Facts
Frequently Asked Questions
Can I use a store-bought crust to save time?
Yes, but look for a trans-fat-free version. You’ll save about 30 minutes of prep time. Just roll it out slightly thinner to match the homemade texture.
Why does the recipe use Greek yogurt in the crust?
It replaces half the butter, cutting fat while adding protein. The yogurt’s acidity also tenderizes the gluten for a flakier texture.
How do I prevent a soggy bottom crust?
Brush the bottom crust with egg white before adding filling. Also, bake on the lower oven rack at 375°F for direct heat.
Can I make this pie ahead of time?
The baked pie keeps at room temperature for 2 days. For longer storage, freeze before baking and add 10-15 minutes to baking time.

- 8 Bean Soup Recipe Crock Pot: Hearty Vegetable Medley in One Pot - September 25, 2026
- 4C Bread Crumbs Meatballs Recipe: Crispy Crust and Juicy Centers - September 25, 2026
- 6 Oz Chocolate Chip Cookie Recipe: Perfectly Balanced Crispy Edges and Chewy Hearts - September 25, 2026