
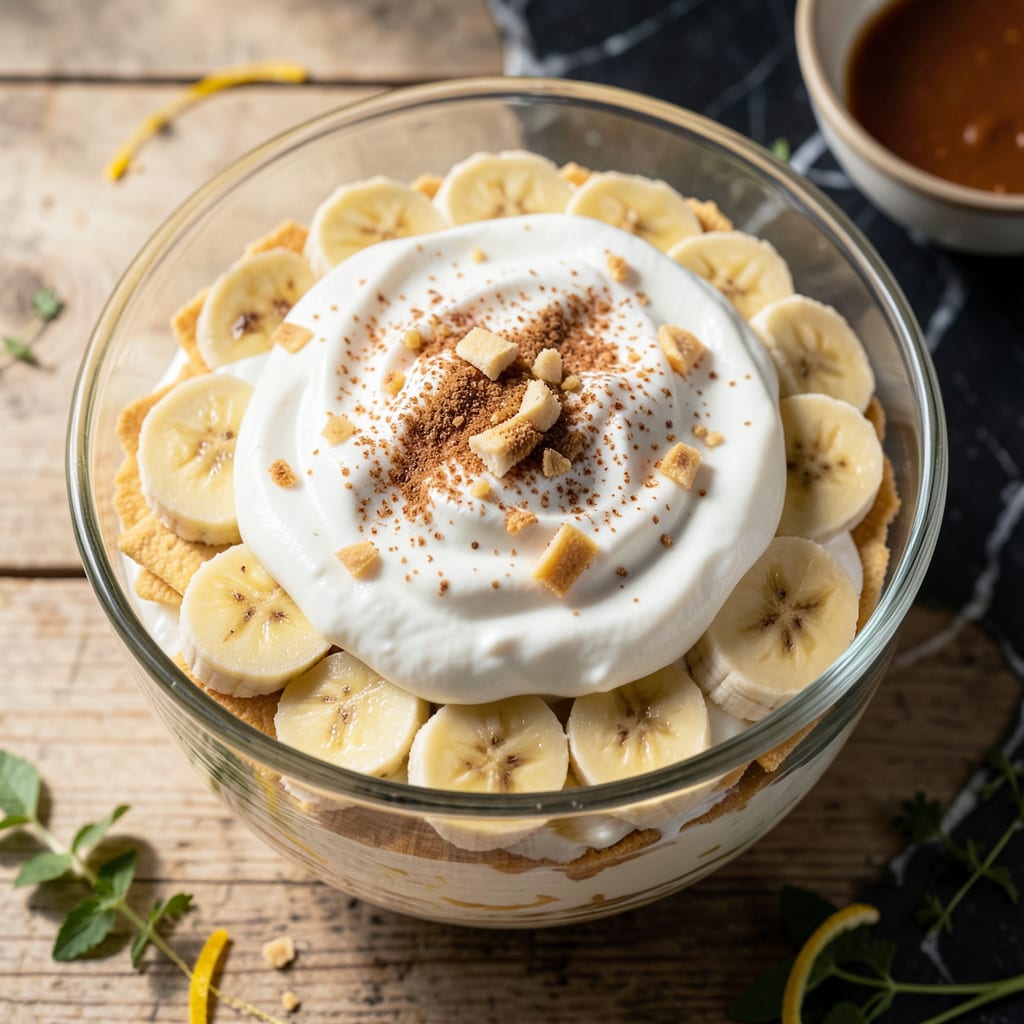
There’s a better way to enjoy banana pudding without the guilt. This from-scratch version delivers creamy layers and wafer crunch while keeping fat in check.
Using smart substitutions and traditional layering, the result is just as satisfying as the classic—light, flavorful, and perfect for any gathering.
Ingredients for Low Fat Banana Pudding Recipe from Scratch
Light layers of vanilla and banana come together with smart swaps. Nothing complicated here.
| Ingredient | Amount | Notes |
|---|---|---|
| Vanilla Wafers 🍪 | 36 pieces | Low-fat variety preferred |
| Ripe Bananas 🍌 | 4 whole | Sliced just before layering |
| Non-Fat Greek Yogurt 🥛 | 2 cups | Plain, unsweetened for tang |
| Low-Fat Milk 🥛 | 1 ½ cups | 1% or skim for creaminess |
| Instant Vanilla Pudding Mix 🍮 | 1 package | Sugar-free if desired |
| Vanilla Extract 🌿 | 1 tsp | Pure for best flavor |
| Granulated Sugar 🧂 | ¼ cup | Adjust to taste preference |
| Cornstarch 🌾 | 2 tbsp | For thickening pudding |
| Egg Whites 🥚 | 2 whole | Lightly beaten for structure |
| Salt 🧂 | ¼ tsp | Fine grain for even distribution |
| Lemon Juice 🍋 | 1 tbsp | Freshly squeezed to prevent browning |
Vanilla wafers are the foundation—Nabisco’s low-fat version works perfectly, or check the health food aisle for a whole-grain option. The pudding mix is your shortcut to creamy layers; Jell-O’s sugar-free vanilla keeps calories down without sacrificing flavor. For the yogurt, Chobani or Fage non-fat Greek has that thick, rich texture you need. Bananas should be just ripe (a few brown speckles) for the best sweetness.
No Greek yogurt? Regular non-fat yogurt works but strain it in a cheesecloth for 30 minutes to thicken. Swap pudding mix for homemade vanilla custard if you’re avoiding additives. For extra richness, use 1% milk instead of skim. The cornstarch can be replaced with arrowroot powder at the same ratio. Egg whites add structure—skip them if you prefer, but the pudding might be slightly softer.
Assemble this the morning of serving—wafer layers soften over time. Keeps covered in the fridge for 2-3 days, though it’s best fresh. Bananas may brown slightly, but the lemon juice slows it down. Not freezer-friendly, unfortunately.
Why You’ll Love This Recipe
- One Bowl Wonder: I just dump the pudding mix, milk, and yogurt together—no whisking marathons here.
- Creamy Dreamy: The Greek yogurt adds this rich tang that makes the vanilla wafers and bananas taste even better.
- Potluck Hero: I bring this to summer picnics and it’s always the first dish gone, even with the health-conscious crowd.
- Stays Fresh: Honestly, it tastes even better the next day after the wafers soak up all that creamy goodness.
Step-by-Step Instructions for Low Fat Banana Pudding
Here’s the method. Straightforward, tested, works every time.
Step 1: Prepare the Banana Pudding Base
In a medium saucepan, whisk together the 1.5 cups Low-Fat Milk, 0.25 cup Granulated Sugar, 2 tbsp Cornstarch, 1 package Instant Vanilla Pudding Mix, and 0.25 tsp Salt until no lumps remain. I like to start with room temperature milk to prevent scorching.
Place the saucepan over medium heat and stir constantly with a silicone spatula. After about 5-7 minutes, the mixture will begin to thicken. You’ll know it’s ready when it coats the back of the spatula and leaves a clean line when you run your finger through it.
Remove from heat and immediately stir in the 1 tsp Vanilla Extract. This prevents the vanilla from evaporating in the heat. Let the pudding cool for 5 minutes while you prepare the remaining ingredients.
Step 2: Fold in Egg Whites and Yogurt
In a separate bowl, lightly beat the 2 whole Egg Whites until frothy but not stiff. Slowly fold them into the warm pudding mixture using a rubber spatula. This adds structure and lightness without the fat of whole eggs.
Next, gently fold in the 2 cups Non-Fat Greek Yogurt. The yogurt adds a delightful tang that balances the sweetness of the pudding. Be careful not to overmix—you want to maintain a smooth, creamy texture.
Let this mixture cool completely at room temperature. I’ll often place the bowl in an ice bath to speed up the process, stirring occasionally to prevent a skin from forming on top.
Step 3: Prepare Bananas and Vanilla Wafers
Just before assembling, slice the 4 whole Ripe Bananas into ¼-inch thick rounds. Toss them immediately with the 1 tbsp Lemon Juice to prevent browning. The lemon juice also adds a subtle brightness that complements the pudding beautifully.
Arrange 12 pieces Vanilla Wafers in a single layer in the bottom of a 8×8-inch baking dish or individual serving glasses. You want enough to create a solid base layer without gaps.
Step 4: Assemble the Banana Pudding Layers
Spoon half of the pudding mixture over the vanilla wafers, spreading it evenly with the back of a spoon. The pudding should be thick enough to hold its shape but still spreadable.
Arrange half of the sliced bananas over the pudding layer, slightly overlapping them for full coverage. Top with another 12 pieces Vanilla Wafers, pressing down gently to help them adhere to the pudding.
Repeat with the remaining pudding, bananas, and the last 12 pieces Vanilla Wafers. The final wafer layer should be completely exposed—this gives you that classic banana pudding look and texture contrast in every bite.
Step 5: Chill and Serve
Cover the dish tightly with plastic wrap and refrigerate for at least 4 hours, but overnight is even better. This chilling time allows the vanilla wafers to soften slightly while maintaining their structure, and lets all the flavors meld together.
When ready to serve, you’ll notice the wafers have transformed into a cake-like layer while the pudding has set to a creamy, spoonable consistency. The bananas will have slightly macerated in the pudding, infusing it with their natural sweetness. Serve chilled with a wafer on top for garnish.
Pro Tips For Making Low Fat Banana Pudding Recipe From Scratch
- Chill the Pudding: Whisk the pudding mix with cold low-fat milk for 2 full minutes, then let it set in the fridge for at least 15 minutes—any shorter and it won’t thicken properly.
- Slice Bananas Last: Wait to slice the bananas until right before assembling to prevent browning; tossing them in a little lemon juice helps too if you need to prep ahead.
- Skip the Soggy Layers: Place a single layer of vanilla wafers at the bottom, then alternate with pudding and bananas—stacking too many wafers in one spot turns them mushy fast.
- Fold in Yogurt Gently: After the pudding thickens, fold in the non-fat Greek yogurt with a spatula just until combined to keep the texture light and creamy.
Serving Suggestions for Leftovers
Elegant Glassware
Individual servings shine in 8-ounce mason jars or clear dessert cups. The layers create a beautiful visual effect, perfect for dinner parties. I love how the vanilla wafers peek through the glass, hinting at the crunch inside.
Garnish Ideas
A dollop of fat-free whipped topping adds a light finish. Sprinkle with crushed vanilla wafers for extra texture. For color, add a few fresh berries—strawberries or blueberries work beautifully. 🍓
Temperature Tip
Serve this chilled but not ice-cold. I pull it from the fridge 15-20 minutes before serving. This takes the edge off the cold while keeping the pudding firm enough to hold its layers.
Portion Control
For a crowd, use a 9×13-inch dish to create one large pudding. The layers still work perfectly, and guests can serve themselves. Cut into 12 equal squares for easy portioning.
Make It Festive
Drizzle with sugar-free caramel sauce just before serving. A dusting of ground cinnamon adds warmth. These small touches elevate the presentation without adding significant fat. ✨
Nutrition Facts
Frequently Asked Questions
Can I use regular yogurt instead of Greek?
Yes, but strain regular yogurt in cheesecloth for 30 minutes to achieve the same thickness. Greek yogurt’s density is key for creamy layers without extra fat.
How do I prevent banana slices from browning?
Toss them with 1 tablespoon lemon juice immediately after slicing. This preserves color and adds a subtle brightness to each bite.
Why does my pudding layer turn watery?
Chilling for at least 4 hours is crucial. If it’s still thin, your cornstarch may not have activated—ensure you whisked it thoroughly with cold milk before heating.
Can I make this ahead of time?
Assemble up to 1 day ahead. The wafers will soften, but the flavors deepen. Store covered in the fridge.

- 8 Bean Soup Recipe Crock Pot: Hearty Vegetable Medley in One Pot - September 25, 2026
- 4C Bread Crumbs Meatballs Recipe: Crispy Crust and Juicy Centers - September 25, 2026
- 6 Oz Chocolate Chip Cookie Recipe: Perfectly Balanced Crispy Edges and Chewy Hearts - September 25, 2026