
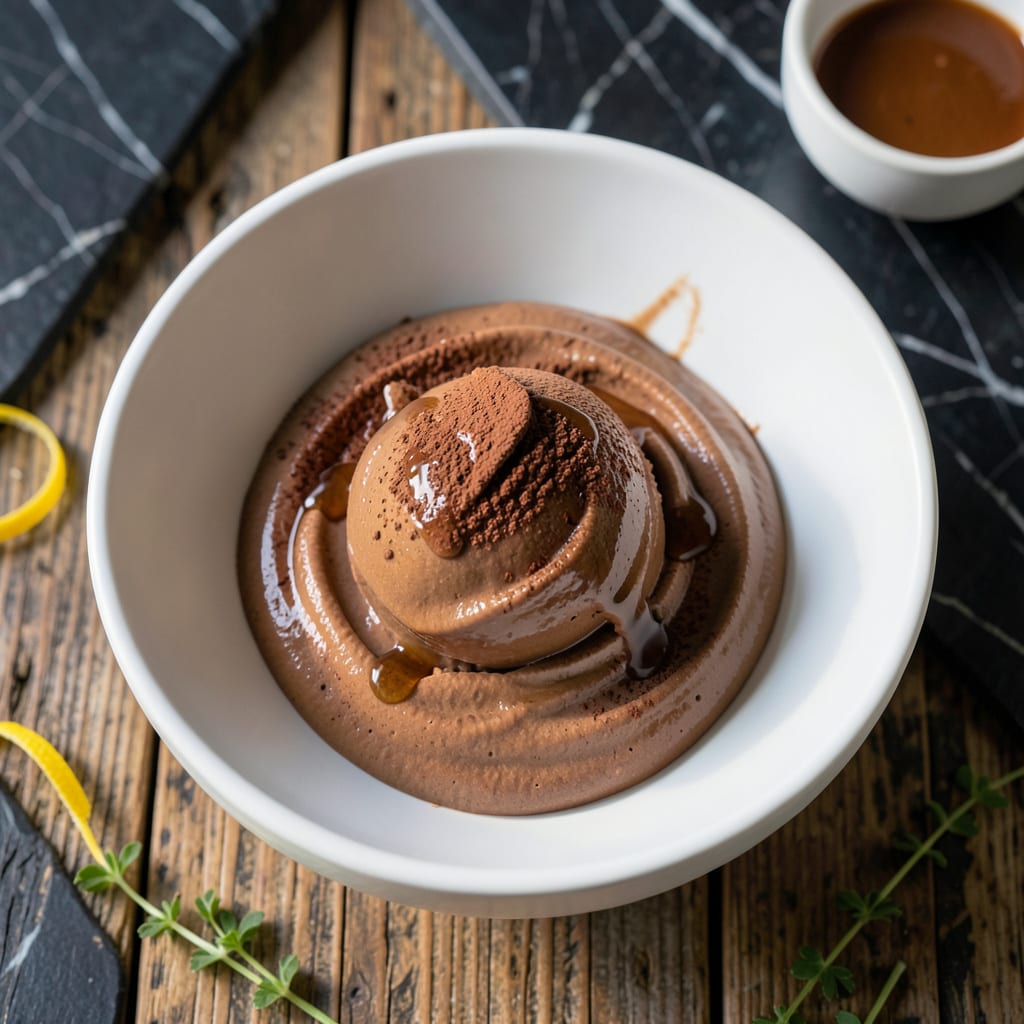
This low fat chocolate ice cream delivers rich, creamy satisfaction without the usual guilt. I’ve perfected a method that keeps the decadence while cutting the fat significantly.
The secret lies in using non-fat milk and cocoa powder for deep chocolate flavor, with a touch of cornstarch to achieve that signature velvety texture. It’s proof that healthier choices can still taste indulgent.
Ingredients for Low Fat Chocolate Ice Cream
Creamy indulgence meets guilt-free ingredients for this frozen dessert masterpiece.
| Ingredient | Amount | Notes |
|---|---|---|
| Non-Fat Milk 🥛 | 2 cups | Cold, divided for best results |
| Unsweetened Cocoa Powder 🍫 | ¾ cup | Dutch-processed preferred for smoothness |
| Granulated Sugar 🍚 | ¾ cup | Adjust to taste preference |
| Cornstarch 🌾 | 2 tbsp | For velvety texture stability |
| Pure Vanilla Extract 🌿 | 1 tsp | Real extract, not imitation |
| Salt 🧂 | ¼ tsp | Fine sea salt preferred |
| Large Eggs 🥚 | 2 whole | Room temperature for emulsification |
| Heavy Cream 🥛 | ¼ cup | Light cream works too |
| Semi-Sweet Chocolate Chips 🍫 | ½ cup | Melted, high-quality brand |
| Espresso Powder ☕ | ½ tsp | Enhances chocolate depth |
| Almond Extract 🌰 | ¼ tsp | Optional, for complexity |
The cocoa powder is non-negotiable for that deep chocolate flavor. Hershey’s Special Dark or Ghirardelli are my go-to brands—look for the Dutch-processed label for smoother results. Non-fat milk might seem counterintuitive for ice cream, but organic varieties from Whole Foods have the richest mouthfeel. The cornstarch is your texture insurance—Argo or Clabber Girl work perfectly (skip the instant stuff).
No Dutch-process cocoa? Natural cocoa at 1.25 times the amount works, though the flavor will be slightly sharper. Eggs can be swapped for cornstarch slurry if avoiding animal products (though this recipe allows them). For sweeter ice cream, increase sugar by 2 tbsp. The espresso powder isn’t optional in my book—Medaglia d’Oro is the standard for bakeries. Light cream can replace heavy cream without texture loss.
Churn immediately after mixing for optimal texture. Stores 1 week in an airtight container, though it’s best fresh. For longer storage, freeze in portions for up to 3 months (thaw 10 minutes before scooping).
Why You’ll Love This Recipe
- One Bowl Wonder: I just mix the cocoa, sugar, and cornstarch right in the saucepan—no extra bowls to wash.
- Rich Without Guilt: The cocoa and vanilla pack serious chocolate flavor, but the non-fat milk keeps it light.
- Kid-Approved Treat: My niece asks for this after soccer practice, and I’ll be real: I sneak a bowl too.
- Freezer Friendly: Leftovers? They keep beautifully for weeks, so I always have a healthy dessert on hand.
Step-by-Step Instructions for Low Fat Chocolate Ice Cream
Master the custard base and chilling process for silky, rich results with minimal fat.
Step 1: Create the Cocoa Infusion
In a medium saucepan, whisk together 2 cups Non-Fat Milk, 0.75 cup Unsweetened Cocoa Powder, 0.75 cup Granulated Sugar, and 0.5 tsp Espresso Powder over medium heat. The espresso amplifies the chocolate depth without adding coffee flavor.
Heat the mixture until it reaches a gentle simmer, whisking constantly to prevent scorching. You’ll notice the cocoa dissolving completely and the mixture turning a deep, rich brown. Remove from heat once small bubbles form around the edges.
Step 2: Temper and Thicken the Custard
In a separate bowl, whisk 2 tbsp Cornstarch with ¼ cup of the hot cocoa mixture to create a slurry. This prevents lumps when added back to the pot. Slowly pour this mixture back into the saucepan while whisking continuously.
Return to medium-low heat and cook for 2-3 minutes, stirring constantly, until the mixture thickens enough to coat the back of a spoon. The texture should resemble a thin pudding. Remove from heat immediately to prevent over-thickening.
Step 3: Incorporate Eggs and Flavorings
In a medium bowl, whisk 2 whole Large Eggs until smooth. Slowly pour about ½ cup of the hot cocoa mixture into the eggs while whisking vigorously—this tempers the eggs so they don’t scramble. Pour the tempered egg mixture back into the saucepan.
Return to low heat and cook for 1-2 minutes, stirring constantly, until slightly thickened. Remove from heat and stir in 1 tsp Pure Vanilla Extract, 0.25 tsp Salt, and 0.25 tsp Almond Extract. The almond extract adds subtle complexity to the chocolate base.
Step 4: Finish with Cream and Chocolate
Stir in 0.25 cup Heavy Cream and 0.5 cup Semi-Sweet Chocolate Chips until the chocolate melts completely and the mixture is smooth. The heavy cream adds richness while keeping the fat content low compared to traditional recipes.
The mixture will be glossy and deeply chocolate-colored. Taste and adjust sweetness if needed, though the cocoa’s natural bitterness balances the sugar. The consistency should be similar to a thick milkshake at this stage.
Step 5: Chill and Churn for Perfect Texture
Pour the custard into a clean bowl and press plastic wrap directly onto the surface to prevent a skin from forming. Refrigerate for at least 4 hours or overnight until completely cold—this is crucial for proper texture development.
Once chilled, pour the custard into your ice cream maker and churn according to manufacturer’s instructions, typically 20-25 minutes. The ice cream will be thick and creamy, with a soft-serve consistency. Transfer to a freezer-safe container and freeze for 2-4 hours until firm enough to scoop.
Pro Tips For Making Low Fat Chocolate Ice Cream
- Chill the Base: Let the cooked mixture cool completely in the fridge—at least 4 hours or overnight. I learned this the hard way after ending up with icy, grainy ice cream from rushing the process.
- Bloom the Cocoa: Whisk the cocoa powder into a small amount of warm milk first to dissolve it fully before adding to the pot. Sounds tedious, but it prevents those unappetizing chocolate clumps.
- Don’t Boil Vigorously: Keep the heat medium-low when thickening with cornstarch—too high and you’ll scorch the milk or create a lumpy custard. Stir constantly, especially near the end.
- Add Vanilla Last: Stir in the vanilla extract only after removing the mixture from heat. High temperatures can mute its flavor, and you want that rich vanilla punch to shine through.
Health Benefits of These Flavors
Heart-Healthy Indulgence
This treat delivers rich chocolate flavor with just 3 grams of fat per serving compared to 15-20 grams in traditional recipes. The non-fat milk provides calcium and vitamin D while keeping saturated fat in check. 💪
Antioxidant Powerhouse
Cocoa powder is packed with flavonoids that support heart health and reduce inflammation. The espresso powder adds even more antioxidants without overpowering the chocolate taste. I love knowing my dessert is working double duty.
Lower Calorie Impact
By replacing heavy cream with mostly non-fat milk, we cut calories significantly. A serving comes in around 180-200 calories, about half of premium ice cream. The cornstarch gives that creamy mouthfeel without adding fat.
Protein Boost
The eggs in this recipe provide about 6 grams of protein per serving, making it more satiating than most frozen desserts. This helps balance blood sugar and keeps you fuller longer. I notice I don’t crave seconds as often.
Dietary Flexibility
This version accommodates various dietary needs. Use dairy-free milk for vegan preparation or sugar substitute for diabetic-friendly options. The base recipe remains just as creamy and satisfying. 💛
Mood Enhancer
Chocolate stimulates endorphin production, and this version lets you enjoy that mood boost guilt-free. The combination of cocoa and vanilla creates a natural sense of well-being. It’s my go-to for a happy ending to any meal.
Nutrition Facts
Frequently Asked Questions
Can I use almond milk instead of non-fat?
Yes, unsweetened almond milk works well, though the texture may be slightly less creamy. Use the same 2 cups measurement. For best results, choose a brand with added calcium for richness.
Why add espresso powder to chocolate?
It deepens the chocolate flavor without tasting like coffee. Just 0.5 tsp enhances the cocoa’s natural richness. Skip it only if you prefer milder chocolate notes.
How long can I store this ice cream?
It stays fresh for up to 1 week in an airtight container. For longer storage, freeze for 3 months but thaw for 10 minutes before scooping.
Can I make this without an ice cream maker?
Yes! Freeze the custard in a shallow dish, stirring vigorously with a fork every 30 minutes for 3-4 hours. This breaks up ice crystals for a smoother texture.

- 8 Bean Soup Recipe Crock Pot: Hearty Vegetable Medley in One Pot - September 25, 2026
- 4C Bread Crumbs Meatballs Recipe: Crispy Crust and Juicy Centers - September 25, 2026
- 6 Oz Chocolate Chip Cookie Recipe: Perfectly Balanced Crispy Edges and Chewy Hearts - September 25, 2026