
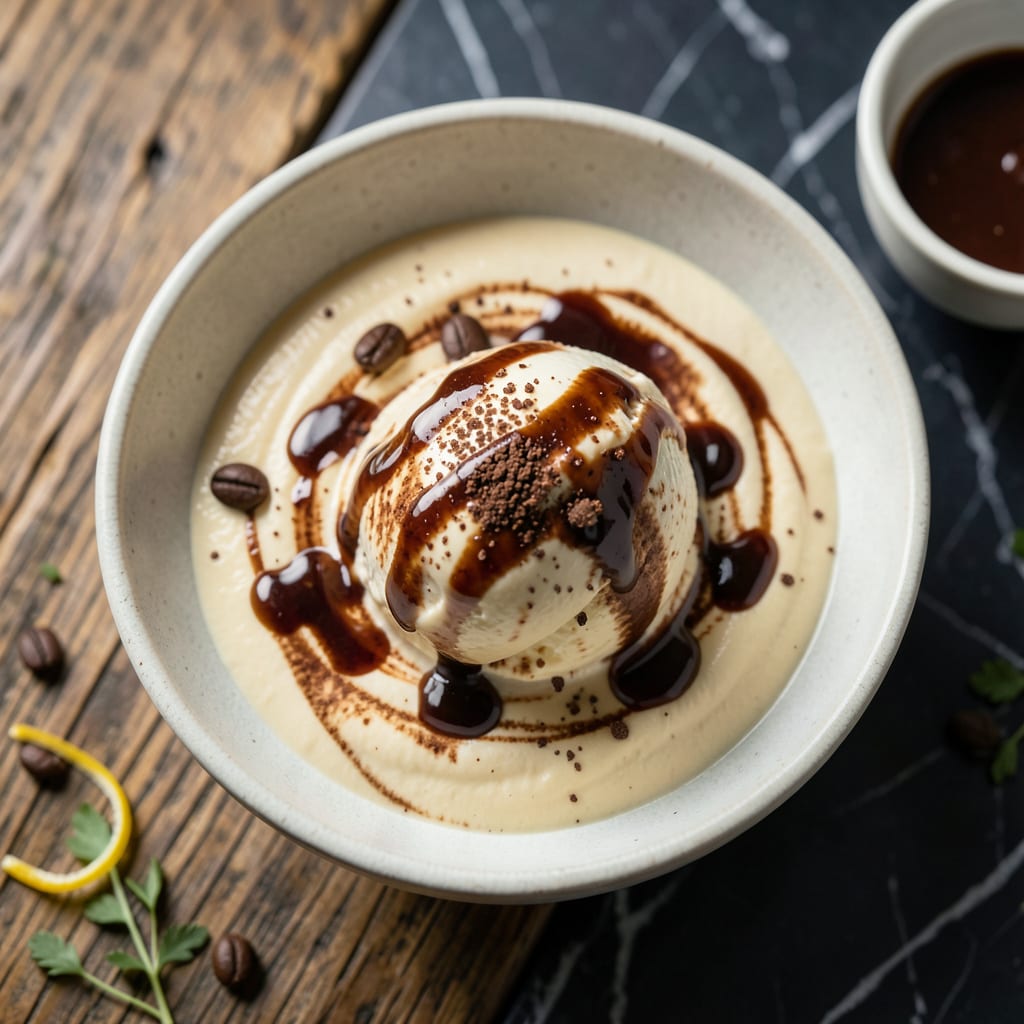
This low-fat coffee ice cream proves you can indulge without compromise. Using non-fat milk and minimal sugar, it delivers rich coffee flavor with a creamy texture you won’t believe.
The secret is a custard base with egg whites for structure. Churned to perfectly smooth consistency, it satisfies every coffee craving while keeping calories in check.
Ingredients for Low Fat Coffee Ice Cream
Just a few simple ingredients create this creamy, dreamy coffee treat with less guilt.
| Ingredient | Amount | Notes |
|---|---|---|
| Non-Fat Milk 🥛 | 2 cups | Cold for best texture |
| Egg Whites 🥚 | 4 whole | Large eggs, room temperature |
| Granulated Sugar 🍚 | ½ cup | Adjust to taste preference |
| Instant Coffee Granules ☕ | 2 tbsp | Or espresso powder |
| Vanilla Extract 🌿 | 1 tsp | Pure for best flavor |
| Heavy Cream 🥛 | ¼ cup | Light cream works too |
| Cornstarch 🌾 | 1 tbsp | For thickening custard |
| Salt 🧂 | ¼ tsp | Enhances all flavors |
| Brewed Strong Coffee ☕ | ½ cup | Cooled to room temperature |
| Pure Coffee Extract ☕ | ½ tsp | Optional for intensity |
[recipeingredientscaler]
The coffee flavor is everything here. Starbucks Via instant coffee packets work great (one packet = 1 tbsp), or use Medaglia d’Oro espresso powder for that extra kick. Non-fat milk is key to keeping it light, but make sure it’s fresh—old milk can turn your ice cream icy. I grab mine from Whole Foods since they seem to have the longest expiration dates on dairy.
No instant coffee? Brew a strong cup and reduce it to 2 tbsp for concentrated flavor. Egg whites give structure without the fat—save the yolks for another recipe (or a fancy breakfast). Want it sweeter? Add another 2 tbsp sugar, but taste as you go. The cornstarch might seem odd, but it prevents ice crystals like a dream.
This keeps 1 week in the freezer, but it’s best fresh. Let it sit at room temperature for 5-10 minutes before scooping (trust me on this one). Freeze leftovers in an airtight container with parchment paper pressed directly on the surface.
Why You’ll Love This Recipe
- 5-Minute Mix: I just whisk egg whites, milk, and coffee granules—no fancy equipment, no fuss.
- Rich Coffee Kick: The instant coffee and vanilla create that deep, satisfying coffee flavor without the guilt.
- Meal Prep Friendly: I make a batch on Sunday and enjoy it all week—no last-minute dessert stress.
- Budget Saver: Non-fat milk and egg whites keep it light on calories and my wallet.
Step-by-Step Instructions for Low Fat Coffee Ice Cream
This method makes a creamy, rich-tasting dessert with just a fraction of the usual fat.
Step 1: Create the Coffee-Infused Milk Base
In a medium saucepan, whisk together the 2 cups Non-Fat Milk, 0.5 cup Granulated Sugar, 2 tbsp Instant Coffee Granules, 1 tbsp Cornstarch, and 0.25 tsp Salt until the cornstarch is completely dissolved and no lumps remain.
Place the saucepan over medium heat and cook, stirring constantly, for 5-7 minutes until the mixture thickens enough to coat the back of a spoon and reaches 160°F. You’ll see it change from thin and translucent to slightly creamy and opaque.
Remove from heat and stir in the 0.5 cup Brewed Strong Coffee. This cools the mixture slightly while intensifying the coffee flavor. Set aside to cool to room temperature, stirring occasionally to prevent a skin from forming.
Step 2: Temper and Combine the Egg Whites
In a separate bowl, lightly whisk the 4 whole Egg Whites until just frothy—don’t overbeat or they’ll form stiff peaks. Slowly pour about 1 cup of the warm milk mixture into the egg whites while whisking constantly. This tempers the eggs, preventing them from scrambling when added to the hot liquid.
Pour the tempered egg white mixture back into the saucepan with the remaining milk base. Return to medium-low heat and cook for 2-3 minutes, stirring constantly, until the mixture thickens further and reaches 170°F. It should be thick enough to leave a clear path when you run your finger through it on the spoon.
Step 3: Add Flavorings and Chill Thoroughly
Remove from heat and stir in the 1 tsp Vanilla Extract, 0.25 cup Heavy Cream, and 0.5 tsp Pure Coffee Extract. The heavy cream adds just enough richness to create a smooth texture without the guilt of full-fat versions.
Pour the custard through a fine-mesh strainer into a clean bowl to remove any cooked bits of egg or undissolved coffee granules. Press plastic wrap directly onto the surface to prevent a skin from forming. Chill in the refrigerator for at least 4 hours or overnight—this is crucial for developing the flavors and achieving the right texture.
Step 4: Churn and Freeze to Perfection
Pour the chilled custard into your ice cream maker and churn according to the manufacturer’s instructions, typically 20-25 minutes. The mixture will transform from a thick liquid into a soft, creamy ice cream with the consistency of soft-serve.
Transfer the ice cream to a freezer-safe container, smoothing the top with a spatula. Cover with parchment paper pressed directly onto the surface, then seal with the lid. Freeze for at least 4 hours or until firm enough to scoop. The final texture should be creamy and smooth, with a rich coffee flavor that lingers on the palate.
Pro Tips For Making Low Fat Coffee Ice Cream
- Chill the Base: After mixing your custard, refrigerate it for at least 4 hours—overnight is even better. I learned this the hard way when my first batch came out icy instead of creamy.
- Whip Egg Whites Stiff: Beat the egg whites to stiff peaks before folding them in, about 3-4 minutes on high. Sounds tedious, but it adds the air this low-fat version needs to stay light.
- Dissolve Coffee First: Mix the instant coffee granules with 2 tablespoons of hot water before adding to the milk. My grandmother swore by this, and it prevents those bitter coffee specks in the final ice cream.
- Skip the Overmixing: Fold the egg whites into the base gently, just until combined—about 8-10 turns with a spatula. Overdoing it deflates the air and leaves you with dense, sad ice cream.
Regional Styles of This Recipe
Italian Affogato Style
In Italy, they serve espresso poured over vanilla gelato for affogato. I adapt this by churning the custard with 1 shot of espresso added at the end. The result is a denser, more intense coffee flavor that’s still light on calories. 💛
Vietnamese Cà Phê Sữa Đá
Inspired by Vietnamese iced coffee, I swap 2 tbsp of the milk for sweetened condensed milk (adds 15g sugar). It’s richer but still lower in fat than traditional versions. The contrast of sweet and bitter is amazing.
French Café Crème
For a Parisian touch, infuse the milk with 1 crushed cardamom pod while heating. Strain it out before adding coffee. This adds a subtle floral note that pairs beautifully with the deep coffee flavor.
American Diner Twist
I love adding ½ cup crushed ice to the churning process for a lighter, almost slushy texture. It’s like a coffee milkshake but with half the guilt. Perfect for hot summer days.
Greek Yogurt Swirl
Fold in ½ cup non-fat Greek yogurt after churning for extra creaminess and protein. The tanginess balances the sweetness, and it keeps the fat content minimal.
Mexican Café de Olla
Add 1 cinnamon stick and 1 strip of orange peel to the milk as it heats. Remove before churning. This brings warm spice notes that complement the coffee beautifully.
Nutrition Facts
Frequently Asked Questions
Can I make this without an ice cream maker?
Yes! Pour the chilled custard into a shallow freezer-safe dish. Freeze for 1 hour, then whisk vigorously to break up ice crystals. Repeat every 30 minutes for 3-4 hours until smooth.
Why use egg whites instead of whole eggs?
Egg whites provide structure and creaminess without the fat from yolks. This keeps the recipe light while preventing iciness. The result is a smooth texture with fewer calories.
How do I prevent ice crystals from forming?
Press plastic wrap directly on the custard’s surface before chilling. This blocks air exposure, which causes crystals. Also, don’t skip the cornstarch—it acts as a stabilizer.
Can I use regular coffee instead of instant?
Brew ½ cup strong coffee and reduce it to 2 tablespoons for concentrated flavor. Let it cool before adding to the milk mixture.

- 6-Month-Old Smash Cake Recipe: Tiny Bites of Celebration Magic - September 25, 2026
- 3 Layer Spice Cake Recipe: Warm Vanilla, Chocolate, and Spiced Swirls - September 25, 2026
- 4 Serving Mac and Cheese Recipe: Ultra-Creamy Bake With Crispy Breadcrumbs - September 25, 2026