
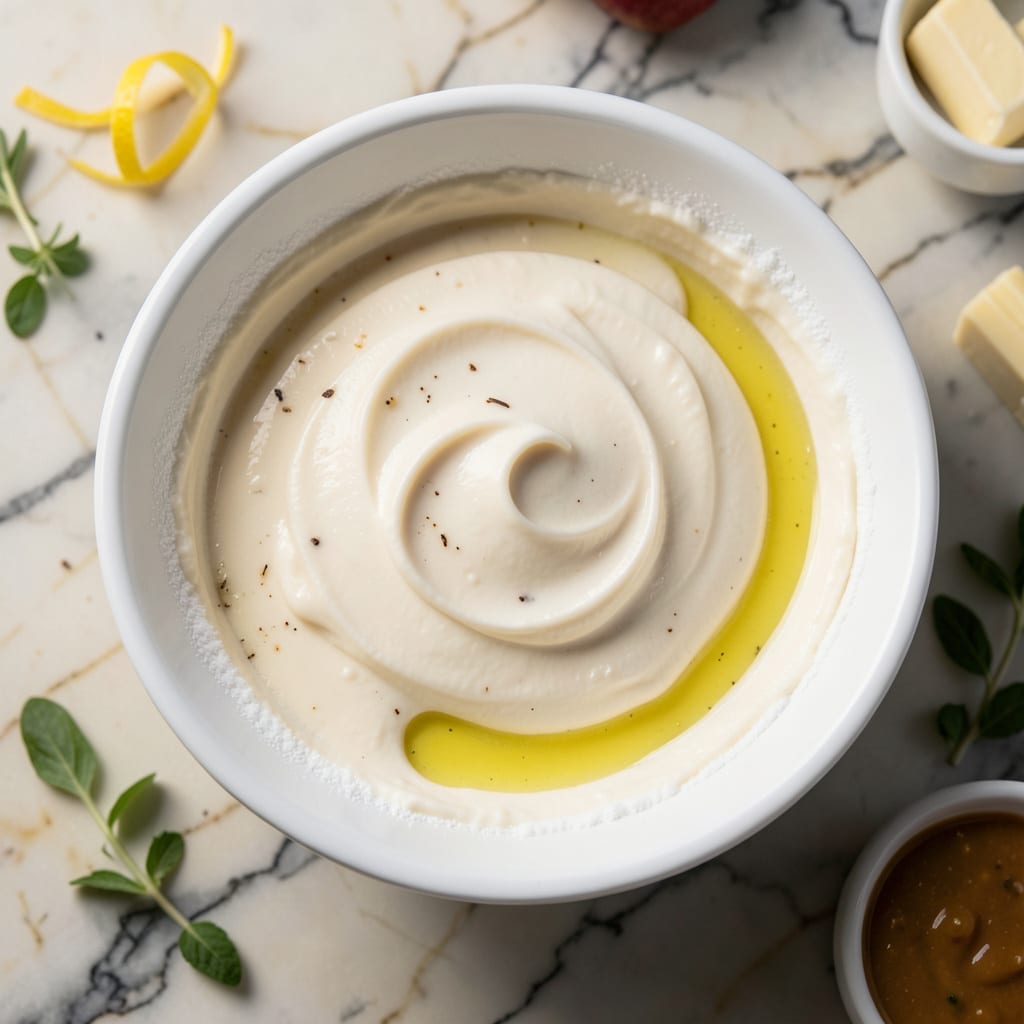
This lightened version delivers all the tangy creaminess of traditional frosting without the heavy guilt. I’ve refined the ratios to maintain that signature smooth texture while cutting fat significantly.
It pipes beautifully and holds its shape, making it perfect for cakes, cupcakes, or cookies. The secret is using low-fat cream cheese and a touch of powdered sugar for stability.
Ingredients for Low Fat Cream Cheese Icing
Seven simple ingredients for a lighter, dreamy cream cheese frosting everyone will love.
| Ingredient | Amount | Notes |
|---|---|---|
| Low-Fat Cream Cheese 🧀 | 8 oz | Room temperature for smoothness |
| Powdered Sugar 🍚 | 2 cups | Sifted to prevent lumps |
| Vanilla Extract 🌿 | 1 tsp | Pure extract for best flavor |
| Unsalted Butter 🧈 | 1 tbsp | Softened, optional for richness |
| Lemon Juice 🍋 | ½ tsp | Freshly squeezed for tang |
| Milk 🥛 | 1 tbsp | Low-fat or skim works |
| Salt 🧂 | 0.125 tsp | Pinch to balance sweetness |
The cream cheese is the star here. Philadelphia Low-Fat is my go-to—it’s consistently smooth and tangy. Make sure it’s truly at room temperature (leave it out for 2 hours), or you’ll end up with lumps no amount of mixing can fix. The powdered sugar? Domino or C&H work great—just sift it first (the clumps are the enemy of silky frosting).
Need to cut more fat? Skip the butter entirely—it’s entirely optional. Out of vanilla? Almond extract at half the amount adds a nice twist. No lemon juice? A splash of white vinegar or apple cider vinegar gives the same tang. Want it thicker? Add powdered sugar a tablespoon at a time. Too thick? That milk can be increased by teaspoons.
This keeps beautifully in the fridge for 5 days in an airtight container. Bring it back to room temperature and give it a quick whip before using—it’ll be good as new. Freezing isn’t ideal (texture changes), but it’ll hold for 1 month if you must.
Why You’ll Love This Recipe
- Five Minutes Flat: I can beat this together faster than the oven preheats—just cream cheese, powdered sugar, and a splash of vanilla.
- Bright and Tangy: The lemon juice cuts through the sweetness, so it’s rich but never cloying, with that classic cream cheese bite.
- Cakes to Muffins: I’ve slathered it on carrot cake, swirled it into brownies, and even piped it onto graham crackers for a quick treat.
- Stays Fresh: Honestly, it keeps in the fridge for a week, so I always have a backup for last-minute baking emergencies.
Step-by-Step Instructions for Low Fat Cream Cheese Icing
Here’s the method. Straightforward, tested, works every time.
Step 1: Beat the Cream Cheese Until Smooth
In a medium bowl, beat the 8 oz Low-Fat Cream Cheese with an electric mixer on medium speed for 1-2 minutes until completely smooth and free of lumps. I always use room temperature cream cheese—cold straight from the fridge won’t blend properly and you’ll end up with a lumpy mess.
Scrape down the sides of the bowl with a silicone spatula at least once during beating. This ensures all the cream cheese gets incorporated evenly. You’re looking for a silky, spreadable consistency before moving to the next step.
Step 2: Gradually Add the Powdered Sugar
With the mixer running on low speed, gradually add the 2 cups Powdered Sugar, about ½ cup at a time. This slow addition prevents a cloud of sugar dust and helps avoid lumps in your icing. Make sure to sift your powdered sugar first if it’s not pre-sifted.
After each addition, pause and scrape down the sides of the bowl. The mixture will start thick and dry, but keep going—it transforms into a creamy base as the sugar incorporates. You’ll know it’s ready when the sugar is fully blended and the mixture looks like thick, grainy frosting.
Step 3: Incorporate the Flavor Enhancers
Add the 1 tsp Vanilla Extract, 1 tbsp Unsalted Butter (softened), 0.5 tsp Lemon Juice, 0.125 tsp Salt, and 1 tbsp Milk to the bowl. Beat on medium speed for 1-2 minutes until everything is fully combined and the icing is smooth.
The butter adds richness, the lemon juice gives a subtle tang that cuts through the sweetness, and the salt balances all the flavors. The milk helps achieve the perfect spreading consistency. If the icing seems too thick, add another teaspoon of milk; if it’s too thin, add a tablespoon of powdered sugar.
Step 4: Adjust Consistency and Taste
Check the consistency. For spreading on cakes or cupcakes, it should hold its shape but still be soft enough to spread easily. If it’s too stiff, beat in another ½ to 1 teaspoon of milk until it reaches your desired texture.
Give it a taste and adjust if needed. Want it sweeter? Add a bit more powdered sugar. Need more tang? A few extra drops of lemon juice will do the trick. Remember that flavors will intensify slightly as the icing sits, so don’t overdo the adjustments.
This icing is now ready to use immediately or can be stored in an airtight container in the refrigerator for up to 5 days. Let it come to room temperature and give it a good stir before using if it’s been chilled.
Pro Tips For Making Low Fat Cream Cheese Icing
- Soften the Cheese: Pull the low-fat cream cheese out of the fridge 2-3 hours before mixing—cold blocks lead to lumpy icing that no amount of beating will fix.
- Beat the Butter First: Cream the unsalted butter alone for 2 full minutes before adding anything else; I learned this the hard way after my icing kept separating.
- Skip the Overmixing: Once the powdered sugar is incorporated, stop the mixer—overworking it introduces air and makes the icing too runny, especially with low-fat cream cheese.
- Chill Before Using: Pop the bowl in the fridge for 15-20 minutes after mixing to thicken it slightly; sounds weird, but it makes piping or spreading way easier without changing the flavor.
Serving Suggestions for low fat cream cheese icing
Cake Pairings
This icing pairs perfectly with carrot cake—the tang cuts through the sweetness beautifully. I spread a thin layer between layers for maximum flavor. Red velvet is another classic match, where the cream cheese flavor really shines through.
Cupcake Decorating
For cupcakes, pipe it using a star tip for beautiful swirls. The light texture holds its shape well. Top with fresh berries or a sprinkle of chopped nuts for extra flair. I love how it looks on vanilla or spice cupcakes. 💫
Cookie Sandwiches
Use this as a filling for sugar cookie sandwiches. Spread 1 tbsp between two cooled cookies. The contrast between the soft icing and crisp cookies is amazing. Works great with gingerbread too.
Fruit Topping
Drizzle over strawberry shortcake or pineapple upside-down cake. The acidity complements the fruit perfectly. I thin it slightly with milk for a pourable consistency when using as a glaze.
Dip or Spread
Serve as a dip for graham crackers or apple slices. Kids love this lighter version. Spread on cinnamon rolls instead of traditional frosting for a tangy twist.
Garnish Ideas
Add a sprinkle of cinnamon or cocoa powder on top for visual appeal. A few lemon zest strands enhance the citrus notes. Always garnish just before serving for best presentation.
Nutrition Facts
Frequently Asked Questions
Can I use fat-free cream cheese instead?
Yes, but expect a slightly thinner texture. Fat-free cream cheese has more moisture. Reduce milk to ½ tbsp and add powdered sugar gradually to compensate.
How do I fix runny icing?
Add powdered sugar 1 tbsp at a time until it thickens. Chilling for 15 minutes also helps firm it up. Avoid overmixing after adding sugar.
Why does my icing taste grainy?
This usually means the powdered sugar wasn’t sifted or the cream cheese wasn’t fully softened. Beat for an extra 1-2 minutes to smooth it out.
Can I make this ahead of time?
Store in an airtight container for up to 5 days. Let it sit at room temperature for 30 minutes and re-whip before using.

- 8 Bean Soup Recipe Crock Pot: Hearty Vegetable Medley in One Pot - September 25, 2026
- 4C Bread Crumbs Meatballs Recipe: Crispy Crust and Juicy Centers - September 25, 2026
- 6 Oz Chocolate Chip Cookie Recipe: Perfectly Balanced Crispy Edges and Chewy Hearts - September 25, 2026