
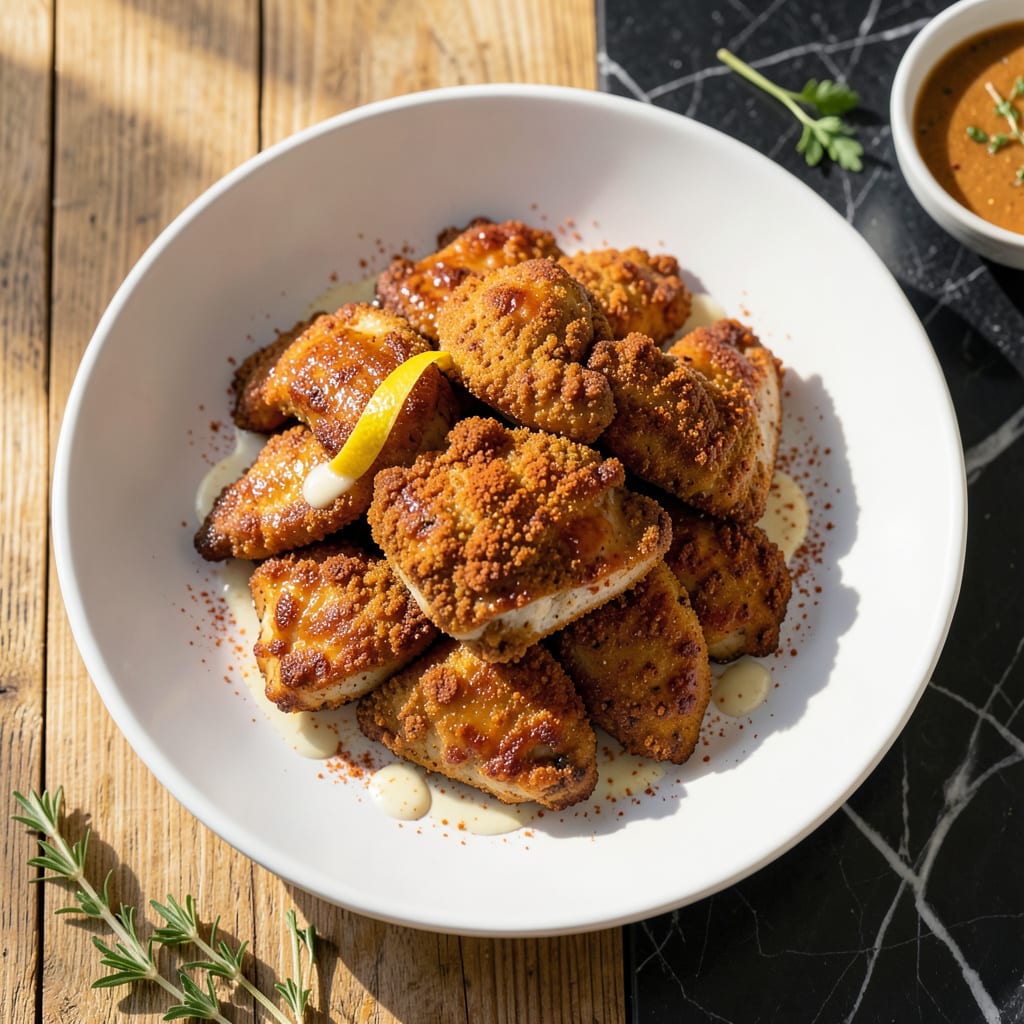
Achieving crispy fried chicken with minimal oil is absolutely possible using modern cooking techniques. This method delivers the satisfying crunch you love without the excess fat of traditional frying.
By using an air fryer or oven-baking approach with a light coating, we create that signature golden exterior while keeping the meat tender and juicy. The result is a healthier version that doesn’t compromise on texture or flavor.
Ingredients for Low Fat Fried Chicken
Pantry staples and a few spices create that golden crunch everyone loves.
| Ingredient | Amount | Notes |
|---|---|---|
| Boneless Skinless Chicken Thighs 🍗 | 1 ½ lb | Patted dry for crispiness |
| Buttermilk 🥛 | 1 cup | Low-fat variety preferred |
| All-Purpose Flour 🌾 | 1 cup | For light coating |
| Cornstarch 🌽 | ¼ cup | Creates extra crunch |
| Paprika 🌶️ | 1 tbsp | Sweet or smoked variety |
| Garlic Powder 🧄 | 1 tsp | Freshly ground if possible |
| Onion Powder 🧅 | 1 tsp | Balances seasoning blend |
| Salt 🧂 | 1 tsp | Diamond Crystal kosher salt |
| Black Pepper 🌶️ | ½ tsp | Freshly ground preferred |
| Cayenne Pepper 🔥 | ¼ tsp | Adjust for heat preference |
| Olive Oil Spray 🫒 | 1 can | For light coating only |
| Large Egg 🥚 | 1 whole | Helps coating adhere |
The chicken thighs are key here—bone-in works too but takes longer to cook through. I grab mine from Costco when they’re on sale, but any grocery store’s butcher section will have what you need. Look for pieces that are similar in size so they cook evenly. The buttermilk (I use low-fat to keep it lighter) tenderizes the meat beautifully—don’t skip this step.
No buttermilk? Milk with 1 tbsp vinegar works in a pinch. Swap the flour for whole wheat if you want extra fiber. The cornstarch is non-negotiable for that crispy texture though. For extra flavor, add 1 tsp of poultry seasoning to the flour mix. If you’re avoiding eggs, a quick flax egg (1 tbsp ground flax + 3 tbsp water) does the trick.
Cooked chicken keeps 3-4 days in the fridge—reheat in the air fryer to maintain crispiness. Freeze uncooked marinated pieces for up to 3 months. The seasoning blend stays fresh for 6 months in a cool, dark place.
Why You’ll Love This Recipe
- One Pan Wonder: I just mix the buttermilk and spices, coat the chicken, and bake—no deep fryer mess.
- Crispy Without Guilt: The cornstarch and paprika give that golden crunch but with way less oil.
- Meal Prep Hero: Makes perfect leftovers that stay tender for days in the fridge.
- Budget Stretcher: Boneless thighs are cheap, and a little flour goes a long way here.
Step-by-Step Instructions for Low Fat Fried Chicken
Here’s my proven method for achieving that coveted crispy texture without deep frying.
Step 1: Marinate the Chicken in Buttermilk
Pat the 1.5 lb boneless skinless chicken thighs completely dry with paper towels. This removes excess moisture that could prevent the coating from adhering properly. Place the chicken in a large bowl and pour over the 1 cup buttermilk, ensuring each piece is fully submerged.
Cover and refrigerate for at least 2 hours, or ideally overnight. The buttermilk tenderizes the meat and helps the dry coating stick. I’ve found this step is non-negotiable for achieving that perfect crispy exterior while keeping the chicken juicy inside.
Step 2: Prepare the Crispy Coating
In a shallow dish, whisk together the 1 cup all-purpose flour, 0.25 cup cornstarch, 1 tbsp paprika, 1 tsp garlic powder, 1 tsp onion powder, 1 tsp salt, 0.5 tsp black pepper, and 0.25 tsp cayenne pepper. The cornstarch is the secret to extra crunch without excess oil.
In a separate bowl, beat the 1 whole large egg until well combined. This will act as the glue between the chicken and the flour mixture. Having both bowls ready before you start coating ensures the process goes smoothly and the coating stays crisp.
Step 3: Coat the Chicken Evenly
Remove the chicken from the buttermilk, letting any excess drip off. Dip each piece first in the beaten egg, then into the flour mixture, pressing gently to ensure an even, thick coating. Place the coated pieces on a wire rack set over a baking sheet.
Let the coated chicken rest for 10-15 minutes at room temperature. This resting period allows the coating to set slightly, which helps it adhere better during cooking. You’ll notice the coating looks dry to the touch when it’s ready.
Step 4: oven-fry to Crispy Perfection
Preheat your oven to 425°F and line a baking sheet with parchment paper. Lightly coat the parchment with olive oil spray—just enough to prevent sticking. Arrange the chicken pieces on the sheet, leaving space between each for even air circulation.
Spray the tops of the chicken lightly with more olive oil spray. Bake for 20 minutes, then flip each piece and spray the other side. Return to the oven and bake for another 15-20 minutes until the coating is golden brown and the internal temperature reaches 165°F.
The chicken should be crispy on the outside and tender on the inside, with no raw flour taste. If it’s browning too quickly, tent loosely with foil for the remaining cooking time.
Pro Tips For Making Low Fat Fried Chicken
- Use an Oil Spritz: Skip the deep fryer—lightly coat your pan with oil spray between batches to keep it nonstick without soaking the chicken. I learned this the hard way after my first few pieces stuck like glue.
- Marinate Overnight: Give the buttermilk and chicken at least 4 hours, but 12 is better. The acid tenderizes the thighs and the seasoning sinks in deep—my grandmother swore by this, and she was right.
- Double Coat Lightly: Dip in flour, then buttermilk, then flour again, but shake off the excess each time. Sounds tedious, but it’s the only way to get that crispy crust without a greasy mess.
- Bake After Sear: Start with a quick sear in a hot pan, then finish in a 375°F oven for 12-15 minutes. This cuts the oil by half and still gets the outside golden and the inside juicy.
Creative Variations of This Recipe
Air Fryer Method
For even crisper results, use your air fryer at 375°F for 12-15 minutes, flipping halfway. The hot air circulates perfectly around each piece, creating that deep-fried texture with just 1-2 sprays of oil. I love how quick and hands-off this method is. 🔥
Spicy Buffalo Style
After baking, toss the chicken in ¼ cup Frank’s RedHot sauce mixed with 1 tbsp melted butter or olive oil. The vinegar-based sauce pairs perfectly with the crispy coating. Serve with celery sticks and light blue cheese dressing for a healthier take on buffalo wings.
Herb-Crusted Variation
Add 1 tbsp dried Italian seasoning and 1 tsp dried thyme to your flour mixture. The herbs infuse the coating with aromatic flavor. For extra freshness, sprinkle 2 tbsp chopped parsley on the chicken right after it comes out of the oven.
Parmesan Crust
Mix ¼ cup grated Parmesan cheese into your flour coating. The cheese adds a salty depth and helps create an extra crispy crust. I recommend using freshly grated Parmigiano-Reggiano for the best flavor and texture.
Gluten-Free Option
Replace the all-purpose flour with 1 cup gluten-free flour blend and ¼ cup almond flour. The almond flour adds extra crunch and a slightly nutty flavor. Make sure your cornstarch is certified gluten-free if needed.
Extra Crispy Double-Coat
For maximum crunch, dip the coated chicken back in the egg, then into the flour mixture a second time. This creates a thicker crust that stays crispy longer. Just be sure to let it rest 15 minutes between coats for best adhesion. 💛
Nutrition Facts
Frequently Asked Questions
Can I use chicken breasts instead of thighs?
Yes, but reduce cooking time to 15-18 minutes total. Breasts dry out faster than thighs. For best results, pound them to even ½-inch thickness before coating.
How do I keep the coating from falling off?
Pat the chicken completely dry before marinating. The buttermilk soak (2+ hours) helps the coating adhere. Also, let coated pieces rest 10-15 minutes before cooking.
Why isn’t my chicken crispy?
Oven temperature is key—make sure it’s fully preheated to 425°F. Overcrowding the pan steams instead of crisps. Use a wire rack for better air circulation.
What’s the best way to reheat leftovers?
Reheat in an air fryer at 375°F for 3-4 minutes or oven at 400°F for 8-10 minutes. This revives the crispiness better than a microwave.

- 8 Bean Soup Recipe Crock Pot: Hearty Vegetable Medley in One Pot - September 25, 2026
- 4C Bread Crumbs Meatballs Recipe: Crispy Crust and Juicy Centers - September 25, 2026
- 6 Oz Chocolate Chip Cookie Recipe: Perfectly Balanced Crispy Edges and Chewy Hearts - September 25, 2026