
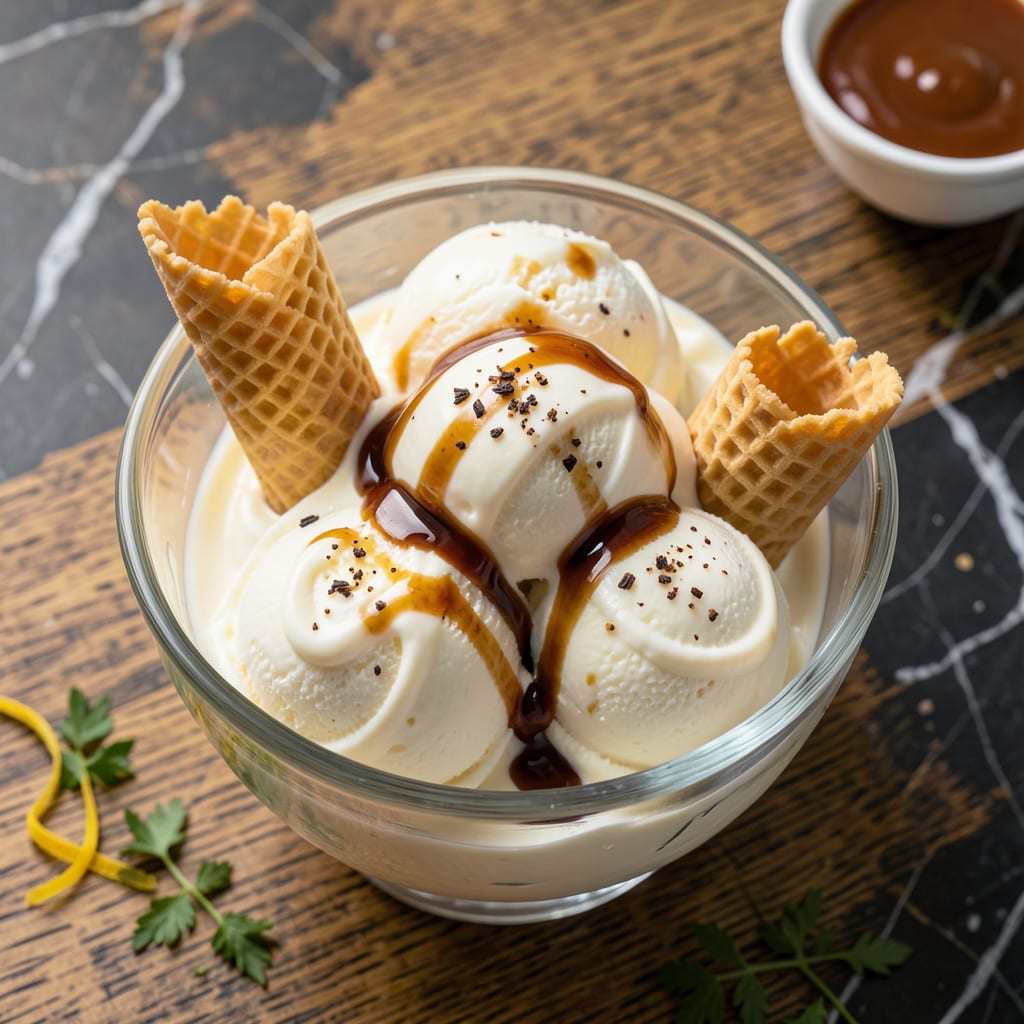
I’ve perfected a way to make homemade ice cream that’s light on calories but rich in flavor. This method uses simple swaps like non-fat milk and natural sweeteners to deliver creamy texture without excess fat.
The result is a smooth, satisfying treat that lets you enjoy dessert guilt-free. With just a few ingredients and an ice cream maker, you’ll have a healthier version that still feels indulgent.
Ingredients for Low Fat Homemade Ice Cream
Simple swaps create a lighter treat that still feels indulgent and rich.
| Ingredient | Amount | Notes |
|---|---|---|
| Non-Fat Milk 🥛 | 2 cups | Cold for best texture |
| Heavy Cream 🥛 | ½ cup | Light cream works too |
| Granulated Sugar 🍚 | ¾ cup | Or substitute honey |
| Vanilla Extract 🌿 | 2 tsp | Pure extract preferred |
| Egg Whites 🥚 | 4 whole | Large, at room temperature |
| Salt 🧂 | ¼ tsp | Enhances flavor balance |
| Vanilla Bean 🌱 | 1 whole | Scraped seeds only |
| Corn Syrup 🧈 | 2 tbsp | Light or dark variety |
| Lemon Juice 🍋 | 1 tsp | Freshly squeezed preferred |
| Pureed Fruit 🍓 | ½ cup | Optional for flavor variation |
The milk is the foundation here—non-fat from any grocery store works, but I find organic has a cleaner taste. For the cream, light cream cuts calories without sacrificing texture. The vanilla? Splurge on Nielsen-Massey if you can (the real stuff makes a difference). Room temperature egg whites whip up better, so plan ahead. Most stores carry all of this in the baking aisle or dairy section.
No vanilla bean? Double the extract works fine. Out of corn syrup? Agave or maple syrup can stand in, but they’ll slightly change the flavor. Want chocolate ice cream? Add 3 tbsp cocoa powder to the mix. The sugar can be reduced by a quarter if you prefer less sweetness—just expect a slightly icier texture. Fresh lemon juice brightens everything up.
This base keeps in the freezer for about 2 months in an airtight container. Let it sit at room temperature for 5-10 minutes before scooping for easier serving. If using fruit puree, add it fresh each time to prevent ice crystals.
Why You’ll Love This Recipe
- No Fuss Mixing: I just whisk the egg whites with sugar, then fold in the milk, cream, and vanilla—no fancy equipment needed.
- Velvety Vanilla: The combo of non-fat milk and heavy cream gives it that creamy texture without being too heavy, and the vanilla shines through.
- Diet-Friendly Treat: I can enjoy a scoop (or two) without the guilt, and it’s still rich enough to feel indulgent.
- Freezer Stash: Honestly, it keeps well for a week, so I always have a light dessert ready for unexpected cravings.
Step-by-Step Instructions for Low Fat Homemade Ice Cream
Here’s my tested method that delivers creamy, dreamy results without the extra fat.
Step 1: Heat and Infuse the Dairy Base
In a medium saucepan, combine the 2 cups Non-Fat Milk, 0.5 cup Heavy Cream, and 0.75 cup Granulated Sugar. Cook over medium heat until the mixture reaches 170°F on a candy thermometer.
While heating, split the 1 whole Vanilla Bean, scrape the seeds into the milk mixture, and add the pod. Stir occasionally to dissolve the sugar and prevent scorching. You’ll see tiny bubbles forming at the edges—that’s your cue it’s heating properly.
Remove from heat once it hits temperature. The sugar should be fully dissolved and the mixture should smell fragrant from the vanilla. Discard the vanilla pod at this point.
Step 2: Temper the Egg Whites
In a separate bowl, whisk the 4 whole Egg Whites with the 0.25 tsp Salt until frothy. This is your tempering base. Slowly pour about 1 cup of the hot milk mixture into the egg whites while whisking constantly.
This gradual introduction prevents the eggs from scrambling. I pour in a thin stream and whisk vigorously—you should see the egg mixture lighten in color as it warms. Once combined, pour the tempered egg mixture back into the saucepan with the remaining dairy.
Step 3: Cook to Custard Consistency
Return the saucepan to medium-low heat and cook, stirring constantly with a silicone spatula, until the mixture thickens enough to coat the back of a spoon. This should take 5-7 minutes.
You’ll know it’s ready when you can draw a line through the custard on the spoon and it holds its shape. Don’t let it boil—that would curdle the egg whites. The mixture should look like a thin pudding at this stage.
Remove from heat and stir in the 2 tsp Vanilla Extract, 2 tbsp Corn Syrup, and 1 tsp Lemon Juice. The corn syrup adds smoothness, while the lemon juice brightens the flavor.
Step 4: Chill and Add Optional Fruit
Pour the custard through a fine-mesh strainer into a clean bowl to remove any cooked bits. Press plastic wrap directly onto the surface to prevent a skin from forming. Refrigerate until completely cold, at least 4 hours or overnight.
Once chilled, stir in the 0.5 cup Pureed Fruit if using. This is where you can customize the flavor—strawberry, mango, or raspberry puree all work beautifully. The cold custard should be thick but still pourable.
Step 5: Churn and Freeze to Perfection
Pour the chilled mixture into your ice cream maker and churn according to the manufacturer’s instructions, typically 20-25 minutes. The ice cream will look soft and creamy, like soft-serve, when it’s done.
Transfer to a freezer-safe container and freeze for at least 4 hours until firm. For the smoothest texture, I like to give it a quick stir after 1 hour of freezing to break up any ice crystals.
The finished ice cream should be scoopable but hold its shape, with a velvety texture that belies its lower fat content. Serve slightly softened for the best consistency.
Pro Tips For Making Low Fat Homemade Ice Cream
- Chill the Base: Always refrigerate your milk, cream, and sugar mixture for at least 4 hours before churning—I learned this the hard way after ending up with soupy ice cream more times than I’d like to admit.
- Whip Egg Whites Stiff: Beat the egg whites to stiff peaks before folding them in, about 3-4 minutes on high speed. Sounds fussy, but it adds the air needed to keep the texture light without extra fat.
- Skip the Overchurn: Resist the urge to over-churn in the ice cream maker; 20-25 minutes is plenty. Any longer and you’ll turn that airy texture into a dense, icy block.
- Use Cold Bowls: Place your mixing bowls in the freezer for 10 minutes before whipping the egg whites or folding the base. My grandmother swore by this, and she was right: it keeps everything stable while you work.
Flavor Customization for low fat homemade ice cream
Fruity Variations
Stir in ½ cup strawberry puree after chilling for a classic berry twist. I blend fresh strawberries with 1 tbsp sugar to intensify the flavor. For tropical notes, try mango or pineapple puree—they add natural sweetness without extra fat. 🍓
Chocolate Lovers
Add 3 tbsp unsweetened cocoa powder to the warm custard and whisk until smooth. For extra richness, fold in ¼ cup mini dark chocolate chips after churning. This keeps the fat low while delivering deep chocolate flavor.
Spiced Delights
Infuse the milk with 1 cinnamon stick or ½ tsp ground cardamom while heating for warm, aromatic notes. A pinch of cayenne pepper adds a subtle kick that pairs surprisingly well with the sweetness.
Coffee Buzz
Dissolve 2 tbsp instant espresso powder in 1 tbsp hot water and mix into the custard. The coffee enhances the vanilla’s depth. For texture, sprinkle crushed coffee beans on top before serving. 💛
Citrus Zing
Add zest of 1 lemon or orange to the custard before chilling. The citrus oils brighten the flavor. For a sorbet-like twist, reduce sugar by 2 tbsp and add 2 tbsp fresh lime juice.
Nutty Crunch
Fold in ¼ cup toasted almonds or pecans after churning for texture. To keep it low-fat, use chopped pistachios—they add color and crunch with minimal fat. Always toast nuts first to enhance their flavor.
Nutrition Facts
Frequently Asked Questions
What can I use instead of heavy cream?
Use 1 cup of whole milk or a light coconut milk for similar creaminess. Greek yogurt also works but may add tang.
Why does my ice cream get icy?
This usually means not enough fat or sugar. Try adding 1 tbsp corn syrup or churning it less time. Always pre-chill your base.
How long does it keep in the freezer?
It stays fresh for about 2 weeks in an airtight container. Press plastic wrap on the surface to prevent ice crystals.
Can I make this without an ice cream maker?
Yes! Freeze in a shallow dish and stir vigorously every 30 minutes for 3-4 hours. It won’t be as smooth but still tasty.

- 8 Bean Soup Recipe Crock Pot: Hearty Vegetable Medley in One Pot - September 25, 2026
- 4C Bread Crumbs Meatballs Recipe: Crispy Crust and Juicy Centers - September 25, 2026
- 6 Oz Chocolate Chip Cookie Recipe: Perfectly Balanced Crispy Edges and Chewy Hearts - September 25, 2026