
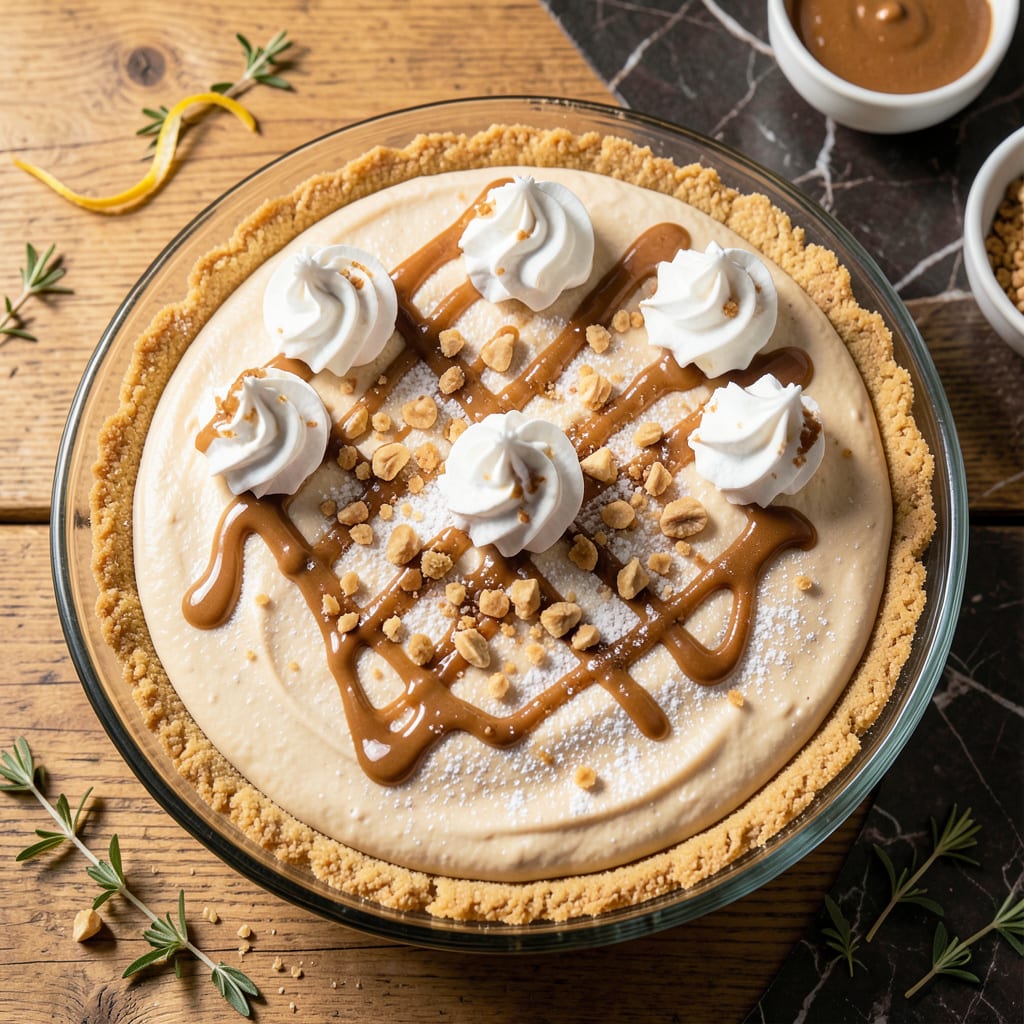
This lightened-up pie delivers all the rich peanut butter flavor without the guilt, proving dessert can be both creamy and conscious. I developed this version using smart ingredient swaps that maintain that classic smooth texture we all crave.
What you get is a silky filling that sets perfectly, with a satisfying peanut butter punch in every bite. The secret is in the balance—just enough sweetness and a flaky crust that complements without competing.
Ingredients for Low Fat Peanut Butter Pie
Light ingredients deliver rich flavor in this silky, dreamy peanut butter treat.
| Ingredient | Amount | Notes |
|---|---|---|
| Reduced-Fat Cream Cheese 🧀 | 8 oz | Softened to room temperature |
| Powdered Peanut Butter 🥜 | ¾ cup | Reconstituted with water per package |
| Granulated Sugar 🍚 | ¾ cup | Or substitute coconut sugar |
| Non-Fat Greek Yogurt 🥛 | 1 cup | Plain, unsweetened variety |
| Fat-Free Cool Whip 🍦 | 2 cups | Thawed before folding in |
| Vanilla Extract 🌿 | 1 tsp | Pure extract for best flavor |
| Reduced-Fat Graham Cracker Crust 🍪 | 1 whole | Store-bought or homemade |
| Skim Milk 🥛 | ¼ cup | As needed for consistency |
| Peanut Butter Chips 🍫 | ¼ cup | Mini chips preferred for texture |
| Salt 🧂 | ¼ tsp | Fine sea salt preferred |
| Lemon Juice 🍋 | 1 tbsp | Freshly squeezed for brightness |
The cream cheese base needs to be the reduced-fat kind—Philadelphia or store brand both work, just avoid the full-fat version. Powdered peanut butter (like PB2) is the magic here, giving you that peanut punch with way fewer calories. I grab mine from Whole Foods or the baking aisle at Kroger. For the Greek yogurt, Fage 0% is my go-to—thick, creamy, and no added sugar.
No powdered peanut butter? Use 1/3 cup natural peanut butter (the stir-into-oil kind) but drain off the excess oil first. Swap the Cool Whip for homemade whipped coconut cream if you want to go dairy-free. Graham crust can be low-fat Oreos pulsed with a little melted butter (or vegan butter). The chips are optional, but they add a nice crunch—Reese’s pieces work too.
This sets up best after 4 hours in the fridge, but overnight is even better. Keeps covered for 3-4 days—if it lasts that long. Freezing isn’t ideal (texture gets weird), but you can freeze the crust ahead if you’re prepping early.
Why You’ll Love This Recipe
- I’ll be real: I love that I can make it the night before. The flavors actually get better after a few hours in the fridge.
- Five Minute Mix: I just dump everything in one bowl—no baking, no fuss. The powdered peanut butter blends right in with the Greek yogurt for a creamy base.
- Rich Without Guilt: Honestly, the combo of reduced-fat cream cheese and Cool Whip tastes indulgent, but I’m sneaking in protein without the heavy calories.
- Crowd Pleaser: Between us, I’ve served this at potlucks and family dinners, and no one believes it’s light. Even my picky nephew asks for seconds.
Step-by-Step Instructions for Low Fat Peanut Butter Pie
This no-bake method delivers a silky texture with minimal effort and maximum flavor.
Step 1: Prepare the Peanut Butter Base
In a large mixing bowl, beat the 8 oz Reduced-Fat Cream Cheese with an electric mixer until completely smooth. Scrape down the sides of the bowl frequently—this ensures even mixing and prevents lumps in your final filling.
Add the 0.75 cup Powdered Peanut Butter (reconstituted per package instructions), 0.75 cup Granulated Sugar, 1 cup Non-Fat Greek Yogurt, 1 tsp Vanilla Extract, 0.25 tsp Salt, and 1 tbsp Lemon Juice. Mix on medium speed for 2-3 minutes until the mixture is ultra-smooth and fluffy. The lemon juice brightens the rich peanut butter flavor beautifully.
Step 2: Adjust Consistency and Fold in Cool Whip
Check your mixture’s thickness. If it seems too dense, add the 0.25 cup Skim Milk gradually, a tablespoon at a time, mixing after each addition until you reach a creamy, spreadable consistency. The milk helps balance the thickness without thinning it too much.
Gently fold in the 2 cups Fat-Free Cool Whip using a silicone spatula. Make sure it’s fully thawed before adding—cold whipped topping can create streaks in your filling. Fold until no white streaks remain, taking care not to deflate the mixture. This step creates that light, airy texture that makes the pie so irresistible.
Step 3: Assemble and Chill the Pie
Pour the filling into the 1 whole Reduced-Fat Graham Cracker Crust, spreading it evenly with the back of a spoon or offset spatula. Smooth the top so it’s level with the crust’s edge—this makes for a professional presentation.
Sprinkle the 0.25 cup Peanut Butter Chips evenly over the surface, pressing them lightly into the filling so they adhere as it sets. The mini chips distribute better and give you that perfect peanut butter flavor in every bite.
Step 4: Refrigerate Until Firm
Cover the pie loosely with plastic wrap and refrigerate for at least 4 hours, though overnight is ideal. This chilling time allows the filling to set completely and the flavors to meld together.
You’ll know it’s ready when the center feels firm to the touch and a knife inserted near the edge comes out clean. The crust should stay crisp, and the filling should slice cleanly without sticking to your knife. Serve chilled for the best texture and flavor.
Pro Tips For Making Low Fat Peanut Butter Pie
- Soften Cream Cheese: Let the reduced-fat cream cheese sit at room temperature for at least 30 minutes before mixing—I learned this the hard way after ending up with lumpy filling that just wouldn’t smooth out.
- Rehydrate Peanut Powder: Mix the powdered peanut butter with a splash of water first to restore its creamy texture, then fold it in. Sounds weird, but it works: otherwise, you’ll taste the gritty powder.
- Skip Overmixing: Once you fold in the Fat-Free Cool Whip, stop as soon as it’s combined. Overmixing deflates the fluff and leaves you with a dense pie instead of that light, airy slice.
- Chill Overnight: Give it a solid 8 hours in the fridge—yes, even if you’re impatient like me. The Greek yogurt and cream cheese need time to set properly, or you’ll be serving peanut soup.
Dietary Considerations for This Recipe
Dairy-Free Adaptations
Swap the Reduced-Fat Cream Cheese for Kite Hill almond cream cheese and use coconut yogurt instead of Greek yogurt. For whipped topping, So Delicious CocoWhip works perfectly. These changes maintain the creamy texture while keeping it plant-based.
Sugar-Free Version
Replace Granulated Sugar with ¾ cup monk fruit sweetener or erythritol blend. Use sugar-free Cool Whip and Lily’s sugar-free peanut butter chips for topping. The texture remains smooth, and the flavor stays rich without added sugar.
Gluten-Free Crust
Use a gluten-free graham cracker crust like Mi-Del or make your own with crushed gluten-free cookies and melted butter. The filling itself is naturally gluten-free, so this is the only swap needed. 💪
Protein Boost
Add 1 scoop vanilla protein powder to the filling mixture for extra protein. This works well with whey or plant-based protein, but reduce the Skim Milk slightly to compensate for thickness. It’s a great way to make this treat more satisfying.
Nut Allergy Safety
Replace Powdered Peanut Butter with sunflower seed butter powder and use sunflower seed chips for topping. Ensure all ingredients are processed in nut-free facilities to avoid cross-contamination.
Lower Calorie Swaps
Cut calories further by using ½ cup sugar substitute instead of ¾ cup sugar and omitting the Peanut Butter Chips. The filling remains creamy and flavorful, just slightly less sweet. Every small change adds up! ✨
Nutrition Facts
Frequently Asked Questions
Can I use regular peanut butter instead of powdered?
Yes, but drain excess oil first and use 1/3 cup to keep it lighter. The texture may be slightly denser than with powdered varieties.
How long does this pie keep in the fridge?
It stays fresh for 3-4 days when covered. For best texture, serve within 2 days of making.
Why did my filling turn out grainy?
This usually happens if the cream cheese isn’t fully softened or overmixed. Beat until just smooth and ensure all ingredients are room temperature.
Can I make this ahead for a party?
Prepare it 1-2 days in advance. The flavors deepen as it chills, making it perfect for gatherings.

- 8 Bean Soup Recipe Crock Pot: Hearty Vegetable Medley in One Pot - September 25, 2026
- 4C Bread Crumbs Meatballs Recipe: Crispy Crust and Juicy Centers - September 25, 2026
- 6 Oz Chocolate Chip Cookie Recipe: Perfectly Balanced Crispy Edges and Chewy Hearts - September 25, 2026