
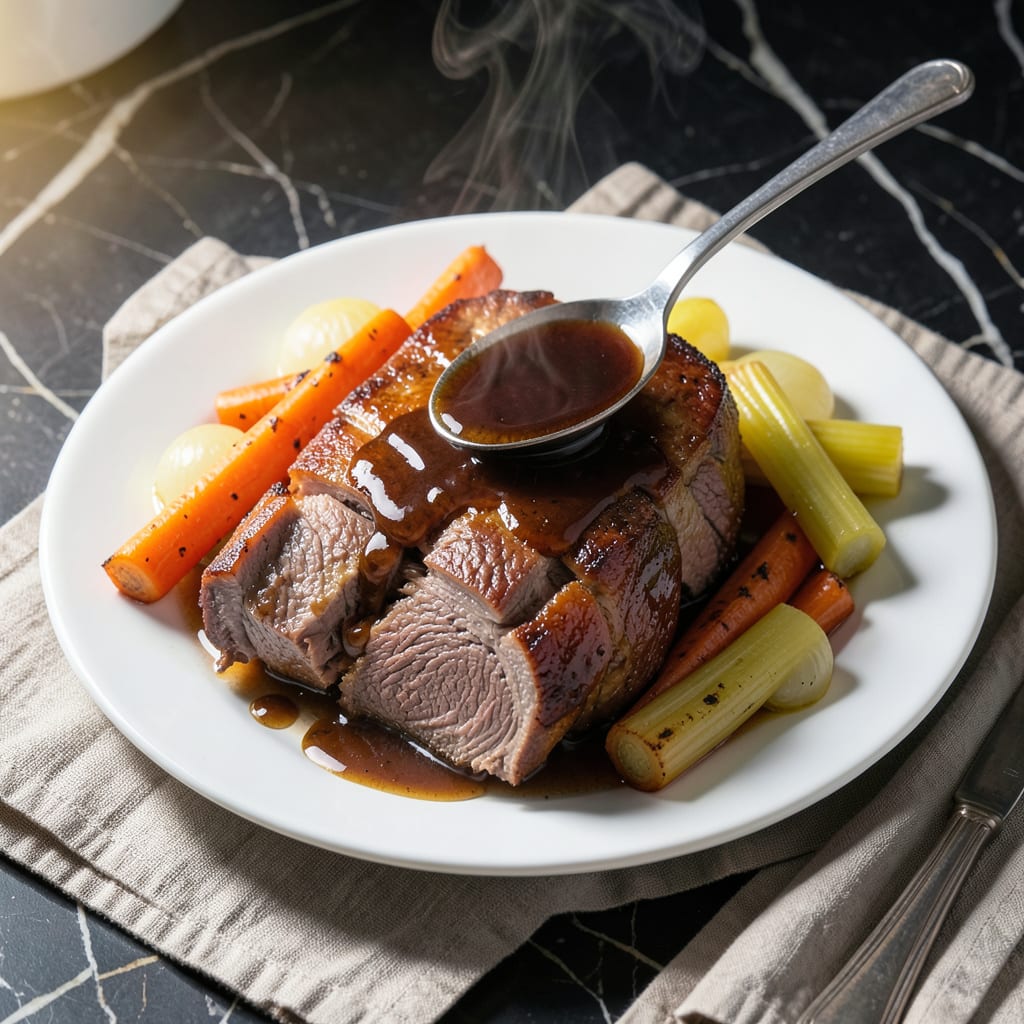
This recipe proves that rich flavor and tender results don’t require excess fat. I’ve developed a method that transforms lean cuts into melt-in-your-mouth pot roast through careful seasoning and slow cooking.
The secret lies in using a low-fat broth base and loading up on aromatic vegetables. By the time it finishes in the slow cooker, you’ll have a dish that’s as satisfying as it is nutritious.
Ingredients for Low Fat Pot Roast
Lean beef and aromatic veggies make this slow cooker meal both hearty and healthy.
| Ingredient | Amount | Notes |
|---|---|---|
| Lean Chuck Roast 🥩 | 2 lb | Trimmed of visible fat |
| Low-Sodium Beef Broth 💧 | 2 cups | 99% fat-free variety |
| Yellow Onions 🧅 | 2 whole | Medium, sliced thick |
| Carrots 🥕 | 3 whole | Peeled, cut into chunks |
| Celery Stalks 🌿 | 3 whole | Cut into large pieces |
| Garlic Cloves 🧄 | 5 cloves | Smashed, peeled |
| Dried Thyme 🍃 | 1 tsp | Crushed between fingers |
| Dried Rosemary 🍃 | 1 tsp | Crushed between fingers |
| Bay Leaves 🍃 | 2 whole | Dried, whole |
| Worcestershire Sauce 🫒 | 1 tbsp | Low-sodium if available |
| Tomato Paste 🍅 | 2 tbsp | No salt added |
| Salt 🧂 | 1 tsp | Kosher or sea salt |
| Black Pepper 🌶️ | ½ tsp | Freshly ground preferred |
| Red Wine Vinegar 🍷 | 1 tbsp | For brightness |
The beef is the foundation here. Look for chuck roast labeled ‘lean’ or ‘90% lean’—it’ll have less marbling but still breaks down beautifully. Most supermarkets like Kroger or Publix carry it, or ask the butcher to trim a regular chuck for you. Don’t skip the fresh garlic; it adds depth without extra calories.
No low-sodium broth? Regular broth works—just skip the added salt. Swap thyme for dried sage at the same amount. If you’re out of tomato paste, 2 tbsp ketchup (the low-sugar kind) can pinch hit. The vinegar might seem odd, but it balances the richness—apple cider vinegar does the same thing.
This tastes even better the next day. Store leftovers in the fridge for up to 4 days or freeze for 3 months. Reheat gently in a pot with a splash of water to keep it juicy.
Why You’ll Love This Recipe
- Set It and Forget: I toss the lean chuck, onions, and veggies in the slow cooker before work and come home to a house that smells like Sunday dinner.
- Rich Without Guilt: The low-sodium broth and lean beef pack serious flavor—no heavy grease, just that deep, savory warmth I crave.
- Feeds Us Twice: One pot makes enough for dinner plus next-day sandwiches that my husband fights me over.
- Budget Hero: A cheap cut of lean chuck turns into a meal that tastes like it cost way more than it did.
Step-by-Step Instructions for Low Fat Pot Roast
Here’s the method I use to transform lean beef into fall-apart tender perfection.
Step 1: Sear and Season the Lean Chuck Roast
Pat the 2 lb Lean Chuck Roast dry with paper towels, then season all sides with the 1 tsp Salt and 0.5 tsp Black Pepper. I always press the spices in gently so they stick.
Heat a large Dutch oven over medium-high heat. When hot, add the roast and sear undisturbed for 4-5 minutes per side until deeply browned. You’ll know it’s ready to flip when it releases easily from the pot.
Step 2: Sauté the Aromatic Vegetables
Remove the roast and set aside. In the same pot, add the 2 whole Yellow Onions, 3 whole Carrots, and 3 whole Celery Stalks. Cook for 5-6 minutes, stirring occasionally, until the onions start to soften and develop light golden edges.
Add the 5 cloves Garlic Cloves and cook for 1 minute until fragrant. Then stir in the 2 tbsp Tomato Paste and cook for another 1-2 minutes—this removes the raw taste and deepens the flavor.
Step 3: Deglaze and Add Liquids
Pour in the 1 tbsp Red Wine Vinegar and scrape up all the browned bits from the bottom. Then add the 2 cups Low-Sodium Beef Broth, 1 tbsp Worcestershire Sauce, 1 tsp Dried Thyme, 1 tsp Dried Rosemary, and 2 whole Bay Leaves.
Stir to combine, then return the roast to the pot along with any accumulated juices. The liquid should come about halfway up the meat—add a splash of water if needed.
Step 4: Slow Cook to Tender Perfection
Bring the liquid to a gentle simmer, then reduce heat to low. Cover and cook for 3-4 hours, turning the roast every 45-60 minutes. You want the liquid at a lazy bubble—too hard of a boil will toughen the meat.
The roast is done when it shreds easily with a fork. I check for doneness by inserting a fork and twisting gently—if it comes apart with no resistance, it’s ready. The vegetables should be fork-tender and the sauce rich and flavorful.
Step 5: Rest and Serve
Remove the roast from the pot and let it rest on a cutting board for 10-15 minutes. This allows the juices to redistribute, ensuring every bite is moist and flavorful.
Slice the roast against the grain into thick pieces. Serve with the vegetables and sauce spooned over the top. The meat should be so tender it practically melts in your mouth, with the sauce soaking into every bite.
Pro Tips For Making Low Fat Pot Roast
- Sear the Lean Meat: I learned this the hard way—lean chuck roast won’t brown as easily as fatty cuts, so use medium-high heat and don’t move it for at least 3-4 minutes per side to get a proper crust.
- Trim Visible Fat: Even with a lean cut, there’s often a little fat left; take 2 minutes to trim it off before cooking to keep the dish truly low-fat.
- Skip the Boiling Broth: Resist the urge to boil the broth aggressively—keep it at a gentle simmer, or the lean meat will turn tough and dry.
- Add Veggies Later: Toss in the onions, carrots, and celery during the last hour of cooking, so they don’t turn to mush—sounds weird, but it works.
Make-Ahead Tips for low fat pot roast
Prep Ahead Strategy
I always prep my vegetables the night before—slice 2 onions, chunk 3 carrots, and cut 3 celery stalks into large pieces. Store them in airtight containers in the fridge. This saves 15-20 minutes on cooking day while keeping everything fresh. 💡
Marinate Overnight
For extra flavor, I rub the 2 lb Lean Chuck Roast with the 1 tsp Salt, 0.5 tsp Black Pepper, 1 tsp Dried Thyme, and 1 tsp Dried Rosemary the evening before. Place it in a sealed bag with 1 tbsp Worcestershire Sauce and refrigerate. The spices penetrate deeper overnight.
Slow Cooker Hack
If using a slow cooker, I layer the prepped veggies in the bottom, add the roast, then pour in the 2 cups Low-Sodium Beef Broth and remaining ingredients. Set to low for 8 hours before leaving for work. It’ll be ready when you walk through the door.
Freeze for Later
This dish freezes beautifully. After cooling, portion into quart-size freezer bags with the sauce and vegetables. It keeps for 3 months—just thaw in the fridge overnight before reheating. ❄️
Reheat Gently
Transfer thawed portions to a pot, add ¼ cup water or broth, and warm over medium-low heat for 15-20 minutes. Stir occasionally to prevent sticking. The flavors taste even richer the second time around.
Nutrition Facts
Frequently Asked Questions
Can I use a different cut of beef for this method?
Yes, but choose lean options like round roast or brisket. Avoid fatty cuts like ribeye as they won’t align with the low-fat goal. Stick to 90% lean or higher for best results.
Why do I need to sear the roast first?
Searing creates a flavorful crust and deepens the taste of the sauce. It also helps render any surface fat, keeping the dish leaner. Don’t skip this 4-5 minute step per side!
Can I make this in a slow cooker instead?
Use the same ingredients and cook on low for 8 hours. Layer veggies first, then add the roast and liquids. The result will be just as tender.
How do I prevent the meat from drying out?
Keep the liquid at a gentle simmer, not a boil. Also, resist the urge to peek too often—each time you lift the lid, you lose heat and moisture. Rest for 10-15 minutes before slicing.

- 8 Bean Soup Recipe Crock Pot: Hearty Vegetable Medley in One Pot - September 25, 2026
- 4C Bread Crumbs Meatballs Recipe: Crispy Crust and Juicy Centers - September 25, 2026
- 6 Oz Chocolate Chip Cookie Recipe: Perfectly Balanced Crispy Edges and Chewy Hearts - September 25, 2026