
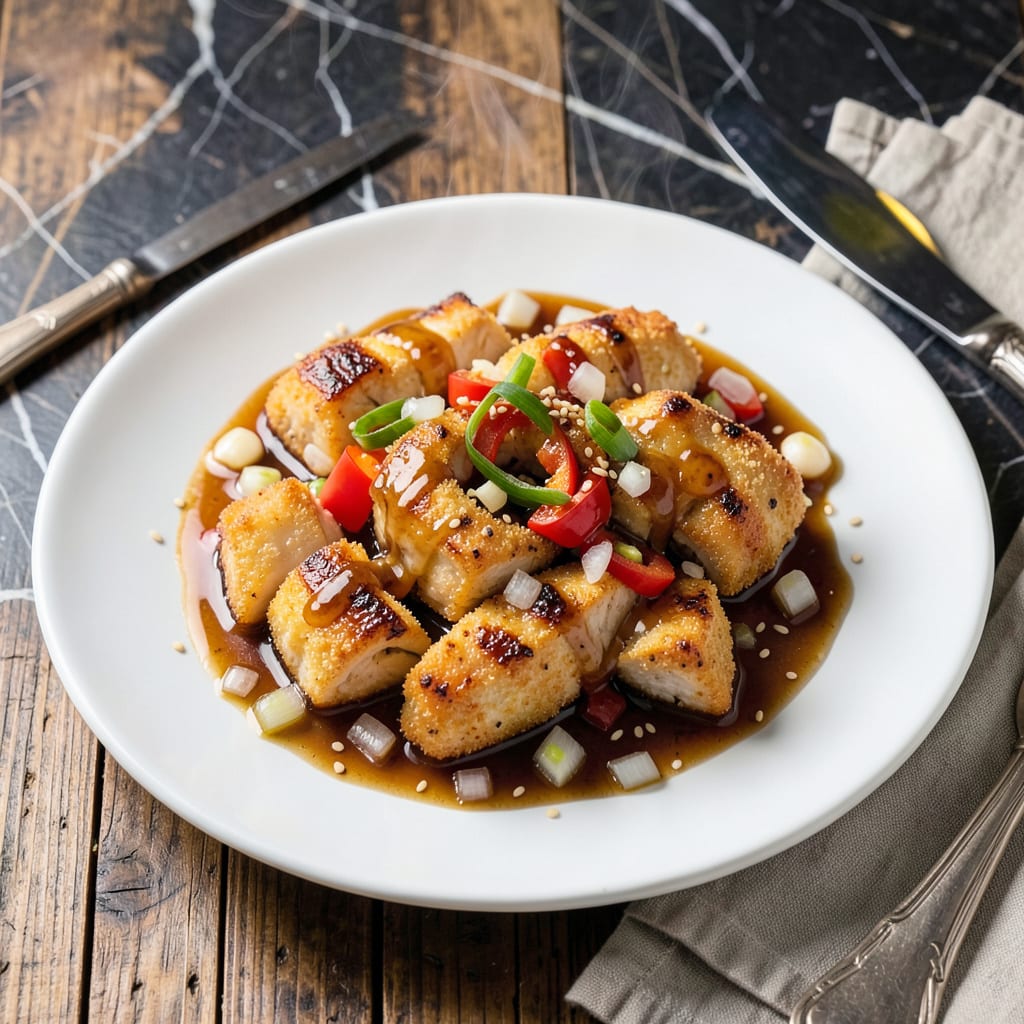
This lightened version delivers all the classic flavors without the guilt. The secret is a crispy oven-baked coating that stays golden without deep frying.
Tender chicken pieces are glazed in a tangy sauce that balances sweet and sour perfectly. Every bite proves you can enjoy this takeout favorite while keeping it healthy.
Ingredients for Low Fat Sweet and Sour Chicken
Pantry staples and fresh veggies make this lightened takeout classic sing.
| Ingredient | Amount | Notes |
|---|---|---|
| Boneless Skinless Chicken Breast 🍗 | 1 ½ lb | Cut into 1-inch pieces |
| Cornstarch 🌾 | ½ cup | For crispy coating |
| Egg Whites 🥚 | 2 whole | Lightly beaten for binding |
| Low-Sodium Soy Sauce 🫒 | 2 tbsp | For umami depth |
| Rice Vinegar 💧 | ¼ cup | For tangy acidity |
| Unsweetened Pineapple Juice 🍍 | ½ cup | Natural sweetness source |
| Ketchup 🍅 | ¼ cup | For sauce base |
| Brown Sugar 🍚 | 2 tbsp | Light or dark works |
| Garlic Cloves 🧄 | 3 cloves | Minced for sauce |
| Fresh Ginger 🌿 | 1 tbsp | Grated, adds zing |
| Red Bell Pepper 🌶️ | 1 whole | Cut into strips |
| Green Bell Pepper 🌿 | 1 whole | Cut into strips |
| White Onion 🧅 | 1 whole | Diced for sauce |
| Olive Oil Cooking Spray 🫒 | 1 can | For baking sheets |
| Salt 🧂 | ½ tsp | To taste |
[recipeingredientscaler]
The chicken is key here—boneless, skinless breasts stay lean but juicy. Costco or Sam’s Club have great bulk options if you’re cooking for a crowd. For the coating, cornstarch is non-negotiable—it’s what gives that bakery-style crunch without deep frying. I grab mine from the baking aisle at Kroger. The egg whites bind everything without the extra fat of whole eggs (and they whip up beautifully).
No pineapple juice? Orange juice with a splash of lemon works in a pinch. Swap the bell peppers for broccoli or snap peas if that’s what you’ve got in the crisper. The ketchup can be sugar-free to cut even more sweetness, but regular is fine too. For extra heat, add a pinch of red pepper flakes to the sauce. Fresh ginger is ideal, but ground ginger at half the amount saves time.
The chicken keeps 3-4 days in the fridge—reheat in the oven to keep it crispy. Sauce thickens as it cools, so thin with a splash of water if needed. Leftovers? Freeze for up to 3 months (the sauce may separate slightly but stirs back together).
Why You’ll Love This Recipe
- One Pan Meal: I toss everything in a skillet—chicken coated in cornstarch and egg whites, then the soy-vinegar glaze. Minimal mess, maximum flavor.
- Tangy Perfection: The rice vinegar gives that bright zing, while the soy sauce adds depth. Honestly, it’s the balance I crave in every bite.
- Meal Prep Hero: I make a big batch on Sunday and it reheats beautifully. Between us, it tastes even better the next day.
- Budget Friendly: Boneless chicken breast stretches far, and the pantry staples keep costs low. I’ll be real: it’s my wallet’s favorite weeknight dish.
Step-by-Step Instructions for Low Fat Sweet and Sour Chicken
Here’s how I make this dish with that perfect crispy coating and tangy glaze every time.
Step 1: Coat and Bake the Chicken
Preheat your oven to 425°F and line a baking sheet with parchment paper. Lightly coat it with the olive oil cooking spray to prevent sticking. Cut the 1.5 lb boneless skinless chicken breast into 1-inch pieces and pat them dry with paper towels.
Place the 0.5 cup cornstarch in a shallow bowl. Lightly beat the 2 egg whites in another bowl until frothy. Dip each piece of chicken into the egg whites, letting any excess drip off, then dredge in the cornstarch, pressing gently to adhere. Arrange the coated pieces on the prepared baking sheet.
Spray the chicken lightly with more olive oil cooking spray and bake for 15-18 minutes, flipping halfway through, until golden brown and crispy. The coating should be firm to the touch and the chicken cooked through.
Step 2: Prepare the Vegetables
While the chicken bakes, dice the white onion and cut the red bell pepper and green bell pepper into thin strips. This prep work ensures everything is ready to go when the chicken finishes baking.
I like to keep the vegetable pieces uniform in size so they cook evenly. The peppers add a nice crunch and color contrast, while the onion provides a sweet base for the sauce.
Step 3: Make the Sweet and Sour Sauce
In a large skillet over medium heat, combine the 0.25 cup rice vinegar, 0.5 cup unsweetened pineapple juice, 0.25 cup ketchup, 2 tbsp brown sugar, 2 tbsp low-sodium soy sauce, minced 3 cloves garlic cloves, and grated 1 tbsp fresh ginger. Stir well to combine.
Bring the mixture to a gentle simmer and cook for 3-4 minutes until it thickens slightly. The sauce should coat the back of a spoon but still be pourable. Taste and adjust seasoning with the 0.5 tsp salt if needed.
Step 4: Combine and Finish
Add the diced white onion, red bell pepper, and green bell pepper to the skillet with the sauce. Cook for 2-3 minutes until the vegetables soften slightly but retain some crispness.
Add the baked chicken to the skillet and toss gently to coat in the sauce. Cook for an additional 1-2 minutes to allow the flavors to meld together. The chicken should stay crispy while soaking up the tangy, sweet glaze.
Serve immediately while hot, with extra sauce spooned over the top. The contrast of the crispy chicken with the glossy, flavorful sauce is what makes this dish so satisfying.
Pro Tips For Making Low Fat Sweet And Sour Chicken
- Dry the Chicken: Pat the boneless skinless chicken breast thoroughly dry with paper towels before coating—excess moisture makes the cornstarch slough off in the pan.
- Chill the Coating: After dipping in egg whites and cornstarch, let the chicken rest in the fridge for 15 minutes; it helps the coating adhere better and crisp up without excess oil.
- Skip Overcrowding: I learned this the hard way—cook the chicken in a single layer with space between pieces, or it’ll steam instead of getting that light, crisp texture.
- Balance the Sauce: Taste before serving and adjust the rice vinegar or a pinch of sugar if needed—low-sodium soy sauce can make the sweet-sour ratio lean too sharp.
Essential Equipment for Great low fat sweet and sour chicken
Baking Essentials
Start with a quality baking sheet—I swear by Nordic Ware Naturals for even heat distribution. Line it with parchment paper for easy cleanup. A wire cooling rack placed on the sheet elevates the chicken, ensuring crispiness on all sides without flipping. 💡
Mixing Bowls
Use stainless steel mixing bowls for your egg whites and cornstarch. I love the Winco 5-quart set—they’re lightweight yet durable. The wide surface makes dredging chicken pieces a breeze. Avoid plastic, which can absorb odors over time.
Skillet Choice
For the sauce, a 12-inch nonstick skillet like Calphalon Contemporary prevents sticking while allowing room to toss the chicken. The sloped sides make stirring easy. If using stainless steel, ensure it’s well-seasoned or deglaze with a splash of water.
Measuring Tools
Precision matters with the sauce. I use OXO Good Grips measuring cups for liquids and 1-tbsp stainless steel scoops for brown sugar and soy sauce. A microplane grater makes quick work of the fresh ginger.
Oven Thermometer
Don’t trust your oven’s built-in thermometer. A $6 oven thermometer from Taylor ensures your 425°F setting is accurate. This prevents undercooked or over-browned chicken. I check mine monthly.
Cooking Spray
Use olive oil cooking spray for a light, even coat. I prefer PAM for Grilling—it has a higher smoke point. Hold the can 8-10 inches away and spray in a sweeping motion for even coverage. 🔥
Nutrition Facts
Frequently Asked Questions
Can I use chicken thighs instead of breasts?
Yes, but remove the skin first to keep it low-fat. Thighs may need 2-3 minutes extra baking time. They’ll stay juicier but have slightly more fat than breasts.
How do I make the sauce thicker?
Mix 1 tsp cornstarch with 1 tbsp water, then stir into simmering sauce. Cook for 1-2 minutes until it reaches your desired consistency.
Why did my chicken coating get soggy?
This happens if the chicken isn’t baked long enough or sits in the sauce too long before serving. Bake until golden and crisp, then toss in sauce just before eating.
Can I make this ahead of time?
Bake and sauce the chicken separately, then combine when reheating. Store in the fridge for up to 3 days. Reheat in the oven to maintain crispiness.

- 8 Bean Soup Recipe Crock Pot: Hearty Vegetable Medley in One Pot - September 25, 2026
- 4C Bread Crumbs Meatballs Recipe: Crispy Crust and Juicy Centers - September 25, 2026
- 6 Oz Chocolate Chip Cookie Recipe: Perfectly Balanced Crispy Edges and Chewy Hearts - September 25, 2026