
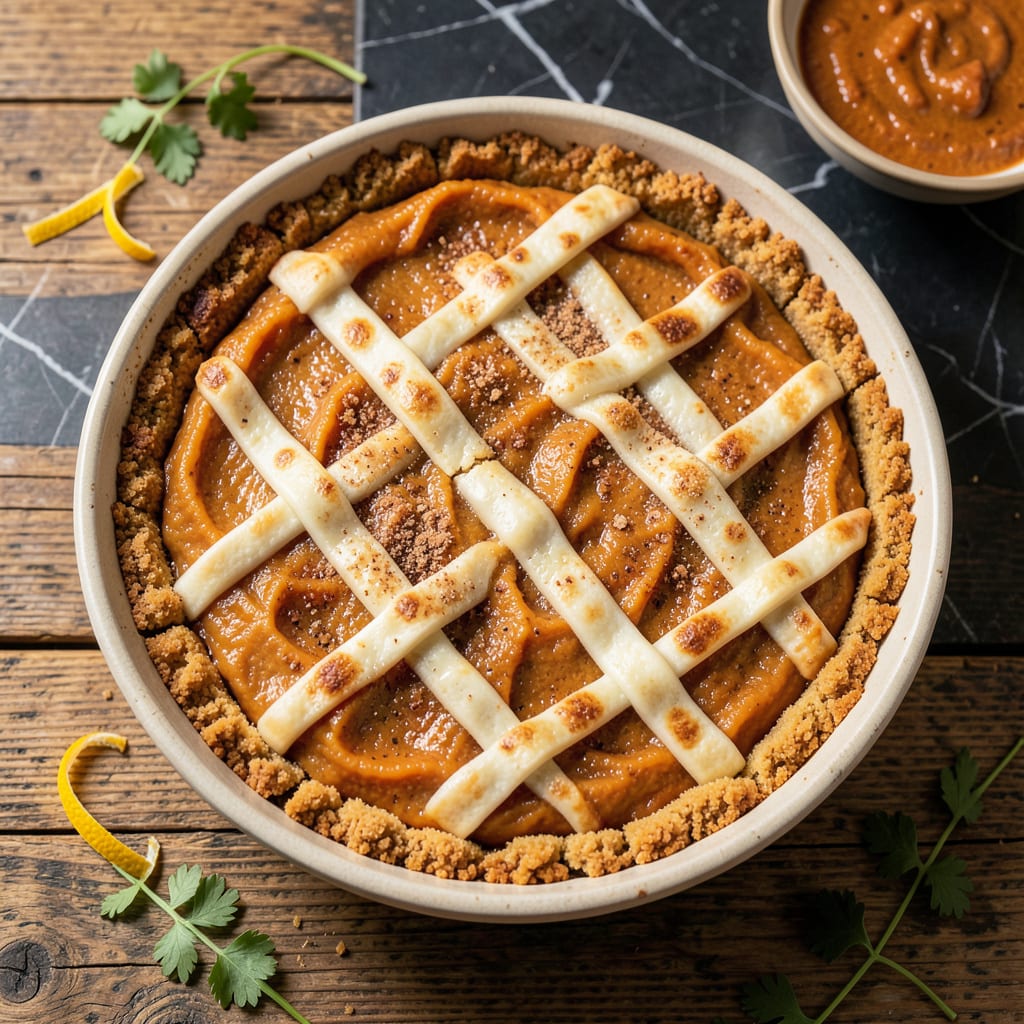
This lighter take on sweet potato pie delivers all the comfort of the classic without the guilt. The filling stays silky and rich thanks to smart substitutions that cut fat without sacrificing flavor.
With a lighter crust option and spiced filling, this version proves you can enjoy dessert while keeping it balanced. The warm spices create that familiar holiday aroma we all love.
Ingredients for Low Fat Sweet Potato Pie
Warm spices meet silky sweet potatoes in this balanced dessert with a lighter touch.
| Ingredient | Amount | Notes |
|---|---|---|
| Sweet Potatoes 🍠 | 2 lb | Peeled and cubed (about 4 medium) |
| Reduced-Fat Graham Cracker Crust 🍪 | 1 whole | 9-inch pre-made or homemade |
| Egg Whites 🥚 | 4 whole | Large, for lighter filling |
| Granulated Sugar 🍚 | ¾ cup | Or sugar substitute blend |
| Brown Sugar 🟤 | ¼ cup | Light or dark variety |
| Unsweetened Almond Milk 🥛 | ½ cup | Or any low-fat milk |
| Vanilla Extract 🌿 | 1 tsp | Pure extract preferred |
| Ground Cinnamon 🌶️ | 1 ½ tsp | Freshly ground if possible |
| Ground Nutmeg 🌰 | ½ tsp | Freshly grated for best flavor |
| Ground Ginger 🌿 | ½ tsp | Adds warm depth |
| Salt 🧂 | ¼ tsp | Balances sweetness |
| Cornstarch 🌾 | 2 tbsp | Thickens filling naturally |
| Light Butter 🧈 | 1 tbsp | Melted, for crust brushing |
The sweet potatoes are the heart here. Look for deep orange flesh—they’re sweeter and creamier than the pale ones. Most grocery stores carry them year-round now. I grab mine from Whole Foods when they’re on sale, but any well-stocked market works. The graham crust can be store-bought (check the label for reduced-fat) or homemade with whole wheat graham crackers for extra fiber.
No almond milk? Skim milk or oat milk work just as well. Swap the brown sugar for coconut sugar if you prefer. The egg whites are key for that silky texture without the fat—don’t substitute whole eggs here. Short on spices? Pumpkin pie spice can replace the cinnamon, nutmeg, and ginger in a pinch. Just use 1.5 teaspoons total.
The filling sets as it cools, so let it sit 2 hours before slicing. Leftovers? Cover and refrigerate for up to 4 days. This pie freezes beautifully too—just thaw overnight in the fridge before serving.
Why You’ll Love This Recipe
- I’ll be real: it’s my go-to for potlucks where I want to satisfy everyone without the guilt.
- One Bowl Wonder: Between us, you just mash, mix, and pour—no fancy steps, just straight-up simple.
- Velvety Sweetness: That brown sugar and sweet potato combo? Ridiculously good with a creamy texture that lingers.
- Diet-Friendly Crowd Pleaser: I’ll be real: it’s my go-to for potlucks where I want to satisfy everyone without the guilt.
Step-by-Step Instructions for Low Fat Sweet Potato Pie
Here’s my tested method for a lighter version that still delivers all the comfort and flavor.
Step 1: Prepare and Cook the Sweet Potatoes
Peel the 2 lb Sweet Potatoes and cut them into uniform 1-inch cubes so they cook evenly. I use about 4 medium sweet potatoes for this amount. Place them in a large pot and cover with cold water.
Bring to a boil over high heat, then reduce to medium and cook for 12-15 minutes until the potatoes are fork-tender. You’ll know they’re ready when a knife slides in without resistance. Drain thoroughly in a colander and let them sit for 5 minutes to release excess moisture.
Step 2: Create the Spiced Sweet Potato Base
In a large mixing bowl, combine the cooked sweet potatoes with the 0.75 cup Granulated Sugar, 0.25 cup Brown Sugar, 1 tsp Vanilla Extract, 1.5 tsp Ground Cinnamon, 0.5 tsp Ground Nutmeg, 0.5 tsp Ground Ginger, and 0.25 tsp Salt.
Mash with a potato masher or beat with an electric mixer until completely smooth. This step is crucial for that silky texture we’re after. The spices should be fully incorporated with no visible streaks. Add the 0.5 cup Unsweetened Almond Milk and mix until well combined.
Step 3: Thicken and Lighten the Filling
Sprinkle the 2 tbsp Cornstarch evenly over the sweet potato mixture. This is your natural thickener that will give the filling structure without adding fat. Mix thoroughly for 1 full minute to ensure the cornstarch is completely distributed.
Now add the 4 whole Egg Whites one at a time, mixing well after each addition. Using just the egg whites keeps this version lighter while still providing the necessary binding. The mixture should be smooth and pourable, with a consistency similar to thick pancake batter.
Step 4: Bake in the Prepared Crust
Preheat your oven to 350°F. Brush the 1 whole Reduced-Fat Graham Cracker Crust lightly with the 1 tbsp Light Butter that’s been melted. This adds a subtle richness and helps prevent sogginess.
Pour the sweet potato filling into the crust, spreading it evenly with a spatula. Bake on the center rack for 45-50 minutes until the filling is set and the center has only a slight wobble when gently shaken. You want it firm but not dry.
Step 5: Cool and Set Completely
Remove from the oven and let the pie cool on a wire rack for 1 hour at room temperature. This gradual cooling prevents cracking. Then transfer to the refrigerator and chill for at least 4 hours or overnight.
The filling will continue to set as it cools, developing that perfect sliceable texture. Serve chilled with a dollop of whipped topping if desired. The flavors actually deepen after a day, making this a great make-ahead dessert.
Pro Tips For Making Low Fat Sweet Potato Pie
- Roast the Potatoes: Skip boiling and roast your sweet potatoes at 400°F for 45 minutes—it caramelizes the sugars and deepens the flavor without adding fat.
- Cool the Filling: Let the sweet potato mixture cool for 10 minutes before adding egg whites to prevent curdling, which I learned the hard way after a lumpy pie disaster.
- Blind-Bake the Crust: Bake the reduced-fat graham crust for 8 minutes before filling to avoid a soggy bottom—sounds tedious but it actually changes the outcome.
- Swap Half the Sugar: Replace half the granulated sugar with brown sugar for a richer taste without extra fat, and balance the sweetness with a pinch of salt.
Perfect Pairings for These Flavors
Dessert Pairings
I love serving this pie with a scoop of light vanilla frozen yogurt—the cool creaminess contrasts beautifully with the warm spices. A sprinkle of toasted pecans adds crunch without much fat. For a fruit element, try warm spiced apple compote on top. 💛
Beverage Matches
A cup of hot chai tea brings out the cinnamon and ginger notes in the filling. The bold spices in chai complement rather than compete. For coffee lovers, a light roast with almond milk cuts through the sweetness without overwhelming it.
Holiday Spread
At Thanksgiving, I pair this pie with pumpkin bread and fresh fruit. The pumpkin bread’s texture contrasts nicely with the silky pie filling. A low-fat whipped topping with a dash of cinnamon makes it feel extra special.
Savory Balance
For a balanced dessert course, serve with sharp cheddar cheese slices—the saltiness enhances the sweet potato flavor. I use Cabot 50% Light Cheddar for a lighter option. The contrast is surprisingly delightful.
Nutrition Facts
Frequently Asked Questions
Can I use whole eggs instead of whites?
For best results, stick with egg whites to keep it light. Whole eggs add fat and may make the texture denser. If you must substitute, use 2 whole eggs plus 2 whites to maintain structure.
What if my filling doesn’t set?
Ensure you used cornstarch and baked until just a slight wobble remained. If still runny, chill for 2 more hours—it often firms up with extra time. Next time, try adding an extra 1 tbsp cornstarch.
Can I make this ahead?
It keeps well refrigerated for up to 4 days and actually tastes better the next day. You can also freeze it for up to 1 month—thaw overnight before serving.
How do I prevent cracks on top?
Avoid overbaking and let it cool gradually. Once out of the oven, cool at room temperature for 1 hour before refrigerating. This slow process prevents cracking.

- 8 Bean Soup Recipe Crock Pot: Hearty Vegetable Medley in One Pot - September 25, 2026
- 4C Bread Crumbs Meatballs Recipe: Crispy Crust and Juicy Centers - September 25, 2026
- 6 Oz Chocolate Chip Cookie Recipe: Perfectly Balanced Crispy Edges and Chewy Hearts - September 25, 2026