
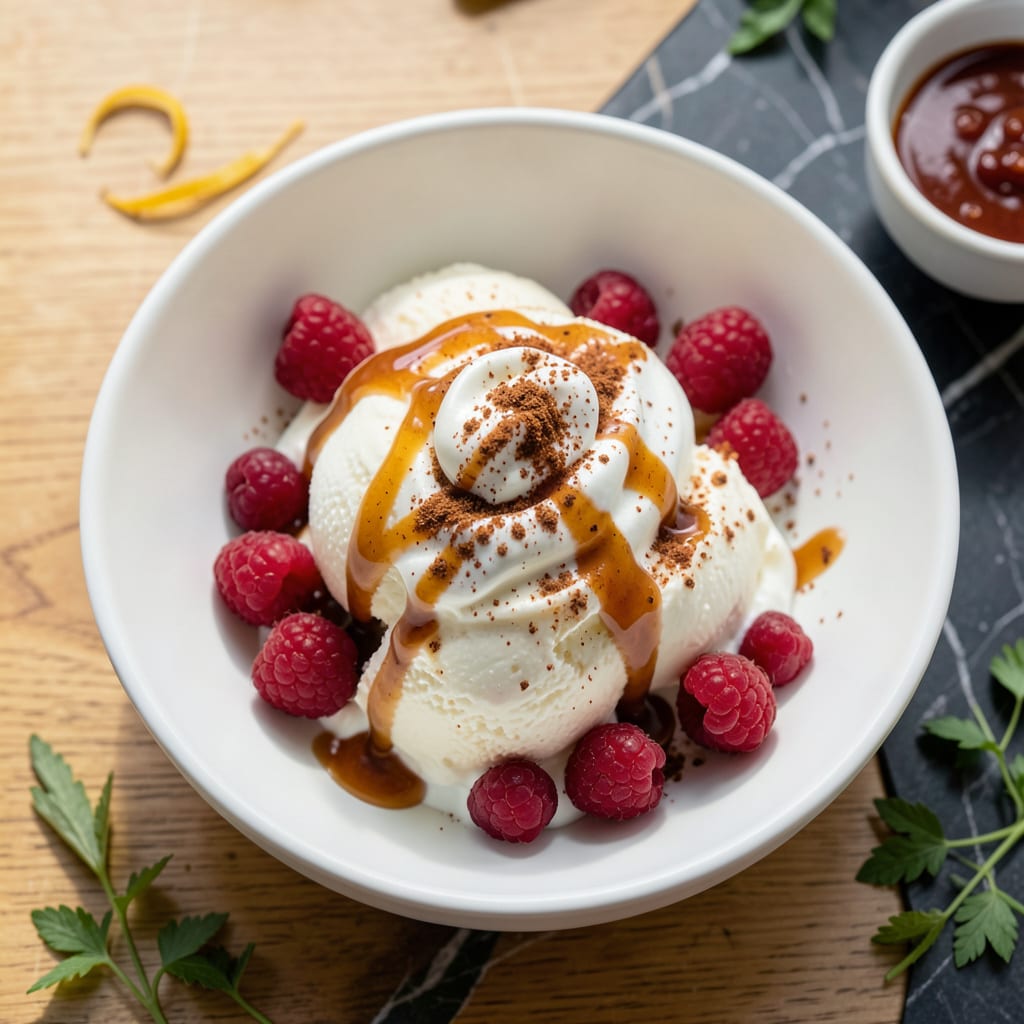
This recipe proves you can enjoy creamy ice cream without the guilt. Using simple swaps like skim milk and sugar substitutes, we achieve that classic texture you love.
Churned to velvety perfection, this version keeps all the satisfaction with a fraction of the fat. The secret is patience—proper chilling ensures the smoothest results every time.
Ingredients for Lowfat Ice Cream
Lightened ingredients that still deliver that classic creamy texture you crave.
| Ingredient | Amount | Notes |
|---|---|---|
| Skim Milk 🥛 | 2 cups | Cold, for smooth texture |
| Heavy Cream 🥛 | ½ cup | Light cream alternative |
| Granulated Sugar Substitute 🍚 | ¾ cup | Splenda or Stevia blend |
| Egg Whites 🥚 | 2 whole | Large, for structure |
| Vanilla Extract 🌿 | 1 tsp | Pure, not imitation |
| Non-Fat Greek Yogurt 🥛 | ½ cup | Plain, for creaminess |
| Salt 🧂 | ¼ tsp | Fine grain preferred |
| Cornstarch 🌾 | 1 tbsp | For stability in churning |
| Almond Extract 🌰 | ¼ tsp | Optional, enhances flavor |
| Fresh Lemon Juice 🍋 | ½ tsp | Brightens sweetness |
[recipeingredientscaler]
The milk is the base, so organic skim milk gives the cleanest flavor. Whole Foods or Trader Joe’s carry good options. For the cream, light cream or half-and-half works if you want a touch more richness (but stick to the half cup). The sugar substitute is key—Splenda bakes like sugar, so it churns beautifully. I always keep a bag in the pantry for this exact purpose.
No sugar substitute? Regular granulated sugar at half the amount works in a pinch (it’s sweeter). Swap Greek yogurt for low-fat sour cream if that’s what you’ve got. The cornstarch can be arrowroot powder at the same ratio. Skip the almond extract if you’re not a fan—vanilla alone carries it. Egg whites can be pasteurized from a carton (no separating needed).
Churn the base immediately after mixing—no sitting around. Keeps in an airtight container for 1 week (if it lasts that long). Freeze for up to 2 months, but texture is best fresh. Let it sit at room temp 10 minutes before scooping for easier serving.
Why You’ll Love This Recipe
- 5-Minute Mix: I just toss the skim milk, egg whites, and vanilla in a bowl—no fancy steps, no fuss.
- Silky Vanilla Dream: The heavy cream and sugar substitute blend into this ridiculously smooth texture with just the right sweetness.
- Weekend or Weeknight: Honestly, I’ve served this at summer BBQs and spooned it straight from the tub at midnight.
- Freezer Stash: One batch makes plenty, and it keeps beautifully for those sudden cravings.
Step-by-Step Instructions for Lowfat Ice Cream
Here’s the method I’ve perfected for creamy, dreamy ice cream that won’t weigh you down.
Step 1: Whisk the Egg Whites and Sweeteners
In a medium bowl, whisk together the 2 whole Egg Whites with the 0.75 cup Granulated Sugar Substitute until the mixture turns pale and slightly thick. I find this takes about 2-3 minutes of vigorous whisking by hand—you want to incorporate air for that light, fluffy texture.
This step is crucial for structure. The sugar substitute needs time to dissolve completely into the egg whites, preventing any grainy texture in your final product. Don’t skip this—it makes all the difference.
Step 2: Create the Creamy Base
In a separate bowl, combine the 2 cups Skim Milk, 0.5 cup Heavy Cream, 0.5 cup Non-Fat Greek Yogurt, 1 tsp Vanilla Extract, 0.25 tsp Salt, 0.25 tsp Almond Extract, and 0.5 tsp Fresh Lemon Juice. Stir until the Non-Fat Greek Yogurt is fully incorporated—it’ll look smooth and slightly thick.
The Fresh Lemon Juice might seem unusual, but it brightens the sweetness beautifully. And the Almond Extract? That’s my secret for depth of flavor without extra calories. Trust me on this combination.
Step 3: Thicken the Mixture
Sprinkle the 1 tbsp Cornstarch evenly over the milk mixture, then whisk vigorously for 1 full minute to ensure it’s completely dissolved. You shouldn’t see any lumps—just a silky, slightly opaque liquid.
Place the mixture in a saucepan and cook over medium heat, stirring constantly with a silicone spatula. After about 5-7 minutes, it should thicken enough to coat the back of a spoon. Don’t let it boil—this could curdle your precious base.
Remove from heat immediately when it reaches this consistency. The mixture will continue to thicken slightly as it cools.
Step 4: Temper and Combine
Slowly pour about ½ cup of the hot milk mixture into the egg white mixture while whisking constantly. This tempers the eggs, preventing them from scrambling when combined with the hot liquid. Then, pour the tempered egg mixture back into the saucepan with the remaining milk mixture.
Return to low heat and cook for an additional 2-3 minutes, stirring constantly, until the mixture thickens further and reaches 170°F on an instant-read thermometer. This ensures the eggs are safely cooked without overcooking.
Step 5: Chill and Churn
Pour the mixture into a clean bowl and press plastic wrap directly onto the surface to prevent a skin from forming. Refrigerate for at least 4 hours, or preferably overnight. The colder the base, the creamier your ice cream will be.
Once thoroughly chilled, churn in an ice cream maker according to the manufacturer’s instructions, typically 20-25 minutes. You’ll know it’s ready when it reaches the consistency of soft-serve. Transfer to a lidded container and freeze for at least 4 hours for a firm, scoopable texture.
Pro Tips For Making Lowfat Ice Cream
- Chill the Base: Always refrigerate your skim milk and heavy cream mixture for at least 4 hours before churning—I learned this the hard way after ending up with soupy ice cream that never set.
- Whip Egg Whites First: Beat your egg whites to stiff peaks before folding them in, about 3-4 minutes on high speed; it adds airiness that compensates for the lower fat content.
- Skip Boiling Sugar: Resist the urge to cook your sugar substitute—it can break down and leave a bitter aftertaste, especially with artificial sweeteners.
- Add Vanilla Last: Stir in the vanilla extract after the base has cooled slightly, around 10 minutes off the heat; high temperatures can mute its flavor.
Flavor Customization for This Dish
Fruit Swirls
Add ½ cup mashed berries like raspberries or strawberries during the last 5 minutes of churning for a fruity ripple effect. I use fresh or frozen—thaw and drain frozen berries first to avoid iciness. 💫
Chocolate Infusion
Mix in 2 tbsp cocoa powder with the base before chilling for chocolate ice cream. For texture, fold in ¼ cup mini chocolate chips post-churn. Ghirardelli makes great sugar-free chips that fit this recipe perfectly.
Spiced Variations
Warm the milk mixture with ½ tsp cinnamon or ¼ tsp nutmeg for cozy flavors. A pinch of cayenne adds surprising depth. I love cinnamon with the vanilla—it tastes like a creamsicle.
Citrus Zing
Boost the lemon juice to 1 tsp and add 1 tsp orange zest for a bright, citrusy twist. The acidity cuts through the sweetness beautifully, making each bite refreshing.
Crunchy Add-Ins
Fold in ¼ cup chopped nuts like almonds or walnuts after churning. Toast them first at 350°F for 8 minutes for maximum crunch. Diamond of California almonds are my go-to.
Coffee Lovers
Dissolve 1 tbsp instant espresso powder in 1 tbsp hot water, then stir into the base. The coffee enhances the chocolate notes without overpowering the delicate texture. 🔥
Nutrition Facts
Frequently Asked Questions
Can I make this without an ice cream maker?
Yes! Pour the chilled base into a shallow freezer-safe container. Freeze for 1 hour, then whisk vigorously to break up ice crystals. Repeat every 30 minutes for 3-4 hours until creamy.
Why use cornstarch in ice cream?
Cornstarch acts as a stabilizer, preventing ice crystals from forming. It gives a smoother texture without adding fat. 1 tbsp is all you need for this recipe.
How long does homemade lowfat ice cream last?
It stays fresh in an airtight container for up to 1 week in the freezer. For best texture, enjoy within 3-4 days.
Can I substitute regular sugar?
Yes, use ½ cup granulated sugar instead of the substitute. It may be slightly sweeter, so adjust to taste. The texture remains smooth.

- 8 Bean Soup Recipe Crock Pot: Hearty Vegetable Medley in One Pot - September 25, 2026
- 4C Bread Crumbs Meatballs Recipe: Crispy Crust and Juicy Centers - September 25, 2026
- 6 Oz Chocolate Chip Cookie Recipe: Perfectly Balanced Crispy Edges and Chewy Hearts - September 25, 2026