
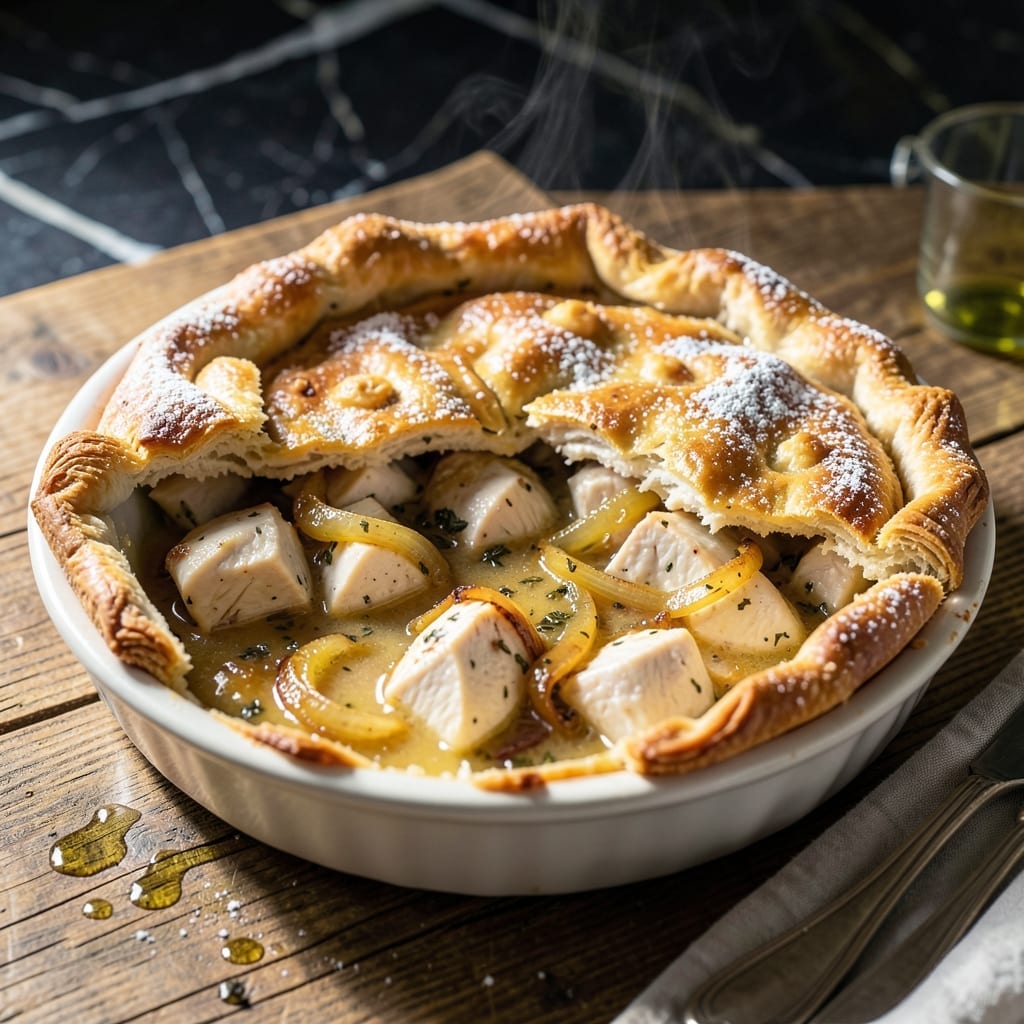
There’s nothing like a golden, flaky crust encasing a creamy, vegetable-packed filling that tastes even better the next day. This recipe solves the weeknight dinner dilemma by letting you prep everything in advance.
The secret lies in the technique: cook the filling completely before assembly, then chill it thoroughly. This prevents a soggy bottom crust and ensures the filling sets properly during baking. The result is a pie that holds its shape when sliced.
You’ll achieve that coveted flaky texture by using cold butter in your crust and avoiding overworking the dough. The filling stays rich and creamy, with tender chicken and vegetables in every bite.
Perfect for busy schedules, this dish bakes straight from the fridge. Serve it fresh from the oven or reheat portions as needed throughout the week.
Ingredients for Make Ahead Chicken Pot Pie
Quality ingredients create that flaky crust and creamy filling worth prepping ahead for.
| Ingredient | Amount | Notes |
|---|---|---|
| All-Purpose Flour 🌾 | 2 ½ cups | Divided for crust and filling |
| Unsalted Butter 🧈 | 1 cup | Cold, cubed for crust |
| Ice Water 💧 | ⅓ cup | For pie dough hydration |
| Salt 🧂 | 1 tsp | Divided for dough and filling |
| Boneless Skinless Chicken Breasts 🍗 | 1 ½ lb | Diced into bite-sized pieces |
| Yellow Onion 🧅 | 1 whole | Medium, finely diced |
| Carrots 🥕 | 2 whole | Medium, peeled and diced |
| Celery Stalks 🥬 | 2 whole | Diced for aromatic base |
| Frozen Peas 🌱 | 1 cup | No need to thaw |
| Garlic Cloves 🧄 | 3 cloves | Minced for depth of flavor |
| Chicken Broth 🍲 | 1 ½ cups | Low-sodium preferred |
| Heavy Cream 🥛 | ½ cup | For creamy filling consistency |
| Fresh Thyme Leaves 🌿 | 1 tbsp | Or 1 tsp dried thyme |
| Black Pepper 🌶️ | ½ tsp | Freshly ground preferred |
| Large Egg 🥚 | 1 whole | For egg wash finish |
The crust demands cold, high-quality butter. Plugrá or European-style gives optimal flakiness due to higher fat content. Source your all-purpose flour from King Arthur for consistent results. For the chicken, air-chilled breasts from Whole Foods or Trader Joe’s stay juicier than water-chilled alternatives. Purchase pre-diced mirepoix at Costco to save prep time without sacrificing quality.
No thyme? Rosemary at half the amount works well. Short on cream? Whole milk with 1 tbsp cornstarch mimics the thickness. Chicken thighs can replace breasts for richer flavor (adjust cooking time accordingly). The peas can be swapped for frozen corn or green beans. For a gluten-free version, use Cup4Cup multipurpose flour—it behaves most like traditional flour in pie dough.
Assemble the pie up to 2 days ahead—store uncovered in the fridge to prevent sogginess. Baked pie keeps 3-4 days refrigerated or freezes beautifully for 2 months. Reheat individual slices in a toaster oven to maintain crust crispness. Always chill filling completely before assembling to prevent a gummy bottom crust.
Why You’ll Love This Recipe
- Set It and Forget: I can assemble this the night before, pop it in the oven later, and the buttery crust with tender chicken does all the work.
- That Crust Though: The flaky, all-purpose flour crust with cold butter? It’s the kind of golden, crispy perfection that makes the whole dish.
- Feeds My Crowd: Between us, this is my go-to for potlucks, Sunday dinners, or just a cozy night in—everyone cleans their plate.
- Leftovers for Days: Honestly, it tastes even better the next day, and one batch gives us lunches for two days straight.
Step-by-Step Instructions for Make Ahead Chicken Pot Pie
Achieve a golden, flaky crust over a rich, creamy filling with these professional techniques.
Step 1: Prepare and Chill the Pie Dough
In a food processor, pulse 2.5 cups All-Purpose Flour with ½ tsp Salt to combine. Add 1 cup Unsalted Butter, cut into small cubes, and pulse until the mixture resembles coarse crumbs with pea-sized butter pieces visible. The key here is maintaining cold butter—this creates the flaky layers in your crust.
With the processor running, drizzle in ⅓ cup Ice Water through the feed tube until the dough just begins to come together. It should look shaggy, not smooth. Turn the dough out onto a lightly floured surface, divide into two equal portions, and shape each into a disk. Wrap tightly in plastic and refrigerate for at least 1 hour or up to 2 days. This chilling step relaxes the gluten and prevents shrinking during baking.
Step 2: Cook the Filling Base
In a large skillet, melt 2 tablespoons of the Unsalted Butter over medium heat. Add the diced Yellow Onion, Carrots, and Celery Stalks, cooking for 8-10 minutes until the vegetables soften and the onion becomes translucent. Stir occasionally to prevent browning.
Add the minced Garlic Cloves and 1 tbsp Fresh Thyme Leaves, cooking for 1 minute until fragrant. This aromatic base builds depth of flavor. Season with the remaining ½ tsp Salt and ½ tsp Black Pepper, ensuring even distribution.
Step 3: Build the Creamy Filling
Increase heat to medium-high and add the diced 1.5 lb Boneless Skinless Chicken Breasts. Cook, stirring occasionally, for 6-8 minutes until the chicken is no longer pink and is cooked through. The pieces should be opaque white with no pink centers.
Pour in 1.5 cups Chicken Broth and ½ cup Heavy Cream, stirring to combine. Bring to a gentle simmer and cook for 5 minutes until the mixture thickens slightly. Stir in the 1 cup Frozen Peas—they’ll warm through without needing to thaw first. Remove from heat and let cool completely before assembling.
Step 4: Assemble and Bake
On a lightly floured surface, roll out one dough disk to a 12-inch circle and transfer it to a 9-inch pie dish. Press gently into the bottom and up the sides. Pour the cooled filling into the crust, spreading evenly. Roll out the second dough disk and place it over the filling. Trim and crimp the edges to seal.
Brush the top crust with a beaten Large Egg for a golden finish. Cut several slits in the top to allow steam to escape. Bake at 375°F for 45-50 minutes until the crust is deep golden brown and the filling is bubbling. If the edges brown too quickly, cover them with foil.
Pro Tips For Making Make Ahead Chicken Pot Pie
- Chill the Dough: After mixing the flour, butter, and ice water, refrigerate the dough for at least 30 minutes—this prevents the butter from melting too soon and guarantees a flaky crust.
- Poach the Chicken: Simmer the boneless chicken breasts in salted water for 12-15 minutes until just cooked through, then shred or dice. This keeps the meat moist even after reheating.
- Vent the Pie: Cut a few small slits in the top crust before baking to let steam escape, or you’ll end up with a soggy bottom and a messy oven.
- Underbake Slightly: Pull the pie out when the crust is golden but the filling is just set—it’ll finish cooking as it rests, and you won’t dry it out when reheating later.
Storing and Reheating This make ahead chicken pot pie
Refrigerator Storage
Let your pie cool completely at room temperature for about 2 hours before refrigerating. Store the whole pie in an airtight container or wrap it tightly in aluminum foil. It will keep beautifully in the fridge for up to 4 days. ❄️
Freezer Storage
For longer storage, freeze the baked and cooled pie in its dish, wrapped first in plastic wrap then heavy-duty foil. It freezes well for up to 2 months without losing quality. I always label with the date to keep track.
Oven Reheating
Preheat your oven to 350°F. Place the pie on a baking sheet and warm for 20-25 minutes until the filling is bubbly and the crust is crisp. For individual slices, 10-12 minutes works perfectly.
Toaster Oven Method
This is my go-to for reheating single servings. Set to 375°F and warm slices for 8-10 minutes. The toaster oven maintains the crust’s crispness better than a microwave. 🔥
Microwave Option
For a quick meal, microwave individual portions on 50% power for 2-3 minutes, checking frequently. Place a damp paper towel over the slice to prevent drying out.
Pro Storage Tip
Always assemble the pie with cold filling to prevent a soggy bottom crust. This technique ensures your make-ahead creation stays as delicious as the day you baked it.
Nutrition Facts
Frequently Asked Questions
How far in advance can I assemble the pie?
You can assemble the pie up to 2 days ahead. Store it uncovered in the fridge to prevent the crust from becoming soggy. This gives the filling time to set properly.
Can I freeze an unbaked pie?
Yes! Assemble the pie, wrap it tightly in plastic wrap and foil, then freeze for up to 2 months. Bake from frozen, adding 10-15 minutes to the baking time.
How do I prevent a soggy bottom crust?
Always chill the filling completely before assembling. Additionally, baking on a preheated baking sheet helps crisp the bottom crust. This ensures a golden, flaky base every time.
What’s the best way to reheat individual slices?
A toaster oven at 375°F for 8-10 minutes keeps the crust crisp. Avoid microwaving, as it can make the crust soft.

- 4C Bread Crumbs Meatballs Recipe: Crispy Crust and Juicy Centers - September 25, 2026
- 6 Oz Chocolate Chip Cookie Recipe: Perfectly Balanced Crispy Edges and Chewy Hearts - September 25, 2026
- 6-Inch Coffee Cake Recipe: Vanilla Bean Swirls and Buttery Streusel Topping - September 25, 2026