
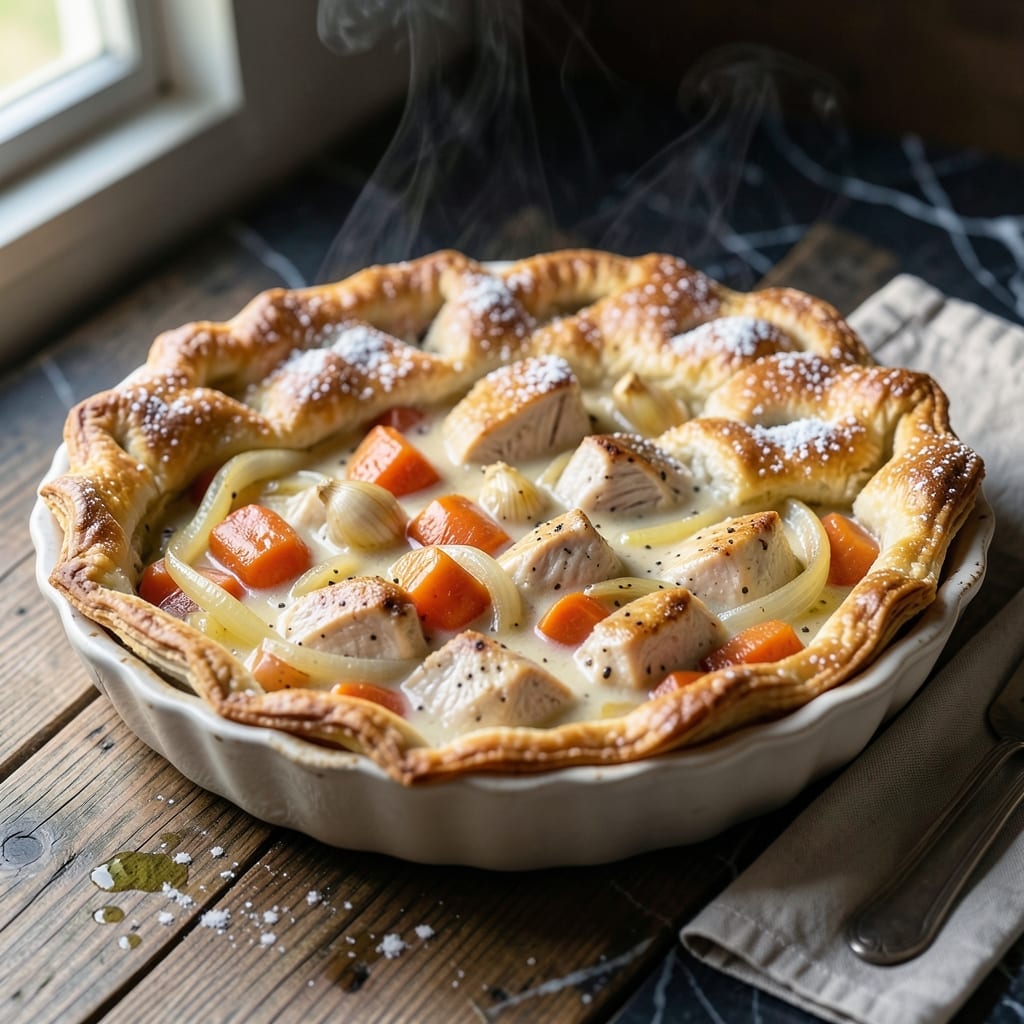
There’s nothing quite like the warmth of a freshly baked chicken pot pie to bring the family together. This recipe captures the essence of homestyle comfort with a golden, buttery crust that encases a creamy, savory filling.
Tender chunks of chicken, hearty vegetables, and a velvety sauce come together in perfect harmony. The secret lies in a slow-simmered filling that ensures every bite is packed with flavor.
Baking it until the crust is golden brown and flaky guarantees a satisfying crunch with each forkful. It’s a dish that feels like a hug on a chilly evening.
Simple ingredients and traditional techniques make this a timeless meal that never fails to deliver homestyle satisfaction.
Ingredients for Mama’s Chicken Pot Pie
Homestyle comfort starts with tender chicken, fresh vegetables, and a buttery crust ready to bake.
| Ingredient | Amount | Notes |
|---|---|---|
| Boneless Skinless Chicken Breast 🍗 | 1 ½ lb | Cut into 1-inch cubes |
| All-Purpose Flour 🌾 | ½ cup | For thickening the filling |
| Unsalted Butter 🧈 | ½ cup | Divided for filling and crust |
| Yellow Onion 🧅 | 1 whole | Medium, finely diced |
| Garlic Cloves 🧄 | 3 cloves | Minced for depth of flavor |
| Carrots 🥕 | 2 whole | Medium, peeled and diced |
| Celery Stalks 🌿 | 2 whole | Diced for aromatic base |
| Frozen Peas 🌱 | 1 cup | Thawed before using |
| Chicken Broth 🥣 | 2 cups | Low-sodium for control |
| Whole Milk 🥛 | ¾ cup | For creamy filling |
| Salt 🧂 | 1 tsp | Diamond Crystal preferred |
| Black Pepper 🌶️ | ½ tsp | Freshly ground for best flavor |
| Dried Thyme 🍃 | 1 tsp | For savory herbal note |
| Pie Crust 🥧 | 2 sheets | Store-bought or homemade |
| Large Egg 🥚 | 1 whole | For egg wash on crust |
The chicken is the foundation here. Boneless, skinless breasts stay juicy when cubed and simmered gently—avoid overcooking. Whole milk creates the velvety sauce base, so avoid low-fat varieties (trust me on this). For the crust, store-bought pie dough works perfectly, but a homemade all-butter crust elevates the dish significantly. Look for Pillsbury or Marie Callender’s in the refrigerated section.
No chicken? Rotisserie chicken at 1:1 ratio saves time and adds depth. Fresh thyme can replace dried at three times the amount. Out of peas? Green beans or corn work well—just blanch them first. For a richer filling, swap whole milk for heavy cream. The broth can be homemade, but Swanson or Kitchen Basics are reliable store-bought options.
Assemble the pie just before baking for a flaky crust. Leftovers keep 3-4 days refrigerated, though the crust softens. Freeze unbaked pies for up to 2 months—wrap tightly in foil and plastic. Reheat in a 350°F oven until warmed through.
Why You’ll Love This Recipe
- One-Pan Magic: I love that everything from the buttery crust to the chicken and onions cooks in a single dish—minimal cleanup, maximum flavor.
- Garlic-Butter Comfort: The golden butter and minced garlic cloves infuse the filling with a rich, savory depth that makes every bite feel like a hug.
- Weeknight Hero: Between us, this is my go-to for busy evenings—ready in under an hour and hearty enough to satisfy the whole family.
- Stretches Far: Leftovers taste even better the next day, and one batch easily feeds four, making it a budget-friendly win.
Step-by-Step Instructions for Chicken Pot Pie
This method delivers a golden crust with a rich, velvety filling every time.
Step 1: Cook the Chicken and Aromatic Base
Cut the 1.5 lb boneless skinless chicken breast into 1-inch cubes. Heat 2 tablespoons of the 0.5 cup unsalted butter in a large skillet over medium heat until melted. Add the chicken and cook for 6-8 minutes until no longer pink inside and lightly browned on the outside.
Remove the chicken with a slotted spoon and set aside. In the same skillet, add the finely diced yellow onion, diced carrots, and diced celery stalks. Cook for 5-6 minutes until the vegetables soften and the onion becomes translucent. Add the 3 minced garlic cloves and cook for 30 seconds until fragrant.
Step 2: Create the Creamy Filling
Sprinkle the 0.5 cup all-purpose flour over the vegetables and stir to coat. Cook for 1-2 minutes to remove the raw flour taste. Gradually whisk in the 2 cups chicken broth, then the 0.75 cup whole milk, ensuring no lumps form.
Return the cooked chicken to the skillet. Stir in the 1 cup thawed frozen peas, 1 tsp salt, 0.5 tsp black pepper, and 1 tsp dried thyme. Simmer for 5-7 minutes until the mixture thickens to a gravy-like consistency. Taste and adjust seasoning if needed.
Step 3: Assemble and Bake to Perfection
Preheat your oven to 375°F. Unroll 1 sheet of pie crust and press it into a 9-inch pie dish, trimming any excess dough from the edges. Pour the chicken filling into the crust.
Unroll the second pie crust and place it over the filling. Crimp the edges with a fork to seal, then cut 4-5 small slits in the top crust to allow steam to escape. Whisk the large egg with 1 tablespoon water and brush evenly over the top crust for a golden finish.
Step 4: Bake and Rest Before Serving
Bake for 35-40 minutes until the crust is deep golden brown and the filling is bubbling through the slits. If the edges begin to brown too quickly, cover them with aluminum foil or a pie shield.
Remove from the oven and let rest for 10-15 minutes before slicing. This resting period allows the filling to set slightly, making it easier to serve neat portions. The crust should be flaky and crisp, while the filling remains rich and creamy.
Pro Tips For Making Mama’S Chicken Pot Pie
- Precook the Chicken: Poach the boneless chicken breasts in salted water for 12-15 minutes until just done—this keeps them juicy instead of drying out in the oven. I learned this the hard way after pulling out rubbery chicken from my first few pies.
- Chill the Dough: Let your flour-butter crust rest in the fridge for at least 30 minutes before rolling. My grandmother swore by this, and she was right: it prevents shrinking and makes handling way easier.
- Sauté Onions Long Enough: Cook the yellow onions until golden, about 8-10 minutes—rushing this leaves them crunchy and raw-tasting in the filling. Sounds obvious, but I used to skip this step until I realized how much depth it adds.
- Use Cold Butter: Cut the unsalted butter into small cubes and keep it ice-cold when making the crust. After burning three batches with warm butter, I finally figured out this is what makes the flakes.
Make-Ahead Tips for This Recipe
Prep Ahead Filling
The filling can be made 1-2 days in advance and stored in an airtight container in the fridge. This actually improves the flavors as they meld together. Just give it a good stir before assembling your pie. 💡
Crust Prep Tips
If using homemade dough, prepare and refrigerate it up to 3 days ahead. For store-bought, keep it in the fridge until ready to use. Let it sit at room temperature for 15 minutes before rolling to prevent cracking.
Assemble Early
You can fully assemble the pie up to 12 hours before baking. Cover tightly with plastic wrap and refrigerate. Brush with egg wash just before baking for that perfect golden finish.
Freezer Method
Assemble the pie completely, wrap tightly in heavy-duty foil, then freeze for up to 2 months. Bake from frozen, adding 10-15 minutes to the baking time. No need to thaw first. ❄️
Individual Portions
Make mini pot pies in ramekins for easy grab-and-go meals. Assemble and refrigerate for up to 24 hours, then bake as directed. These are perfect for lunches throughout the week.
Reheating Leftovers
Store cooked pie in the fridge for 3-4 days. Reheat slices in a 350°F oven for 10-15 minutes to restore the crust’s crispness. Microwaving works but may soften the crust.
Nutrition Facts
Frequently Asked Questions
Can I use rotisserie chicken instead?
Use 1.5 lb of shredded or chopped rotisserie chicken. It adds extra flavor and saves prep time. Just skip the initial cooking step and add it directly to the filling.
How do I prevent a soggy bottom crust?
Pre-bake the bottom crust for 8-10 minutes before adding filling. Also, ensure your filling is thick and not watery before assembling. This creates a barrier against moisture.
What’s the best way to store leftovers?
Keep in an airtight container in the fridge for 3-4 days. Reheat in a 350°F oven for 10-15 minutes to maintain crust crispness.
Can I make this without peas?
Yes! Try 1 cup of diced green beans, corn, or mixed vegetables. Just blanch fresh veggies first or use thawed frozen ones.

- 4C Bread Crumbs Meatballs Recipe: Crispy Crust and Juicy Centers - September 25, 2026
- 6 Oz Chocolate Chip Cookie Recipe: Perfectly Balanced Crispy Edges and Chewy Hearts - September 25, 2026
- 6-Inch Coffee Cake Recipe: Vanilla Bean Swirls and Buttery Streusel Topping - September 25, 2026