
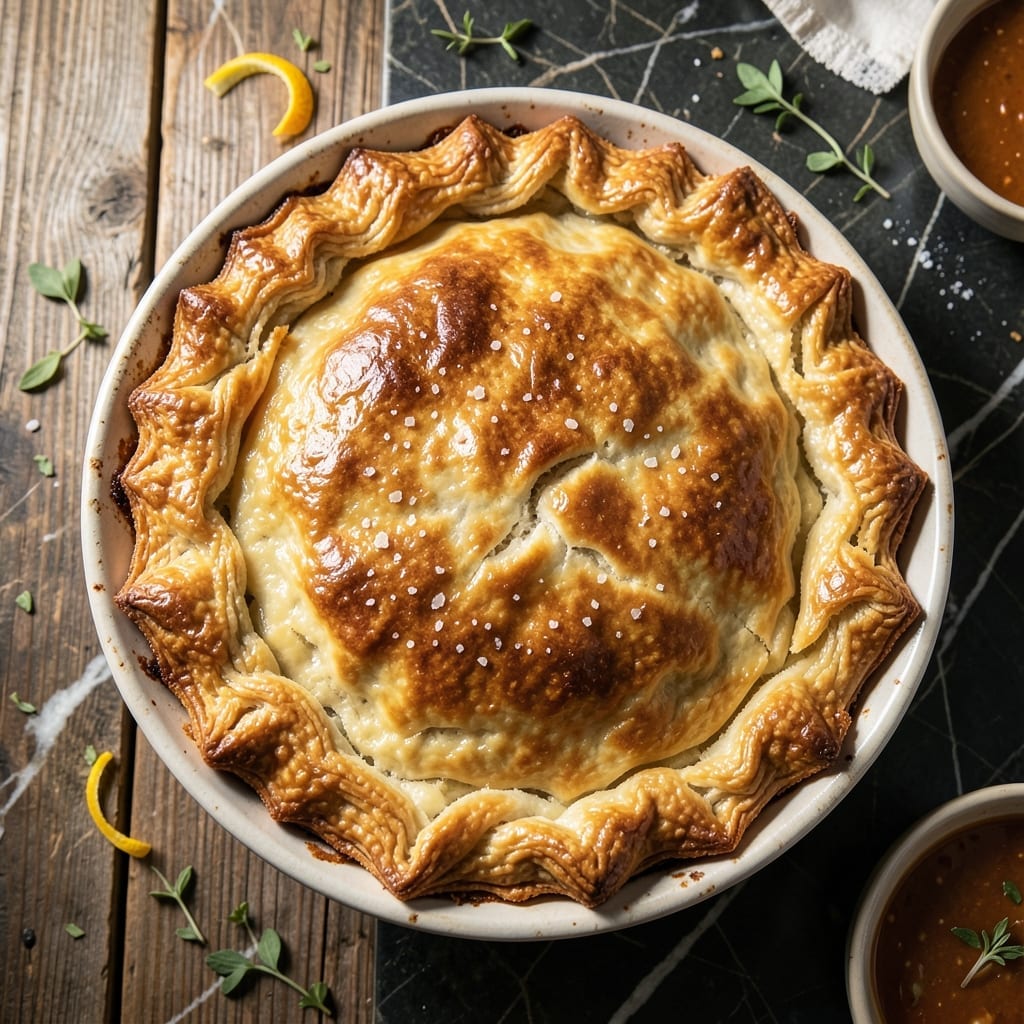
A golden, flaky crust elevates any pot pie from good to extraordinary. This recipe delivers that signature Marie Callender’s texture with precise layering and perfect browning every time.
The secret lies in cold butter and minimal handling. By keeping ingredients chilled and working quickly, you create distinct layers that puff into delicate, crispy sheets during baking.
What emerges from the oven is a crust that shatters at the touch, with a rich, buttery flavor that complements the filling without overpowering it. The edges stay crisp while the bottom resists sogginess.
Master this foundation, and your pot pies will rival any restaurant version. The technique is straightforward but demands attention to detail for that professional-quality result.
Ingredients for Marie Callender’s Pot Pie Crust
Precise ingredients for that signature flaky, golden crust you expect from a professional kitchen.
| Ingredient | Amount | Notes |
|---|---|---|
| All-Purpose Flour 🌾 | 2 ½ cups | Sifted, plus extra for dusting |
| Unsalted Butter 🧈 | 1 cup | Cold, cubed into 1/2-inch pieces |
| Vegetable Shortening 🧈 | ¼ cup | Cold, for extra flakiness |
| Fine Sea Salt 🧂 | 1 tsp | Diamond Crystal preferred |
| Granulated Sugar 🍚 | 1 tsp | Balances saltiness |
| Ice Water 💧 | ½ cup | Plus 1 tbsp as needed |
| Large Egg 🥚 | 1 whole | For egg wash finish |
| Heavy Cream 🥛 | 1 tbsp | Optional for richer egg wash |
| White Vinegar 🍶 | 1 tbsp | Keeps dough tender |
| Baking Powder 🧂 | ½ tsp | Ensures lift and flakiness |
The butter must be ice-cold—European-style like Plugrá or Kerrygold works best for its higher fat content. King Arthur Flour is ideal for consistent results, but any all-purpose will do. The shortening adds insurance against tough crusts; Crisco is the standard. Keep everything chilled until ready to use (the vinegar helps inhibit gluten formation for tenderness).
No shortening? Use additional cold butter at a 1:1 ratio. For a richer crust, replace the water with ice-cold vodka (the alcohol evaporates, leaving a flakier texture). Swap the egg wash for melted butter if preferred. The vinegar can be apple cider vinegar in a pinch—use the same amount (don’t worry, you won’t taste it).
Dough can be refrigerated for 2 days or frozen for 1 month. Let chilled dough sit at room temperature for 10 minutes before rolling to prevent cracking. Baked crusts keep 3 days at room temperature in an airtight container.
Why You’ll Love This Recipe
- No-Fuss Mixing: I just dump the flour, butter, shortening, salt, and sugar in a bowl—no fancy techniques, and it still turns out flaky every time.
- Buttery, Crisp Layers: The combo of butter and shortening gives that perfect tender crunch I crave in every bite.
- Freezer Friend: I make double batches and freeze the extras for last-minute dinners. (Yes, even on a Tuesday night)
- Pocketbook Pleaser: All-purpose flour and basic pantry staples keep this way cheaper than store-bought crusts.
Step-by-Step Instructions for Buttery Pot Pie Crust
Follow this precise method to achieve the signature flaky layers that define a perfect pot pie crust.
Step 1: Combine Dry Ingredients with Precision
In a large bowl, whisk together the 2.5 cups All-Purpose Flour, 1 tsp Fine Sea Salt, 1 tsp Granulated Sugar, and 0.5 tsp Baking Powder. This ensures even distribution of leavening and seasoning throughout the crust.
I sift the flour first to eliminate lumps and create a lighter texture. The sugar balances the saltiness, while the baking powder provides subtle lift for extra flakiness. This dry mixture forms the foundation of your crust’s structure.
Step 2: Cut in Cold Fats for Maximum Flakiness
Add the 1 cup Unsalted Butter (cubed into 1/2-inch pieces) and 0.25 cup Vegetable Shortening to the dry ingredients. Using a pastry cutter or your fingers, work the fats into the flour until the mixture resembles coarse crumbs with pea-sized pieces of butter visible.
The cold fats must remain solid during this process—this creates the steam pockets that separate into flaky layers during baking. The combination of butter (for flavor) and shortening (for stability) mimics the professional quality of Marie Callender’s original recipe.
Step 3: Incorporate Liquid Ingredients Gradually
Create a well in the center of your flour-fat mixture. Add the 0.5 cup Ice Water and 1 tbsp White Vinegar all at once. The vinegar tenderizes the gluten, preventing toughness while maintaining structure.
Using a fork, gently toss the mixture until it just begins to come together. The dough should look shaggy with visible dry spots—overworking at this stage develops gluten, which makes the crust tough rather than flaky. Add the optional 1 tbsp of additional ice water only if the mixture won’t hold when pressed.
Step 4: Chill and Roll for Optimal Texture
Turn the dough onto a lightly floured surface and gently shape it into two equal discs. Wrap each in plastic and refrigerate for at least 1 hour (or up to 2 days). This chilling period allows the gluten to relax and the fats to resolidify, which is crucial for flaky layers.
When ready to use, roll each disc on a floured surface to 1/8-inch thickness. The dough should hold together without cracking—if it resists, let it warm slightly at room temperature for 5-10 minutes before continuing.
Step 5: Finish with Egg Wash for Golden Perfection
Before baking, brush the top crust with an egg wash made from the 1 whole Large Egg and 1 tbsp Heavy Cream. This creates a deep golden-brown finish and adds a subtle sheen that makes the crust visually appealing.
Bake according to your pot pie recipe instructions, typically at 375-400°F until the crust is golden brown and the filling is bubbling. The egg wash not only enhances appearance but also adds a delicate crispness to the exterior.
Pro Tips For Making Marie Callender’S Pot Pie Crust
- Chill the Fat: Keep your butter and shortening ice-cold until the last second—this prevents them from melting into the flour, which is what gives you that flaky, Marie Callender’s-style crust.
- Use Both Fats: Don’t swap one for the other; the butter adds flavor while the shortening gives that sky-high, tender flake. I learned this the hard way after making a greasy, flat crust with just butter.
- Skip Overworking: Mix the dough just until it comes together—any more and you’ll develop the gluten, making the crust tough instead of light and airy.
- Rest Before Rolling: After shaping the dough into a disk, give it a solid 30 minutes in the fridge. Sounds tedious, but it relaxes the gluten and makes rolling out a breeze.
Essential Equipment for This Dish
Pastry Cutter
A pastry cutter is essential for working cold fats into flour efficiently without warming the butter. I use the OXO Good Grips model—its sturdy blades and comfortable handle make quick work of cutting in 1 cup of butter and ¼ cup shortening.
Rolling Pin
Invest in a French-style tapered rolling pin for even pressure distribution. My J.K. Adams maple pin gives me perfect control rolling dough to that ideal ⅛-inch thickness. Avoid non-tapered pins—they create uneven edges.
Marble Pastry Board
A chilled marble pastry board keeps dough cold during rolling. I chill mine in the freezer for 15 minutes before use. The natural stone stays colder than wood, preventing butter from melting prematurely. John Boos makes excellent marble boards.
Plastic Wrap
Use heavy-duty plastic wrap for chilling dough discs. I prefer Glad Press’n Seal because it clings tightly, preventing air exposure. Wrap each disc separately and refrigerate for at least 1 hour to relax the gluten.
Pastry Brush
A silicone pastry brush applies egg wash evenly without leaving bristles behind. I use the Cuisinox brush—it’s heat-resistant and easy to clean. Dip in the egg-cream mixture and brush generously for that golden finish. 💛
Ruler
Measure dough thickness precisely with a stainless steel ruler. I check multiple spots to ensure even ⅛-inch thickness before transferring to my pie dish. This prevents uneven baking and ensures consistent flakiness throughout.
Nutrition Facts
Frequently Asked Questions
Can I make this crust ahead of time?
Yes! The dough can be refrigerated for up to 2 days or frozen for 1 month. Let it warm slightly before rolling to prevent cracking.
Why use both butter and shortening?
Butter adds rich flavor while shortening creates stability for extra flakiness. The combo mimics the professional texture of the original.
How do I prevent a soggy bottom crust?
Blind-bake the bottom crust for 10 minutes before adding filling. Also, brush it with egg wash to create a moisture barrier.
What if my dough cracks while rolling?
Let it rest at room temperature for 5-10 minutes. If cracks persist, patch with extra dough and press gently.

- 6 Oz Chocolate Chip Cookie Recipe: Perfectly Balanced Crispy Edges and Chewy Hearts - September 25, 2026
- 6-Inch Coffee Cake Recipe: Vanilla Bean Swirls and Buttery Streusel Topping - September 25, 2026
- 1 Hour Soup Recipe: Velvety Richness Without the Wait - September 25, 2026