
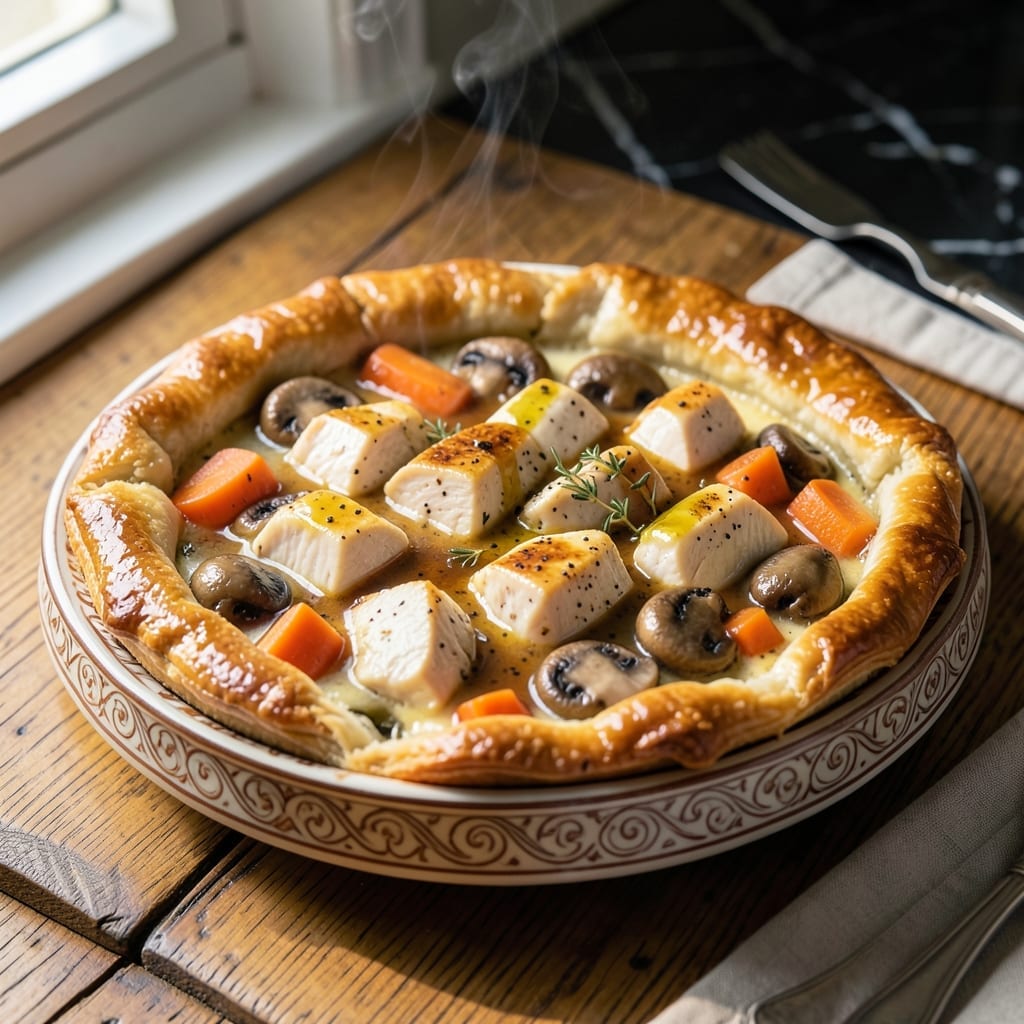
I created this pot pie for a special anniversary dinner, and it was love at first bite. There’s something magical about a flaky crust giving way to a creamy, savory filling that feels like a warm hug.
The secret is in the layers: tender chicken, crisp vegetables, and a velvety sauce that comes together in one pan. I use a simple store-bought crust to keep things easy without sacrificing that buttery texture.
What you’ll get is pure comfort in every bite—creamy without being heavy, rich without feeling indulgent. It’s the kind of dish that makes ordinary nights feel special.
Perfect for cozy dinners or impressing someone you love. Here’s how to make it.
Ingredients for Marry Me Chicken Pot Pie
Buttery crust, tender chicken, and a creamy filling make this dish unforgettable.
| Ingredient | Amount | Notes |
|---|---|---|
| Chicken Breast 🍗 | 1 ½ lb | Boneless, skinless, cubed |
| Refrigerated Pie Crust 🥧 | 2 sheets | Store-bought for ease |
| Butter 🧈 | ½ cup | Unsalted, for sauce |
| All-Purpose Flour 🌾 | ⅓ cup | For thickening sauce |
| Chicken Broth 🥣 | 1 ½ cups | Low-sodium preferred |
| Heavy Cream 🥛 | ¾ cup | Full-fat for creaminess |
| Carrots 🥕 | 2 whole | Peeled and diced |
| Celery Stalks 🌿 | 2 whole | Diced for texture |
| Yellow Onion 🧅 | 1 whole | Medium, finely diced |
| Frozen Peas 🌱 | 1 cup | No need to thaw |
| Garlic Cloves 🧄 | 3 cloves | Minced for depth |
| Fresh Thyme 🌿 | 1 tbsp | Chopped, or 1 tsp dried |
| Salt 🧂 | 1 tsp | Kosher or sea salt |
| Black Pepper 🌶️ | ½ tsp | Freshly ground preferred |
| Large Egg 🥚 | 1 whole | For egg wash |
The crust is the star here. Pillsbury refrigerated pie crust has that perfect flaky texture right out of the tube—no one will guess it wasn’t homemade. For the chicken, bone-in thighs actually stay juicier than breasts if you’ve got the time to pick them off the bone. I grab both at Kroger for convenience. Look for chicken broth with low sodium so you can control the seasoning.
No fresh thyme? Dried works at one-third the amount. Heavy cream can be swapped for half-and-half if you want it lighter (but less rich). Forgot the peas? Frozen corn or diced green beans work just as well. The veggies can be swapped based on what’s in your crisper—just keep the total volume similar. If you’re making this ahead, hold off on the egg wash until right before baking.
Assemble and bake the same day if you can—the crust gets soggy if left unbaked. Leftovers? 3 days in the fridge, but honestly it’s best fresh. Freeze unbaked pies for up to 2 months (egg wash after thawing).
Why You’ll Love This Recipe
- One Pan Wonder: I love that the refrigerated pie crust and simple chicken breast mean less prep and fewer dishes to wash.
- Rich and Creamy: The butter and flour roux soaks up the chicken broth into a sauce so good you’ll want to lick the plate.
- Weeknight Hero: This dish is exactly what you need for a cozy family dinner or when you want to impress guests without the fuss.
- Leftovers for Days: Honestly, it tastes even better the next day, and it stretches easily for lunches or another dinner.
Step-by-Step Instructions for Chicken Pot Pie
Here’s how I create this cozy, flaky masterpiece that’s sure to impress.
Step 1: Cook the Chicken and Vegetables
In a large skillet, melt the 0.5 cup butter over medium heat. Add the cubed 1.5 lb chicken breast and cook for 6-8 minutes until no longer pink inside. Remove the chicken and set aside.
In the same skillet, add the diced 2 whole carrots, 2 whole celery stalks, and finely diced 1 whole yellow onion. Cook for 5 minutes until the vegetables begin to soften. Stir in the minced 3 cloves garlic cloves and chopped 1 tbsp fresh thyme, cooking for another 1 minute until fragrant.
Step 2: Make the Creamy Sauce
Sprinkle the 0.33 cup all-purpose flour over the vegetables and stir to coat. Gradually pour in the 1.5 cups chicken broth and 0.75 cup heavy cream, stirring constantly to prevent lumps.
Cook the mixture over medium heat for 3-4 minutes until it thickens and comes to a gentle simmer. Season with 1 tsp salt and 0.5 tsp black pepper. Return the chicken to the skillet and add the 1 cup frozen peas. Stir everything together and remove from heat.
Step 3: Assemble the Pot Pie
Preheat your oven to 375°F. Unroll the 2 sheets refrigerated pie crust and place one sheet in a 9-inch pie dish, pressing it gently against the bottom and sides. Trim any excess crust hanging over the edge.
Pour the chicken and vegetable filling into the crust-lined dish. Place the second sheet of pie crust over the filling. Crimp the edges to seal, then cut a few small slits in the top crust to allow steam to escape.
Step 4: Bake to Golden Perfection
In a small bowl, beat the 1 whole large egg and brush it evenly over the top crust. This egg wash gives the pie that beautiful golden brown finish.
Bake for 30-35 minutes until the crust is golden brown and the filling is bubbly. If the edges begin to brown too quickly, cover them with a strip of foil. Let the pie rest for 10 minutes before serving to allow the filling to set.
Pro Tips For Making Marry Me Chicken Pot Pie
- Pre-Cook the Chicken: Poach or sear the chicken breast in the chicken broth before assembling the pie—this keeps it juicy and infuses extra flavor into the filling.
- Chill the Crust: Let the refrigerated pie crust sit out for 10-15 minutes before rolling; it softens just enough to prevent cracking but stays cold for flakiness.
- Thicken the Filling: After simmering the broth and flour mixture, cook it for an extra 2-3 minutes to fully activate the flour’s thickening power—no one wants a soupy pot pie.
- Vent the Top: Cut a few small slits in the top crust before baking to let steam escape, or you’ll risk a soggy bottom and a sad, collapsed pie.
Pro Cooking Tips for marry me chicken pot pie
Prevent Soggy Bottoms
I always pre-bake the bottom crust for 8 minutes at 375°F before adding the filling. This creates a moisture barrier. Brush the crust with a thin layer of beaten egg white before filling for extra protection. 💡
Perfect Sauce Consistency
Cook your roux for 2 full minutes after adding flour to eliminate the raw taste. When adding liquids, pour slowly while whisking constantly. The sauce should coat the back of a spoon but still drip slightly.
Vegetable Prep Trick
Cut all your veggies uniformly—¼-inch dice ensures even cooking. I use a Kroger brand mandoline for perfect carrots and celery. Salt the vegetables lightly while cooking to draw out moisture before adding the sauce.
Crust Venting
Cut 4-5 decorative slits in the top crust rather than one large vent. This allows steam to escape evenly without cracking. Use a sharp knife and twist slightly for a professional bakery look. ✨
Resting Time
The 10-minute rest is non-negotiable. The filling thickens as it cools, making serving easier. I place the pie on a wire rack during resting to prevent the bottom crust from getting soggy.
Egg Wash Secret
Add 1 tbsp water to your beaten egg for a thinner wash that brushes on more evenly. For extra shine, add ½ tsp sugar to the wash. This creates that beautiful golden color that makes everyone say “wow.”
Nutrition Facts
Frequently Asked Questions
Can I use pre-cooked chicken?
Yes, rotisserie chicken works great! Use 3 cups shredded and skip the initial cooking step. Just warm it in the sauce to absorb flavors.
How do I prevent the crust from burning?
Cover the edges with foil or a pie shield after 20 minutes of baking. This keeps them golden while the center cooks through.
Can I make this ahead of time?
Assemble the pie without baking, then refrigerate for up to 1 day. Add egg wash and bake when ready. Avoid freezing unbaked pies longer than 2 months.
What if my filling is too runny?
Simmer the sauce for 2-3 extra minutes before assembling. A slurry of 1 tbsp cornstarch + 1 tbsp water can thicken it if needed.

- 6-Month-Old Smash Cake Recipe: Tiny Bites of Celebration Magic - September 25, 2026
- 3 Layer Spice Cake Recipe: Warm Vanilla, Chocolate, and Spiced Swirls - September 25, 2026
- 4 Serving Mac and Cheese Recipe: Ultra-Creamy Bake With Crispy Breadcrumbs - September 25, 2026