
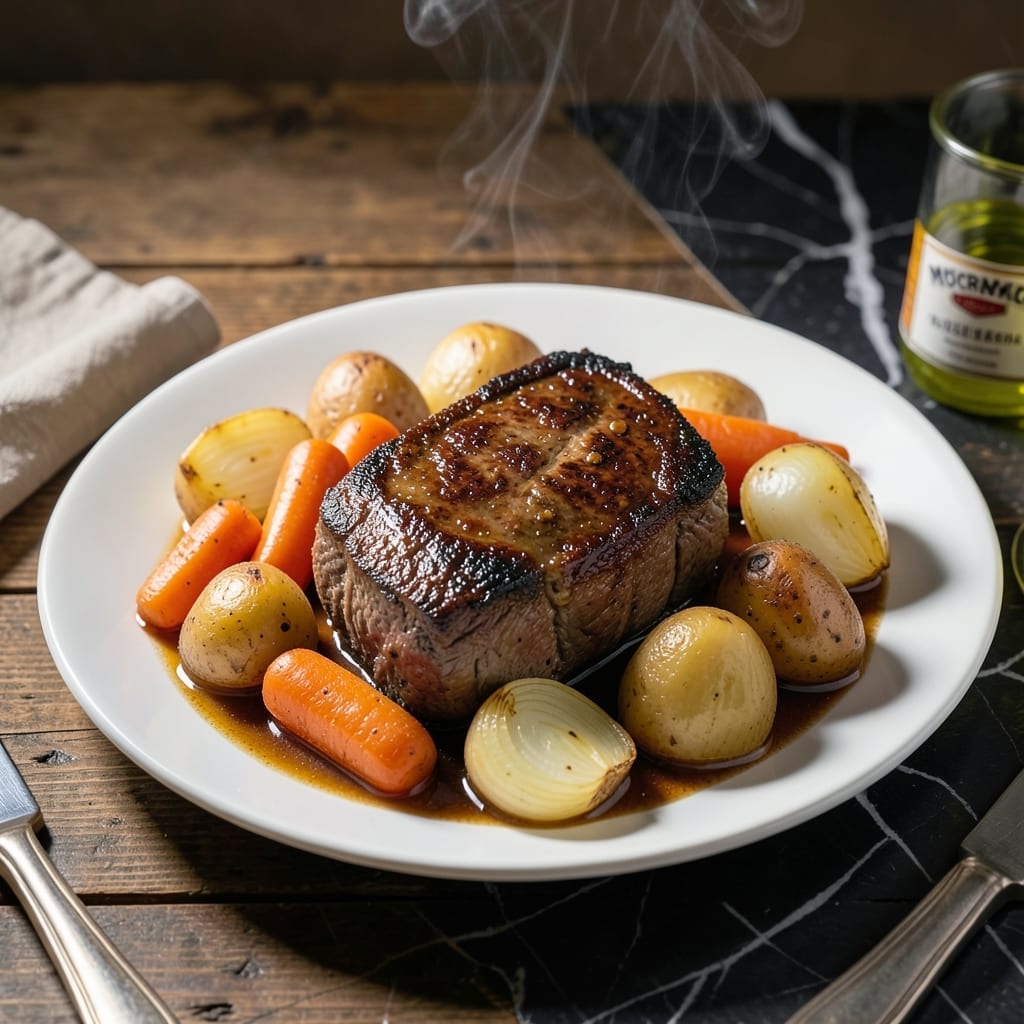
Slow-cooked beef that falls apart at the touch of a fork, surrounded by hearty vegetables soaked in rich, savory juices—this is comfort food at its finest.
The seasoning bag does most of the work, infusing the meat with a perfect blend of herbs and spices while the oven or slow cooker handles the rest. Just add beef, potatoes, carrots, and onions, then let time work its magic.
After 6-8 hours on low or 3-4 hours in the oven, you’ll have a tender, flavorful roast with vegetables that have absorbed every bit of the delicious broth. The result is a meal that tastes like it simmered all day.
Perfect for Sunday suppers or cozy weeknight dinners. Here’s how to make it right every time.
Ingredients for Mccormick Pot Roast Bag
Classics like beef, potatoes, carrots, and onions make this a hearty, satisfying meal.
| Ingredient | Amount | Notes |
|---|---|---|
| Beef Chuck Roast 🥩 | 3 lb | Boneless, well-marbled preferred |
| Russet Potatoes 🥔 | 1 ½ lb | Peeled and cut into chunks |
| Carrots 🥕 | 4 whole | Peeled and cut into chunks |
| Yellow Onions 🧅 | 2 whole | Peeled and quartered |
| McCormick Pot Roast Seasoning Bag 🌿 | 1 package | Includes herbs and spices |
| Beef Broth 💧 | 1 ½ cups | Low-sodium preferred |
| Olive Oil 🫒 | 2 tbsp | For searing beef |
| Garlic Cloves 🧄 | 4 cloves | Minced or smashed |
| Fresh Rosemary 🌿 | 2 sprigs | Optional for extra flavor |
| Fresh Thyme 🌿 | 3 sprigs | Optional for extra flavor |
| Salt 🧂 | 1 tsp | Adjust to taste |
| Black Pepper 🌶️ | ½ tsp | Freshly ground preferred |
| Water 💧 | ½ cup | As needed for moisture |
The beef is key here. Chuck roast breaks down beautifully—look for good marbling at Costco or your local butcher. Most supermarkets carry it pre-packaged too. The McCormick seasoning bag is the shortcut (find it in the spice aisle), but check the date—old spices lose their punch. Potatoes should be firm, not sprouting. Russets hold up best to long cooking.
No seasoning bag? Mix 1 tbsp each salt, pepper, garlic powder, and onion powder with 1 tsp each thyme and rosemary. Swap carrots for parsnips if you like (same texture, slightly sweeter). Beef broth can be homemade or boxed—Better Than Bouillon is a great backup. Out of fresh herbs? Dried at half the amount works fine.
Leftovers taste even better the next day. Store in the fridge for up to 4 days or freeze for 3 months. Reheat gently on the stove with a splash of water to keep it moist. Always slice against the grain for the tenderest bites (worth the extra minute).
Why You’ll Love This Recipe
- One Bag Wonder: I just dump the chuck roast, potatoes, carrots, and onions into the slow cooker with the McCormick seasoning bag—no measuring, no fuss.
- Fallback Favorite: That rich beefy aroma with the herbs and garlic makes the whole house smell like Sunday dinner, even on a weekday.
- Feeds My Crew: Between us, this stretches to feed six with seconds, and the leftovers make killer sandwiches the next day.
- Set and Forget: Honestly, I walk away for eight hours and come back to fork-tender beef and veggies ready to serve.
Step-by-Step Instructions for Savory Slow-Cooked Beef and Vegetables
Here’s how I make this comfort-food classic with minimal effort and maximum flavor.
Step 1: Sear the Beef Chuck Roast
Heat the 2 tbsp olive oil in a large Dutch oven over medium-high heat. Pat the 3 lb beef chuck roast dry with paper towels, then season it with the 1 tsp salt and 0.5 tsp black pepper. This step is non-negotiable—it creates a deep, rich crust that locks in juices.
Sear the roast on all sides for 3-4 minutes per side until it develops a deep brown crust. You’ll know it’s ready to flip when it releases easily from the pot. Transfer the beef to a plate and set it aside temporarily.
Step 2: Layer Vegetables and Seasoning
Add the 2 whole yellow onions, 4 whole carrots, and 1.5 lb russet potatoes to the Dutch oven, arranging them in an even layer. These will soak up all the flavorful drippings from the beef. Scatter the 4 cloves garlic cloves, 2 sprigs fresh rosemary, and 3 sprigs fresh thyme over the vegetables.
Place the 1 package McCormick Pot Roast Seasoning Bag on top of the vegetables. This blend already contains the perfect mix of herbs and spices, so there’s no need for additional seasoning. The aroma alone will have your kitchen smelling incredible in no time.
Step 3: Add Liquids and Slow Cook
Return the seared beef to the pot, nesting it on top of the vegetables. Pour in the 1.5 cups beef broth and the 0.5 cup water, ensuring the liquid covers about halfway up the roast. This keeps everything moist without diluting the flavors too much.
Cover the Dutch oven and bring it to a gentle simmer. Once simmering, reduce the heat to low and let it cook for 3-4 hours until the beef is fork-tender and practically falls apart. Check occasionally to ensure the liquid hasn’t evaporated—add a splash of water if needed.
Step 4: Rest and Serve
Once the beef is tender, carefully transfer it to a cutting board and let it rest for 10-15 minutes. This allows the juices to redistribute, so every bite stays moist and flavorful. While it rests, skim any excess fat from the cooking liquid if desired.
Serve the beef sliced or shredded, spooning the vegetables and cooking liquid over the top. The potatoes and carrots will be tender and infused with the rich, savory flavors of the seasoning and beef. This dish tastes even better the next day, so don’t hesitate to make leftovers.
Pro Tips For Making Mccormick Pot Roast Bag
- Sear the Chuck First: I learned this the hard way—browning the chuck roast in a hot pan with a little oil before adding the seasoning bag develops a deep flavor the slow cooker alone can’t match. About 3-4 minutes per side on medium-high heat does the trick.
- Cut Veggies Evenly: After ending up with mushy potatoes and undercooked carrots one too many times, I now chop all the russets, carrots, and onions into 1.5-inch chunks so everything cooks at the same rate.
- Skip the Extra Salt: The McCormick seasoning bag is already well-salted, so resist the urge to add more—it’s easy to overdo it, and you can’t take it out once it’s in.
- Use a Meat Thermometer: Sounds obvious, but I used to guess and ended up with dry roast more than once. Pull the chuck at 195-200°F for fall-apart tenderness—no higher, or it’ll dry out.
Make-Ahead Tips for mccormick pot roast bag
Overnight Prep
I prep all my vegetables the night before—peel and chunk the 1.5 lb russet potatoes and 4 carrots, then store them in airtight containers with 2 quartered yellow onions. This saves 20-30 minutes on cooking day. Just give them a quick rinse before using. 💡
Morning Assembly
In the morning, I sear the 3 lb beef chuck roast as directed, then layer everything in the Dutch oven with the McCormick seasoning bag. The whole process takes 15 minutes before I head out for the day. My slow cooker does the rest on low for 8 hours.
Freezer-Friendly
You can freeze the entire uncooked assembly—beef, veggies, broth, and seasoning—in a heavy-duty freezer bag for up to 3 months. Thaw overnight in the fridge, then cook as usual. I always label my bags with the date and cooking instructions.
Make-Ahead Gravy
After cooking, strain the juices and skim the fat. Store the liquid in a jar for up to 4 days. Reheat and thicken with a cornstarch slurry (1 tbsp cornstarch + 2 tbsp water) right before serving. This adds a restaurant-quality finish.
Reheating Tips
For leftovers, I reheat individual portions in the microwave covered with a damp paper towel on 70% power for 2-3 minutes. Add a splash of beef broth to maintain moisture. 🔥
Meal Prep Portions
Divide the cooked roast and vegetables into meal-sized containers. They’ll keep in the fridge for 4 days or freeze for 3 months. I love having these ready for quick lunches or dinners during busy weeks.
Nutrition Facts
Frequently Asked Questions
Can I use a different cut of beef?
Stick with tough, well-marbled cuts like brisket or round roast. These break down beautifully during long cooking. Avoid lean cuts like sirloin—they’ll stay dry and chewy.
Do I need to sear the beef first?
Yes, searing creates a flavorful crust and locks in juices. Skip this step and you’ll miss out on depth of flavor. 3-4 minutes per side over medium-high heat does the trick.
What if my liquid evaporates too quickly?
Check every 1-2 hours and add 1/2 cup water as needed. A tight-fitting lid helps, but some evaporation is normal. The meat needs moisture to stay tender.
Can I cook this in a slow cooker instead?
Use the same ingredients and cook on low for 8 hours or high for 5-6 hours. Sear the beef first for best results, then transfer everything to the slow cooker.

- 4C Bread Crumbs Meatballs Recipe: Crispy Crust and Juicy Centers - September 25, 2026
- 6 Oz Chocolate Chip Cookie Recipe: Perfectly Balanced Crispy Edges and Chewy Hearts - September 25, 2026
- 6-Inch Coffee Cake Recipe: Vanilla Bean Swirls and Buttery Streusel Topping - September 25, 2026