
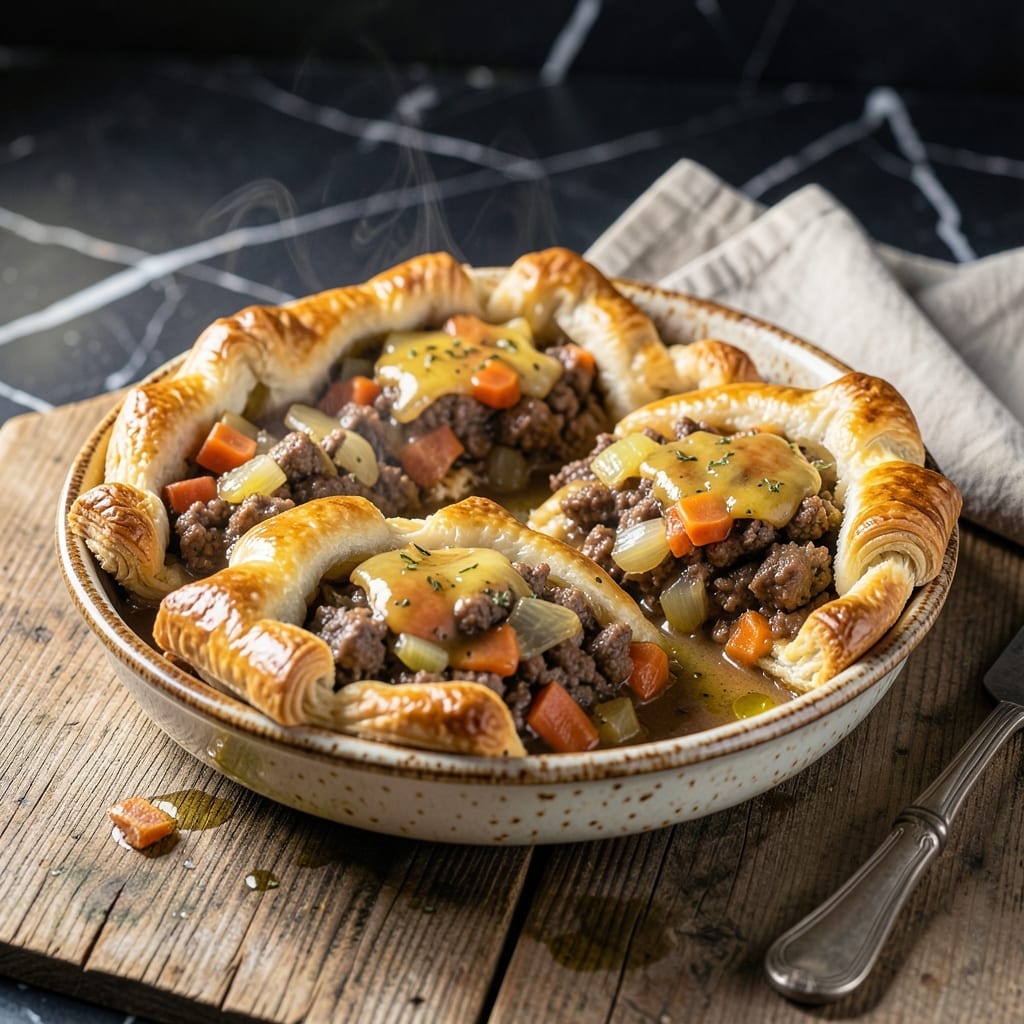
There’s something undeniably satisfying about serving individual portions of a classic dish, and this version delivers comfort in every bite. The buttery crust encases a rich, savory filling that’s both hearty and perfectly seasoned.
What makes this recipe stand out is its balance of simplicity and sophistication. The filling comes together with tender beef, vegetables, and a velvety gravy, all baked until golden and bubbling.
The individual pies ensure each serving has a perfectly flaky top and bottom crust, with no soggy bottoms. The result is a dish that looks impressive but requires minimal effort to assemble.
Ideal for cozy dinners or entertaining, these mini pot pies are sure to become a go-to. Here’s how to make them at home.
Ingredients for Mini Beef Pot Pie
Buttery crust, tender beef, and a savory gravy filling come together in these individual pies.
| Ingredient | Amount | Notes |
|---|---|---|
| Ground Beef 🥩 | 1 lb | 80/20 lean-to-fat ratio preferred |
| All-Purpose Flour 🌾 | ⅓ cup | For thickening gravy |
| Unsalted Butter 🧈 | 6 tbsp | Divided for crust and filling |
| Yellow Onion 🧅 | 1 whole | Finely diced |
| Carrots 🥕 | 2 whole | Peeled and diced |
| Celery Stalks 🌿 | 2 whole | Finely chopped |
| Garlic Cloves 🧄 | 2 cloves | Minced |
| Beef Broth 💧 | 1 ½ cups | Low-sodium preferred |
| Frozen Peas 🌱 | ½ cup | Thawed before using |
| Worcestershire Sauce 🍶 | 1 tbsp | Adds umami depth |
| Dried Thyme 🌿 | ½ tsp | Crushed between fingers |
| Dried Rosemary 🌿 | ½ tsp | Crushed between fingers |
| Pie Crust Sheets 🥧 | 2 sheets | Store-bought, thawed |
| Salt 🧂 | 1 tsp | Kosher or sea salt |
| Black Pepper 🌶️ | ½ tsp | Freshly ground preferred |
The beef is the foundation—80/20 ground chuck gives the best flavor and texture. For the pie crust, Pillsbury refrigerated sheets save time without sacrificing flakiness. Fresh vegetables are ideal, but frozen carrots and peas (thawed first) work in a pinch. Always use low-sodium beef broth so you can control the seasoning yourself.
No ground beef? Ground turkey or chicken work well (drain excess fat). Swap the peas for corn or green beans if that’s what you have. Missing Worcestershire? Soy sauce with a dash of vinegar adds similar depth. Dried herbs can be swapped for fresh at triple the amount. The crust can be homemade if you’re feeling ambitious.
Assemble the pies just before baking to avoid a soggy crust. Leftovers keep in the fridge for 3-4 days or freeze unbaked for up to 2 months. Reheat in a 350°F oven until warm and crisp.
Why You’ll Love This Recipe
- One Pan Magic: I brown the beef, sauté the onions and carrots, then top with a buttery crust—all in the same skillet.
- That Crust Though: The flaky, golden layers from the butter and flour are the perfect contrast to the savory beef filling.
- Weeknight Hero: I make a double batch on Sunday and freeze half for those “no-time-to-cook” evenings.
- Stretches Far: A pound of ground beef and a few veggies feed my family of four with leftovers for lunch.
Step-by-Step Instructions for Mini Beef Pot Pie
Here is the method for creating these individual pies with a flaky, golden crust.
Step 1: Brown the Ground Beef and Aromatics
Heat a large skillet over medium-high heat and add the 1 lb Ground Beef. Cook, breaking it apart with a wooden spoon, for 5-6 minutes until browned and crumbly. Drain excess fat if needed, leaving about 1 tablespoon in the pan.
Add the finely diced Yellow Onion, Carrots, and Celery Stalks to the skillet. Cook for 4-5 minutes until the vegetables soften and the onion becomes translucent. Stir in the 2 cloves Garlic Cloves and cook for 30 seconds until fragrant.
Step 2: Create the Rich Beef Filling
Sprinkle the 0.33 cup All-Purpose Flour over the beef and vegetable mixture, stirring to coat evenly. Cook for 1 minute to remove the raw flour taste. Slowly pour in the 1.5 cups Beef Broth while stirring constantly to prevent lumps.
Add the 1 tbsp Worcestershire Sauce, 0.5 tsp Dried Thyme, 0.5 tsp Dried Rosemary, 1 tsp Salt, and 0.5 tsp Black Pepper. Stir in the 0.5 cup Frozen Peas and simmer for 3-4 minutes until the filling thickens to a gravy-like consistency.
Remove from heat and let the filling cool slightly while you prepare the crust.
Step 3: Assemble the Individual Pot Pies
Preheat your oven to 375°F. Unroll the 2 sheets Pie Crust Sheets and use a 4-inch round cutter to cut out circles for the tops and bottoms. You should get about 8 circles per sheet. Press the bottom circles into the wells of a greased muffin tin.
Divide the beef filling evenly among the crust-lined wells, filling each about ¾ full. Top each with a remaining pie crust circle, pressing the edges to seal. Cut a small slit in the top of each pie to allow steam to escape.
Step 4: Bake to Golden Perfection
Bake for 25-30 minutes until the crusts are golden brown and the filling is bubbling. If the tops brown too quickly, tent with foil for the remaining baking time.
Let the mini pot pies cool in the pan for 5 minutes before carefully removing them to a wire rack. The crust should be crisp and flaky, with a rich, thick filling inside. Serve warm for the best experience.
Pro Tips For Making Mini Beef Pot Pie
- Brown the Beef Well: Cook the ground beef until it’s deeply browned, not just gray—this builds flavor that carries through the whole pie. I learned this the hard way when my early versions tasted bland.
- Chill the Dough: Give your flour-butter crust at least 30 minutes in the fridge before rolling. Sounds tedious, but it prevents shrinking and makes the mini pies hold their shape.
- Skip Raw Carrots: Par-cook the carrots for 5 minutes in boiling water before adding to the filling. Nothing worse than crunchy carrots in an otherwise perfect pot pie.
- Use Cold Butter: Cut the unsalted butter into small cubes and keep it ice-cold when making the crust. After burning three batches with warm butter, I finally figured out this is non-negotiable for flaky layers.
Storing and Reheating This mini beef pot pie
Refrigerator Storage
Let your mini pot pies cool completely (about 1 hour) before storing. Place them in an airtight container with parchment between layers to prevent sticking. They’ll keep in the fridge for 3-4 days without losing quality. ❄️
Freezer Storage
For longer storage, freeze unbaked pies on a baking sheet first, then transfer to a freezer bag. They’ll last up to 2 months. To freeze baked pies, wrap individually in foil and place in a bag. Reheat from frozen when ready to enjoy.
Oven Reheating
Preheat to 350°F and place pies on a baking sheet. Cover with foil to prevent over-browning and heat for 15-20 minutes. Uncover for the last 5 minutes to crisp the crust. This method keeps the filling moist and the crust flaky.
Microwave Reheating
For a quick option, microwave a single pie on 70% power for 1-2 minutes. Place a damp paper towel over it to retain moisture. The crust won’t be as crisp, but the filling will be just as delicious. 🔥
Make-Ahead Tip
Assemble the pies but don’t bake them. Cover tightly with plastic wrap and refrigerate for up to 24 hours. When ready, bake as directed, adding 5 minutes to the cooking time since they’ll be cold.
Nutrition Facts
Frequently Asked Questions
Can I use a different type of meat?
Yes! Ground turkey or chicken work well as substitutes. Drain excess fat as they cook. For a richer flavor, try ground lamb or pork instead.
What if my filling is too thin?
Simmer uncovered for 2-3 minutes longer, or mix 1 tablespoon cornstarch with cold water and stir in. This thickens it quickly without changing the flavor.
Can I make these ahead of time?
Assemble the pies and refrigerate for up to 24 hours before baking. Add 5 minutes to the cook time since they’ll start cold.
How do I prevent a soggy bottom crust?
Pre-bake the bottom crust for 5 minutes before adding filling. Also, ensure the filling cools slightly before assembling to reduce moisture.

- 4C Bread Crumbs Meatballs Recipe: Crispy Crust and Juicy Centers - September 25, 2026
- 6 Oz Chocolate Chip Cookie Recipe: Perfectly Balanced Crispy Edges and Chewy Hearts - September 25, 2026
- 6-Inch Coffee Cake Recipe: Vanilla Bean Swirls and Buttery Streusel Topping - September 25, 2026