
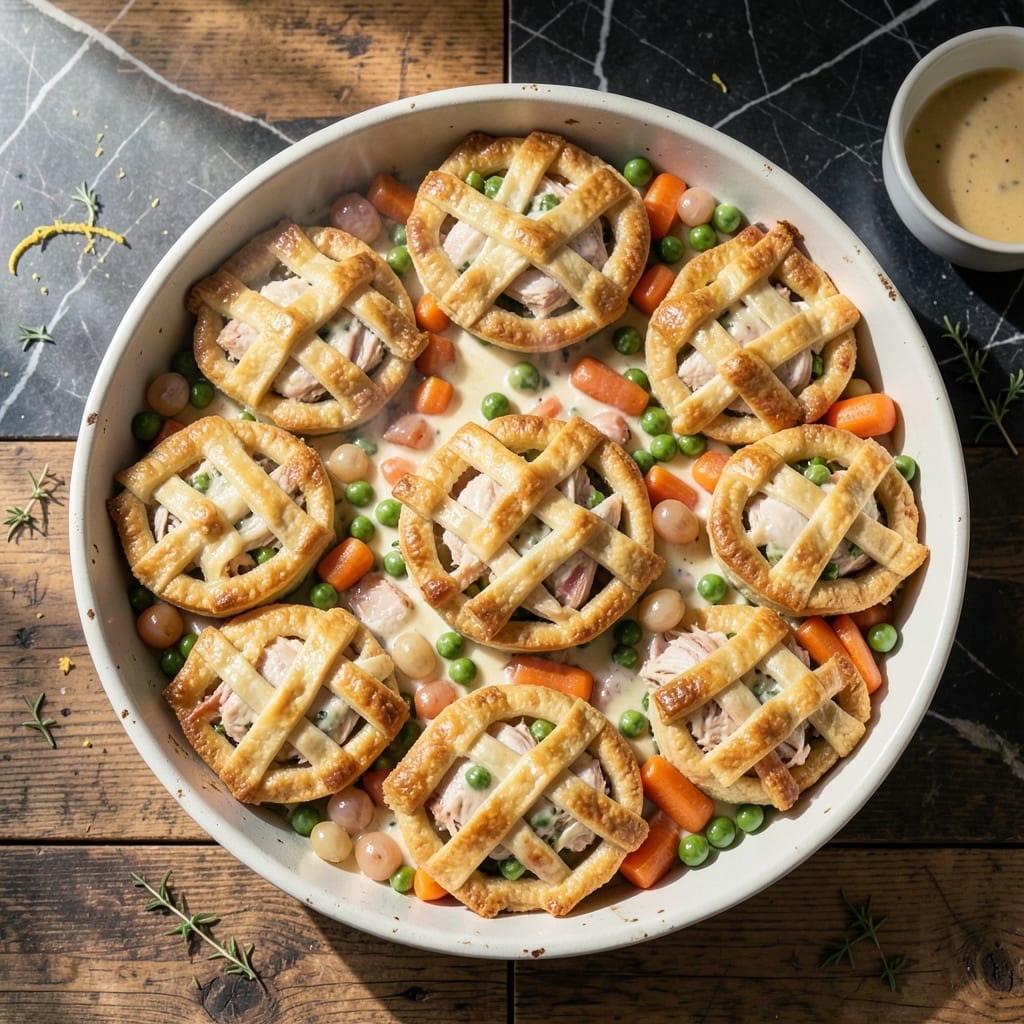
There’s something deeply satisfying about pulling a golden mini chicken pot pie from the oven, its crust flaky and buttery, promising comfort in every bite. This recipe focuses on that perfect crust—tender, layered, and designed to hold the rich, creamy filling without sogginess.
The secret lies in cold butter and minimal handling. By cutting the butter into the flour just until pea-sized crumbs form, you create pockets that steam into airy layers. A splash of ice water binds it all together without overworking the dough.
Each individual pie bakes to a golden brown, with edges that shatter at the touch. The crust’s buttery richness complements the savory filling, making every mouthful a balance of textures and flavors.
Perfect for cozy dinners or impressive gatherings. This crust elevates a classic dish into something truly special.
Ingredients for Mini Chicken Pot Pie Crust
Cold butter and minimal handling create the flaky, layered crust that defines these individual comfort pies.
| Ingredient | Amount | Notes |
|---|---|---|
| All-Purpose Flour 🌾 | 2 ½ cups | Sifted for airy texture |
| Unsalted Butter 🧈 | 1 cup | Cold, cubed for flakiness |
| Fine Sea Salt 🧂 | 1 tsp | Diamond Crystal preferred |
| Ice Water 💧 | ½ cup | Plus 1 tbsp as needed |
| Large Egg 🥚 | 1 whole | For egg wash finish |
| Cooked Chicken Breast 🍗 | 2 cups | Shredded or diced fine |
| Frozen Mixed Vegetables 🥕 | 1 ½ cups | Peas, carrots, corn blend |
| Heavy Cream 🥛 | ¾ cup | Full-fat for richness |
| Chicken Stock 🍲 | 1 cup | Low-sodium preferred |
| Yellow Onion 🧅 | 1 whole | Finely diced for filling |
| Garlic Cloves 🧄 | 2 cloves | Minced for depth |
| All-Purpose Flour 🌾 | 2 tbsp | For thickening sauce |
| Fresh Thyme Leaves 🌿 | 1 tsp | Chopped for aroma |
| Black Pepper 🌶️ | ½ tsp | Freshly ground preferred |
| Dijon Mustard 🟡 | 1 tsp | For tangy brightness |
The butter must be ice-cold—Plugrá or European-style for superior flakiness and lower water content. Use White Lily or King Arthur flour for the most tender crumb. The salt should be fine sea salt; Diamond Crystal dissolves evenly without over-salting. Chill your mixing bowl and pastry cutter for 15 minutes beforehand (worth the extra minute).
No unsalted butter? Salted butter at half the amount of added salt, but unsalted is ideal for control. For richer flavor, substitute one-quarter cup lard for some butter. The chicken stock can be vegetable stock for a lighter taste. Frozen veggies work perfectly—no need to thaw first (just chop larger pieces).
Dough keeps 3 days wrapped tightly in the fridge, or freeze for 1 month. Baked pies reheat at 350°F for 10-12 minutes—edges stay crisp. Always chill dough 30 minutes before rolling to prevent shrinking.
Why You’ll Love This Recipe
- No-Fuss Dough: I can mix this crust in one bowl with just flour, butter, and a little ice water—no fancy tools required.
- Buttery Crisp: The unsalted butter and sea salt make the crust flaky and rich, the perfect base for those creamy chicken fillings.
- Weeknight Hero: Honestly, I prep the dough in advance and bake mini pot pies fresh when company drops by unexpectedly.
- Budget Stretch: Five simple ingredients, and I get enough crust for a dozen mini pies—feeding my family for less than store-bought.
Step-by-Step Instructions for Mini Chicken Pot Pie Crust
Master the art of flaky pastry with this precise method for individual pot pie crusts.
Step 1: Combine Dry Ingredients and Cold Butter
In a large mixing bowl, whisk together the 2.5 cups all-purpose flour and 1 tsp fine sea salt until evenly distributed. This ensures consistent seasoning throughout the crust. The sifted flour will create a lighter, airier texture in your final product.
Add the 1 cup unsalted butter, which should be cold and cut into small cubes. Using a pastry cutter or your fingertips, work the butter into the flour mixture until the largest pieces are the size of peas. This creates the flaky layers that make a superior crust.
Step 2: Incorporate Liquid and Form Dough
Create a well in the center of the flour-butter mixture. Add the 0.5 cup ice water in stages, mixing gently with a fork after each addition. The dough should just begin to come together—it will look shaggy and slightly dry at this point.
Turn the dough out onto a lightly floured surface and gently knead it 3-4 times until it forms a cohesive ball. Be careful not to overwork the dough, as this can develop gluten and make your crust tough rather than tender.
Step 3: Chill and Divide the Dough
Divide the dough into two equal portions, flatten each into a disc, and wrap tightly in plastic wrap. Refrigerate for at least 1 hour or up to 24 hours. This chilling step is crucial—it allows the gluten to relax and the butter to firm up, which prevents shrinking during baking.
When ready to use, let the dough sit at room temperature for 10-15 minutes to soften slightly. This makes it easier to roll out without cracking. The dough should feel pliable but still cold to the touch.
Step 4: Roll and Cut for Individual Pies
On a lightly floured surface, roll one dough disc to about ⅛-inch thickness. For individual pot pies, use a round cutter slightly larger than your ramekins to cut out tops. For bottom crusts, cut circles that fit the base of your dishes with a slight overhang.
Use the remaining dough for decorative elements or to make additional pies. If the dough becomes too warm while working, return it to the refrigerator for 10-15 minutes to firm up before continuing.
Step 5: Assemble and Prepare for Baking
Line your ramekins with the bottom crust pieces, pressing gently into the edges. Fill with your pot pie filling, leaving about ½ inch of space at the top. Brush the edges of the bottom crust with some of the 1 whole large egg (lightly beaten) to help the top crust adhere.
Place the top crusts over the fillings, pressing the edges to seal. Trim any excess dough and crimp the edges decoratively. Brush the tops with the remaining egg wash and cut small slits in the center to allow steam to escape during baking.
Pro Tips For Making Mini Chicken Pot Pie Crust
- Chill the Dough: After mixing, refrigerate the dough for at least 30 minutes—I learned this the hard way when my first batch shrank in the oven. Cold butter makes flaky layers.
- Use Ice-Cold Water: Sounds weird, but it works: only use water with ice cubes in it, and measure after the cubes are removed. This keeps the butter from melting prematurely.
- Skip Overworking: Mix just until the dough comes together—resist the urge to knead it smooth. Overworking develops gluten, and your crust will be tough, not tender.
- Egg Wash Last: Brush the tops with beaten egg right before baking for that golden finish. I skip this when I’m lazy, but the crust looks pale and dull without it.
Wine and Beer Pairings for This mini chicken pot pie crust
White Wine Pairings
A crisp Chardonnay with its buttery notes beautifully complements the flaky crust and creamy filling. I prefer an unoaked version to avoid overwhelming the dish. A Sauvignon Blanc from New Zealand offers citrusy brightness that cuts through the richness. 🍷
Red Wine Options
For red wine lovers, a light-bodied Pinot Noir with its earthy undertones pairs surprisingly well. Avoid heavy tannic reds that clash with the dish. I like one from Oregon’s Willamette Valley for its balanced acidity.
Beer Pairings
A Belgian Tripel with its fruity esters and spice notes enhances the thyme in the filling. For something lighter, a crisp Pilsner cleanses the palate between bites. The carbonation helps cut through the buttery crust. 🍺
Non-Alcoholic Choices
Sparkling apple cider with its effervescence and sweetness balances the savory flavors. I also enjoy a strongly brewed Earl Grey tea with its bergamot notes that complement the thyme and Dijon in the filling.
Nutrition Facts
Frequently Asked Questions
Can I use store-bought pie crust instead?
Yes, but it won’t be as flaky or flavorful. Store-bought crusts often lack the buttery layers that make homemade special. If using one, opt for all-butter versions for better results.
How do I prevent a soggy bottom crust?
Pre-bake the bottom crust for 8-10 minutes before adding filling. Also, avoid overfilling and ensure your filling isn’t too wet before assembling.
Can I make the dough ahead of time?
The dough keeps in the fridge for up to 3 days or can be frozen for 1 month. Let it thaw in the fridge overnight before using.
What size ramekins work best?
Use 6-8 oz ramekins for perfect individual portions. This size allows for proper crust-to-filling ratio and even baking.

- 4 Serving Mac and Cheese Recipe: Ultra-Creamy Bake With Crispy Breadcrumbs - September 25, 2026
- 4 Egg Frittata Recipe: Oven-Baked Fluffiness With Zero Leftovers - September 25, 2026
- 5 Lb Bag Of Mashed Potatoes Recipe: Slow-Cooker Creaminess Without the Lumps - September 25, 2026