
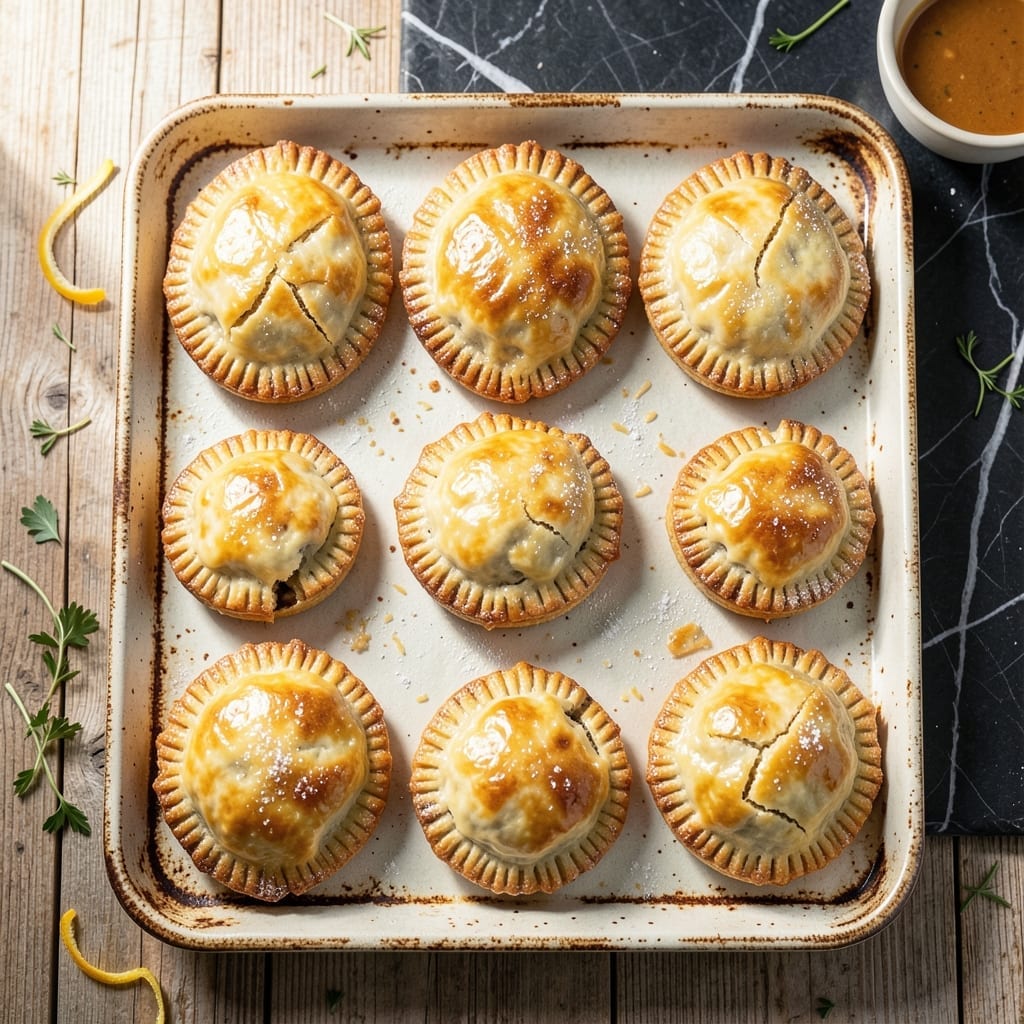
Creating the perfect mini pot pie crust is about achieving that ideal balance of flakiness and sturdy structure. This recipe delivers a buttery, golden crust that holds up beautifully to rich fillings without becoming soggy.
The secret lies in using cold ingredients and minimal handling. By keeping the butter chilled and working it just enough to create visible flakes, you ensure layers that separate beautifully during baking.
Each individual serving gets its own perfectly portioned crust, crisp on the outside and tender within. The recipe scales easily whether you’re making a dozen or just a few.
With a 30-minute chill time and 15 minutes of baking, these crusts come together efficiently while delivering professional results every time.
Ingredients for Mini Pot Pie Crust
Professional results start with cold butter and minimal handling for perfect flakiness every time.
| Ingredient | Amount | Notes |
|---|---|---|
| All-Purpose Flour 🌾 | 2 ½ cups | Sifted for even texture |
| Unsalted Butter 🧈 | 1 cup | Cold, cubed into 1/2-inch pieces |
| Ice Water 💧 | ½ cup | Plus 1 tbsp as needed |
| Kosher Salt 🧂 | 1 tsp | Diamond Crystal preferred |
| Granulated Sugar 🍚 | 1 tsp | Balances saltiness |
| White Vinegar 🫒 | 1 tsp | Enhances flakiness |
| Large Egg 🥚 | 1 whole | For egg wash finish |
| Heavy Cream 🥛 | 1 tbsp | Optional for richer wash |
The butter is non-negotiable here. European-style with 82% fat gives superior flakiness, but standard Land O’Lakes or Cabot work well. Must stay ice-cold—cut into cubes and chill 15 minutes before using. King Arthur Flour is my go-to for consistency, but any unbleached all-purpose delivers. The vinegar tenderizes without affecting flavor—apple cider works too.
No all-purpose flour? Pastry flour at 1:1 ratio works but yields a slightly more tender crust. Out of unsalted butter? Use salted and reduce added salt by half. The egg wash can be swapped for milk or cream—just brush generously. For a vegan version, coconut oil (solid) replaces butter at the same ratio, though texture differs slightly.
Dough keeps 3 days wrapped tightly in the fridge or 2 months frozen. Baked crusts? Best eaten same day but reheat at 350°F for 5-8 minutes to revive crispness. Always chill dough between roll-outs to prevent shrinking.
Why You’ll Love This Recipe
- I’ll be real: I always make a double batch and freeze the extras for lazy dinners.
- Five Ingredients: Honestly, that’s all you need—flour, butter, ice water, salt, sugar—and you’re halfway to flaky perfection.
- Buttery Layers: The cold butter creates these little pockets of crispy, golden magic in every bite.
- Freezer Friendly: I’ll be real: I always make a double batch and freeze the extras for lazy dinners.
Step-by-Step Instructions for Mini Pot Pie Crust
Master the art of flaky pastry with this precise method for individual portions.
Step 1: Combine Dry Ingredients and Cold Butter
In a large mixing bowl, whisk together the 2.5 cups All-Purpose Flour, 1 tsp Kosher Salt, and 1 tsp Granulated Sugar until evenly distributed. This ensures the salt and sugar are properly incorporated throughout the flour base.
Add the 1 cup Unsalted Butter (cold, cubed into 1/2-inch pieces) to the flour mixture. Using a pastry cutter or your fingertips, work the butter into the flour until the mixture resembles coarse crumbs with pea-sized butter pieces visible. The butter must remain cold to create those desirable flaky layers.
Step 2: Incorporate Liquid Ingredients
Create a well in the center of the flour-butter mixture. Add the 0.5 cup Ice Water and 1 tsp White Vinegar to the well. Using a fork, gently stir the mixture from the center outward, gradually incorporating the dry ingredients into the wet.
The vinegar tenderizes the gluten, resulting in a more delicate crust. The dough should just come together when pressed—if it feels too dry, add the additional 1 tablespoon of ice water. Avoid overworking the dough, as this develops gluten and produces a tough crust.
Step 3: Form and Chill the Dough
Turn the dough out onto a lightly floured surface and gently shape it into a disk about 1 inch thick. The dough should be smooth but not elastic—visible butter streaks are a good sign. Wrap the disk tightly in plastic wrap.
Refrigerate for at least 1 hour, or up to 24 hours. This chilling period allows the gluten to relax and the butter to firm up, making the dough easier to roll out and preventing shrinkage during baking. The longer chill also enhances the flaky texture.
Step 4: Roll and Cut for Mini Pies
On a lightly floured surface, roll the chilled dough to a 1/8-inch thickness. Use a round cutter approximately 4 inches in diameter to cut circles for the pot pie bases. For the tops, you can use the same cutter or create decorative shapes.
Gather the scraps, re-roll once, and cut additional circles as needed. The dough can be used immediately or frozen between parchment paper layers for up to 1 month. If freezing, thaw in the refrigerator before using.
Step 5: Apply Egg Wash and Pre-Bake if Needed
For a golden finish, whisk together the 1 whole Large Egg and 1 tbsp Heavy Cream to create an egg wash. Brush this mixture lightly over the crust portions that will be visible in the finished pies.
If pre-baking (blind baking) the crusts for your mini pot pies, line each with parchment paper and fill with pie weights or dried beans. Bake at 375°F for 12-15 minutes until the edges are just beginning to turn golden brown. Remove the weights and parchment, then bake for an additional 3-5 minutes until the entire crust is lightly golden.
Pro Tips For Making Mini Pot Pie Crust
- Chill the Dough: After mixing, let the dough rest in the fridge for at least 30 minutes—I learned this the hard way when my first few crusts shrank in the oven.
- Use Ice Cold Water: Keep your water truly icy, about 3-4 ice cubes in a cup of water, or the butter will start to melt and ruin the flakiness.
- Skip Overworking: Mix just until the dough comes together, even if it looks a little shaggy—overworking makes it tough, and nobody wants a chewy pot pie crust.
- Cut Butter Fast: Use a pastry cutter or your fingers to work the cold butter into the flour quickly, so it stays in small, pea-sized pieces for that perfect flaky texture.
Common Mistakes When Making mini pot pie crust
Overworking the Dough
The biggest mistake I see is handling the dough too much. Once you add the ice water, stir just until it comes together. Overmixing develops gluten, which makes the crust tough instead of flaky and tender. 💡
Warm Butter
Your 1 cup Unsalted Butter must stay cold—cubed and chilled before starting. Warm butter blends into the flour, eliminating the flaky layers that make pot pie crust special. I keep my butter in the freezer until ready to use.
Skipping the Chill
Rushing the process by skipping the 1-hour chill is a recipe for disaster. The gluten needs time to relax, and the butter needs to firm up. Otherwise, your crust will shrink and lose its shape during baking.
Incorrect Thickness
Rolling the dough too thick or too thin affects both texture and baking time. Aim for a consistent 1/8-inch thickness for even cooking. I use rolling pin guides to maintain uniformity.
Overfilling Pies
Resist the temptation to overfill your mini pot pies. Too much filling can make the 4-inch crusts difficult to seal properly, leading to leaks and soggy bottoms. Stick to about 2-3 tablespoons of filling per pie.
Neglecting the Egg Wash
Skipping the egg wash means missing out on that beautiful golden finish. Brush it on just before baking for a professional look. I mix mine with 1 tbsp Heavy Cream for extra shine.
Nutrition Facts
Frequently Asked Questions
Can I use store-bought pie crust instead?
Yes, but homemade offers superior flakiness. Store-bought works in a pinch—just ensure it’s rolled to 1/8-inch thickness for even baking. Thaw frozen crusts completely before cutting.
How do I prevent a soggy bottom crust?
Pre-bake (blind bake) the crust at 375°F for 12-15 minutes before adding filling. Also, avoid overfilling—stick to 2-3 tablespoons per mini pie.
Can I make the dough ahead of time?
Wrapped tightly, dough keeps in the fridge for 3 days or frozen for 2 months. Thaw overnight in the fridge before rolling.
What’s the best way to seal the edges?
Use a fork to crimp edges tightly, or press with your fingers for a decorative look. A light brush of egg wash helps the top and bottom crusts adhere.

- 6 Oz Chocolate Chip Cookie Recipe: Perfectly Balanced Crispy Edges and Chewy Hearts - September 25, 2026
- 6-Inch Coffee Cake Recipe: Vanilla Bean Swirls and Buttery Streusel Topping - September 25, 2026
- 1 Hour Soup Recipe: Velvety Richness Without the Wait - September 25, 2026