
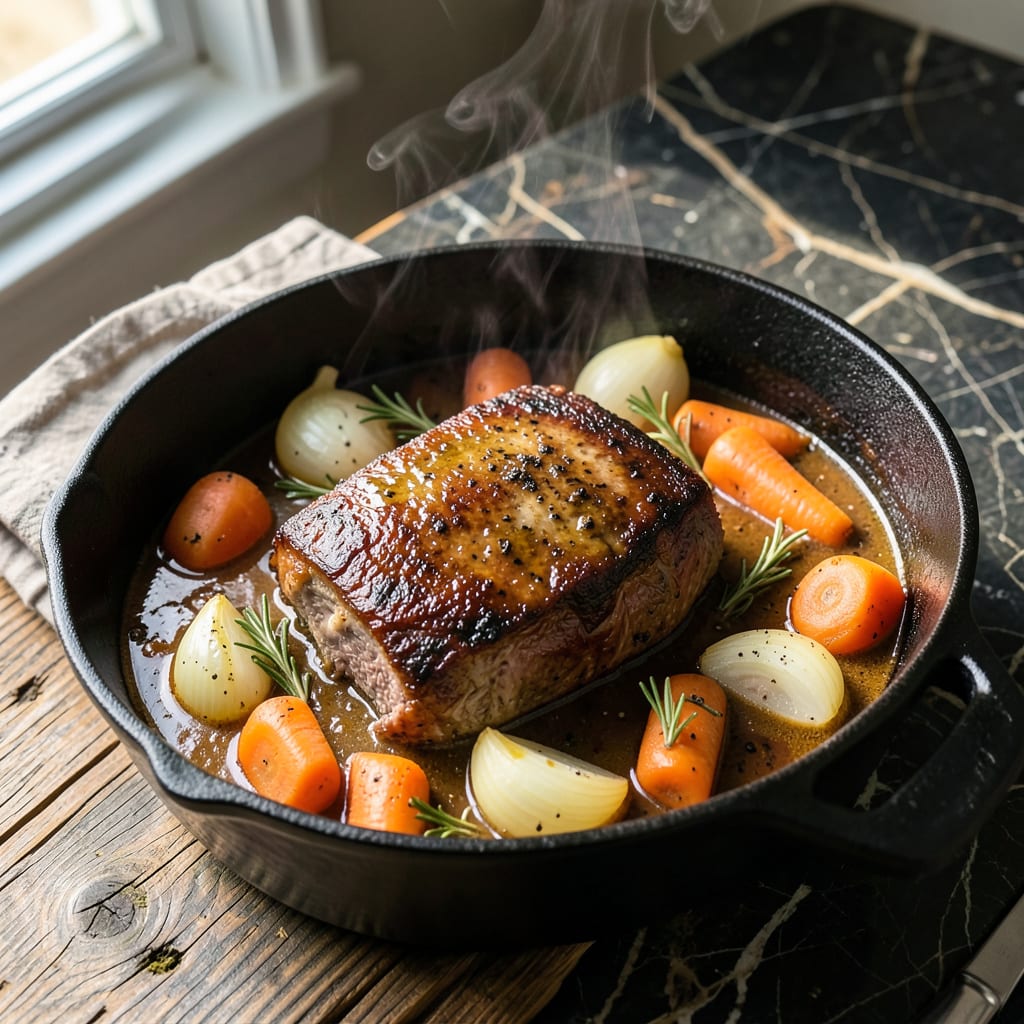
This Dutch oven method guarantees fall-off-the-bone tenderness with every bite. The secret lies in low, slow braising that breaks down tough fibers while locking in juices.
Searing the roast first creates a flavorful crust, then vegetables and liquid build a rich, moist cooking environment. The result is meat so tender it nearly dissolves on your tongue.
Ingredients for Moist Pot Roast
Quality beef and a few aromatic vegetables create this tender, braised masterpiece.
| Ingredient | Amount | Notes |
|---|---|---|
| Chuck Roast 🥩 | 3 lb | Well-marbled, trimmed of excess fat |
| Kosher Salt 🧂 | 2 tsp | Diamond Crystal preferred |
| Black Pepper 🌶️ | 1 tsp | Freshly ground |
| Olive Oil 🫒 | 2 tbsp | Divided for searing and sautéing |
| Yellow Onion 🧅 | 2 whole | Large, quartered |
| Carrots 🥕 | 4 whole | Peeled, cut into 3-inch chunks |
| Celery Stalks 🌿 | 3 whole | Cut into 2-inch pieces |
| Garlic Cloves 🧄 | 6 cloves | Smashed, unpeeled |
| Dry Red Wine 🍷 | 2 cups | Bold variety like Cabernet Sauvignon |
| Beef Broth 🥣 | 2 cups | Low-sodium preferred |
| Tomato Paste 🍅 | 2 tbsp | For depth of flavor |
| Fresh Thyme Sprigs 🌿 | 4 whole | Tied with twine |
| Fresh Rosemary Sprig 🌿 | 2 whole | Optional, for aroma |
| Bay Leaf 🍃 | 1 whole | Dried, for braising liquid |
The chuck roast is non-negotiable for optimal results. Look for abundant marbling—this fat renders down during the long braise, ensuring the meat stays moist and fork-tender. Most butchers will cube it for you if requested. Costco and Whole Foods carry excellent pre-cut options. Avoid leaner cuts like round or sirloin, as they lack the connective tissue that breaks down beautifully.
No red wine? Substitute with additional beef broth and 1 tbsp balsamic vinegar for acidity. Fresh herbs can be replaced with dried at one-third the quantity (1 tsp dried thyme, 1 tsp dried rosemary). If tomato paste is unavailable, 1 cup crushed tomatoes works, though the flavor concentration will differ slightly. Baby carrots can replace whole carrots in a pinch.
The cooked roast keeps beautifully. Store in its braising liquid in the fridge for up to 4 days or freeze for 3 months. Reheat gently on the stovetop to preserve moisture. The flavor actually improves overnight as the meat reabsorbs the rich cooking liquid.
Why You’ll Love This Recipe
- Hands-Off Cooking: I can sear the chuck roast, toss in the onions, and let the oven do the rest—no stirring, no fuss.
- Feeds My Crew: One pot, one meal that satisfies everyone—from my picky nephew to my meat-and-potatoes dad.
- Leftovers for Days: Honestly, it tastes even better the next day, and I love turning extras into sandwiches or tacos.
Step-by-Step Instructions for Moist Pot Roast
This method guarantees tender, fall-off-the-bone results with minimal hands-on time.
Step 1: Sear the Chuck Roast for Maximum Flavor
Pat the 3 lb chuck roast dry with paper towels, then season generously with the 2 tsp kosher salt and 1 tsp black pepper on all sides. This drying step is critical for achieving a proper sear rather than steaming the meat.
Heat 1 tbsp olive oil in a Dutch oven over medium-high heat until shimmering. Add the chuck roast and sear undisturbed for 4-5 minutes per side until a deep, rich brown crust forms. The sear creates the flavor foundation for your braising liquid.
Remove the roast and set aside. The fond (browned bits) left in the pot will dissolve into your sauce, adding incredible depth.
Step 2: Sauté the Aromatic Vegetable Base
In the same Dutch oven, add the remaining 1 tbsp olive oil. Add the 2 whole yellow onion, 4 whole carrots, and 3 whole celery stalks. Sauté for 5-7 minutes until the vegetables begin to soften and develop color.
Add the 6 cloves garlic cloves and 2 tbsp tomato paste, stirring constantly for 1-2 minutes to cook the raw flavor out of the tomato paste. You’ll notice the mixture darken slightly as the tomato paste caramelizes.
Step 3: Deglaze and Build the Braising Liquid
Pour in the 2 cups dry red wine, scraping the bottom of the pot to release all the browned bits. This deglazing step transforms those flavorful bits into your sauce. Simmer for 3-4 minutes until reduced by about half.
Add the 2 cups beef broth, 4 whole fresh thyme sprigs, 2 whole fresh rosemary sprig, and 1 whole bay leaf. Stir to combine, then return the chuck roast to the pot along with any accumulated juices. The liquid should come about halfway up the roast.
Step 4: Braise to Tender Perfection
Cover the Dutch oven and transfer to a preheated 325°F oven. Braise for 2.5 to 3 hours, turning the roast every 45 minutes to ensure even cooking. The meat is done when it yields easily to a fork and reaches an internal temperature of 195-200°F.
Resist the urge to check too frequently—each time you open the oven, you lose valuable heat and moisture. The low, steady temperature breaks down the connective tissue, transforming tough meat into melt-in-your-mouth tenderness.
Step 5: Rest and Serve
Carefully remove the chuck roast from the pot and transfer to a cutting board. Tent loosely with foil and let rest for 15-20 minutes. This allows the juices to redistribute throughout the meat.
Skimming excess fat from the braising liquid gives you a rich, flavorful sauce. Serve the pot roast sliced or shredded, generously spooning the vegetables and sauce over the top. The meat should be so tender it nearly dissolves with each bite.
Pro Tips For Making Moist Pot Roast
- Sear the Chuck: Get your pan screaming hot with about 2 tablespoons of olive oil and sear the chuck roast aggressively on all sides—this builds a crust that locks in moisture. I learned this the hard way after my first few pot roasts turned out dry.
- Season Generously: Don’t be shy with the kosher salt and black pepper; coat the roast thoroughly before searing. After burning three batches, I finally figured out that under-seasoning leads to bland, forgettable meat.
- Low and Slow: Once the onion and roast are in the pot, keep the heat low—around 300°F in the oven—and give it at least 3 hours. My grandmother swore by this, and she was right: rushing it makes the meat tough.
- Rest Before Slicing: Pull the roast out and let it rest under foil for 15-20 minutes before carving. Sounds weird, but it works: all the juices redistribute, so your slices stay moist instead of bleeding out on the cutting board.
Essential Equipment for Perfect Results
Dutch Oven Essentials
A heavy enamel-coated cast iron Dutch oven is non-negotiable for this recipe. I recommend Le Creuset or Lodge—their even heat distribution prevents hot spots that can dry out your roast. The tight-fitting lid locks in moisture during the long braise. 🔥
Thermometer Accuracy
An instant-read meat thermometer ensures perfect doneness every time. I use the ThermoWorks ThermoPop—it’s affordable and accurate to ±1°F. Check multiple spots in the thickest part of the roast to confirm it hits 195-200°F.
Quality Knives Matter
A sharp 8-inch chef’s knife makes prepping vegetables safe and efficient. I trust Victorinox Fibrox for its razor edge and comfortable grip. Slice against a stable cutting board—bamboo or plastic works best for protecting your knife edge.
Tongs for Turning
Use 12-inch locking tongs to safely flip the searing roast and turn it during braising. OXO Good Grips offers excellent control and heat resistance. Avoid piercing the meat with forks, which releases precious juices.
Optional but Helpful
A fat separator makes skimming the braising liquid effortless. I like the OXO Gravity Fat Separator—its spout pours clean sauce while leaving grease behind. A wooden spoon helps scrape up all those flavorful browned bits during deglazing.
Nutrition Facts
Frequently Asked Questions
What cut of beef works best?
Chuck roast is ideal for its marbling and connective tissue. 3 lb with good fat distribution ensures a moist result after braising. Avoid lean cuts like sirloin.
Can I use a slow cooker instead?
Yes, but sear the meat first in a pan. Cook on low for 8-10 hours or high for 5-6 hours in the slow cooker. The texture will differ slightly from Dutch oven braising.
Why did my pot roast turn out dry?
Likely causes: not enough liquid, oven too hot, or insufficient cooking time. Ensure the braising liquid covers at least halfway up the roast and maintain 325°F.
Can I make this ahead of time?
The flavor improves overnight. Store in its braising liquid in the fridge for up to 4 days or freeze for 3 months. Reheat gently to preserve moisture.

- 4C Bread Crumbs Meatballs Recipe: Crispy Crust and Juicy Centers - September 25, 2026
- 6 Oz Chocolate Chip Cookie Recipe: Perfectly Balanced Crispy Edges and Chewy Hearts - September 25, 2026
- 6-Inch Coffee Cake Recipe: Vanilla Bean Swirls and Buttery Streusel Topping - September 25, 2026