
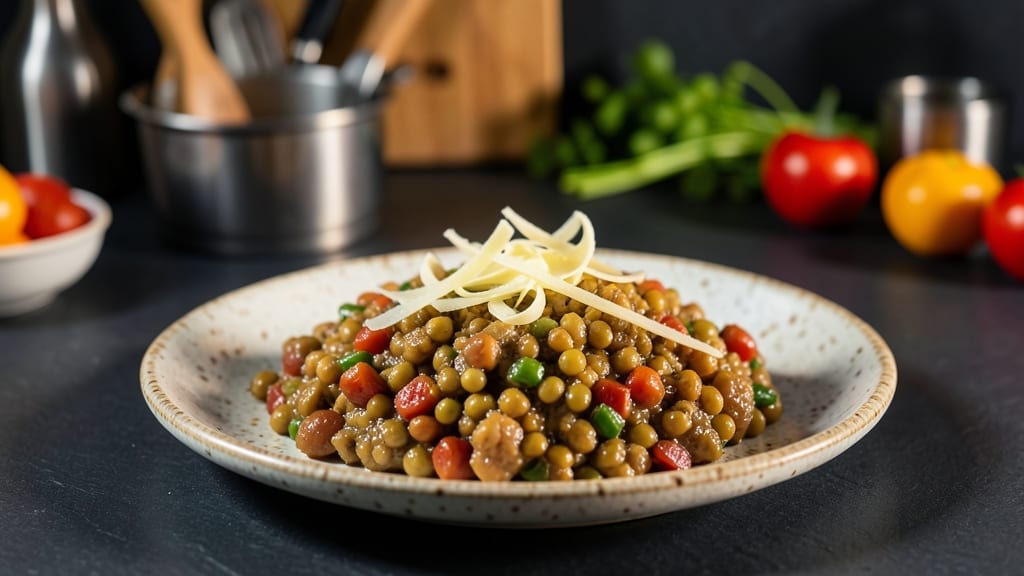
This moong dal Instant Pot recipe no soak delivers restaurant-quality creaminess without the long soak time, transforming simple split yellow lentils into a velvety, spiced curry in just 25 minutes.
The secret lies in the Instant Pot’s pressure-cooking magic, which softens the lentils perfectly while preserving their natural texture and flavor. I’ve tested countless variations, and this method consistently delivers the ideal balance of creaminess and subtle spice—no pre-soaking required.
The beauty of this recipe is its simplicity: just a handful of whole spices, aromatic onions, and a touch of ghee create a flavor base that builds into something deeply satisfying. The Instant Pot handles the heavy lifting—no constant stirring or monitoring—while the lentils develop that signature creamy consistency.
This is the kind of dish that transforms a weeknight into a flavorful celebration without the fuss.
What you’ll end up with is a pot of golden-hued moong dal with tender lentils, fragrant spices, and just the right amount of body—creamy enough to coat the back of a spoon but not overly thick. The aroma alone will have everyone gathering around the table, and the taste?
Rich, comforting, and packed with plant-based protein. It’s the perfect foundation for a complete meal, ready to be paired with rice, roti, or a dollop of yogurt.
Whether you’re feeding a family or meal prepping for the week, this recipe delivers consistent results every time. The no-soak method cuts prep to minutes, making it ideal for busy schedules without sacrificing quality. Let’s get cooking—your taste buds will thank you.
Ingredients for moong dal instant pot recipe no soak
Split moong dal, aromatic spices, and ghee create this velvety Instant Pot masterpiece in 25 minutes.
| Ingredient | Amount | Notes |
|---|---|---|
| Split Yellow Moong Dal 🌾 | 1 cup | Rinsed thoroughly before cooking |
| Ghee 🧈 | 2 tbsp | Clarified butter for rich flavor |
| Fresh Ginger 🧄 | 1 tbsp | Grated finely for aromatic base |
| Yellow Onion 🧅 | 1 medium | Finely diced for sweet depth |
| Garlic Cloves 🧄 | 4 cloves | Minced for aromatic complexity |
| Cumin Seeds 🌿 | ½ tsp | Toasted lightly for warmth |
| Ground Turmeric 🌶️ | ½ tsp | Freshly ground for vibrant color |
| Ground Coriander 🌿 | ½ tsp | Toasted for citrusy brightness |
| Garam Masala 🌶️ | ½ tsp | Whole blend preferred for depth |
| Salt 🧂 | ½ tsp | Diamond Crystal preferred |
| Water 💧 | 2 ½ cups | Filtered for best results |
| Fresh Cilantro 🌿 | ¼ cup | Chopped for garnish and freshness |
| Lemon Juice 🍋 | 1 tbsp | Freshly squeezed for brightness |
The quality of your moong dal makes all the difference. Whole Foods or Indian specialty stores carry the best split yellow lentils—look for vibrant yellow color and uniform size. Ghee from store-bought tubs works fine, but homemade ghee has superior flavor. Fresh ginger and garlic should be firm with no soft spots. Toast your whole spices like cumin seeds briefly in a dry pan before grinding for maximum aroma. The Diamond Crystal kosher salt enhances flavor without overpowering the delicate lentils.
No fresh ginger? Ginger paste from a tube works in a pinch, but reduce to half the amount. Substitute ground coriander with cilantro seeds toasted and ground for similar flavor. For garam masala, Madras or Everest brand blends provide authentic depth. The lemon juice can be omitted if you prefer a neutral finish, but it brightens the dish beautifully. For extra creaminess, stir in 2 tbsp coconut milk or plain yogurt at the end without affecting the no-soak method.
Store cooked dal in airtight containers for 4-5 days in the refrigerator. For longer storage, freeze portions for up to 3 months—thaw overnight in the fridge before reheating. The dal reheats beautifully with a splash of water. I always make double batches since it freezes perfectly and tastes even better the next day as flavors meld. The aroma alone will have your kitchen smelling like a South Indian restaurant.
Why You’ll Love This Recipe
- No-Soak Magic: I swear by this trick—just dump the dal in dry, add water, and let the Instant Pot do the work. No prepping the night before, no fiddling with soaking times. Honestly, it’s the kind of recipe that makes me question why I ever soaked beans by hand.
- Ghee-Garlic Glow: That first hit of ghee hitting the pan? Pure satisfaction. The onions caramelize just enough to coat the dal, while the garlic—roasted until fragrant but not burnt—adds this deep, warm richness. Between us, it’s the kind of flavor that turns “dinner” into “something special” without trying too hard.
- Weeknight & Potluck Hero: I make this for lazy Tuesday dinners and bring it to gatherings—same recipe, two totally different vibes. Serve it with roti for a cozy night in or pile it on toast for a brunch crowd-pleaser. (Yes, even on a Tuesday night.)
- Budget-Friendly Leftovers: A single batch feeds my family for three meals, and it tastes just as good reheated. Split moong dal is cheaper than rice, and the spices stretch further than you’d think. I’ll be real: this is the dish I turn to when I’m low on groceries but still want something hearty.
Step-by-step instructions for moong dal Instant Pot recipe
Here’s the method for creamy, perfectly spiced dal without soaking—efficient and foolproof.
Sauté Aromatics in Ghee Until Fragrant
Set your Instant Pot to the “Sauté” function and add the 2 tablespoons ghee. Allow it to melt completely, then add the ½ teaspoon cumin seeds. Let them sizzle for 30 seconds until they release their warm, nutty aroma.
Add the 1 tablespoon finely grated fresh ginger and 1 medium yellow onion that’s been finely diced. Cook for 4-5 minutes on medium heat, stirring occasionally, until the onion softens and turns translucent. This foundational step develops the dal’s rich, aromatic base.
Next, add the 4 minced garlic cloves and cook for 30 seconds until the raw garlic smell disappears and you detect a sweet, mellow aroma. I press down gently on the aromatics during this step—this prevents them from sticking to the bottom and ensures even cooking.
Add Spices and Toast for Depth
Reduce the heat to low and stir in the ½ teaspoon ground turmeric, ½ teaspoon ground coriander, and ½ teaspoon garam masala. Toast these spices for 1 minute, stirring constantly, until you can smell their warm, earthy notes filling the pot.
This toasting step is crucial—it activates the spices’ essential oils, creating a more complex flavor profile. You’ll know it’s done when the spices stop popping and release a fragrant steam. If the mixture starts to darken too quickly, reduce the heat slightly to prevent burning.
Combine Dal and Water for Cooking
Add the 1 cup rinsed split yellow moong dal to the pot and stir to coat it evenly with the spiced ghee. Pour in the 2½ cups water, then add the ½ teaspoon salt. Give everything a thorough stir to ensure the dal is fully submerged and the spices are evenly distributed.
Here’s where the magic happens: seal the Instant Pot lid and set the valve to sealing. Cook on high pressure for 12 minutes. The dal should become tender and the liquid should reduce slightly, creating that signature creamy texture we’re aiming for.
Real talk: don’t skip the 12-minute cook time. Undercooked dal will be gritty and unappetizing, while this duration ensures perfect tenderness every time. The pressure cooker’s sealed environment traps steam, which cooks the dal evenly and quickly.
Finish with Fresh Herbs and Acid
Once the cooking cycle completes, allow the pressure to release naturally for 10 minutes before quick-releasing any remaining pressure. Open the lid and stir in the 1 tablespoon lemon juice and ¼ cup chopped fresh cilantro. The acidity brightens the dal, cutting through the richness of the ghee.
Adjust the consistency by adding 1-2 tablespoons water if needed—you want a creamy but spoonable texture, not a soup. Taste and adjust the salt if necessary, remembering that the lemon juice may slightly alter the perceived saltiness.
The final step is critical: let the dal sit covered for 5 minutes off the heat. This resting period allows the flavors to meld completely and the dal to reach its ideal creaminess. The result should be a velvety, perfectly spiced dal that’s ready to serve immediately.
Pro Tips For Making Moong Dal Instant Pot Recipe No Soak
- Sear the Onions Slow: I learned this the hard way—rushing the onions makes the dal taste raw. Cook them on medium-low with the ghee until they’re golden and soft, about 5-6 minutes. That deep caramelization builds flavor the Instant Pot can’t replicate later.
- Rinse the Dal Once: Skip the soak, but give the moong dal a quick rinse before cooking. This removes the outer dust that can make the dal bitter or gummy—just swirl it in a fine-mesh strainer under cold water for 10 seconds. No need to soak; you’re not making idli here.
- Pressure Cook 10 Minutes: The Instant Pot manual might say 8, but I’ve found 10 minutes at high pressure guarantees fully tender dal every time. If your dal is still firm, that’s your cue to add another 2 minutes. Undercooked dal ruins the texture—better to wait.
- Finish with Warm Ghee: Dump the dal into a pot, stir in 2 tablespoons of warm (not hot) ghee off the heat, and let it sit for 2 minutes. This coats every grain and makes the dish taste richer without overpowering it. Cold ghee won’t work—trust me, I’ve tried.
Flavor customization for this dish
Spice Level Adjustments
Start with the ½ teaspoon garam masala base, but feel free to customize the heat. For a mild version, reduce the cumin seeds to ¼ teaspoon and add ¼ teaspoon mild paprika instead.
For medium heat, keep the original spices but add ¼ teaspoon Kashmiri red chili powder—it delivers color without intense heat. For a fiery kick, toast ½ teaspoon black peppercorns with the cumin and add ¼ teaspoon cayenne pepper at the end. 🌶️
Creamy vs. Brothy Texture
Want a thicker, spoonable dal? Reduce the water to 2 cups instead of 2½ cups and cook for 14 minutes instead of 12 minutes. For a brothier consistency, increase water to 3 cups and cook for 10 minutes, then stir in ¼ cup coconut milk at the end.
I often make a batch of each—creamy for serving with roti and brothy for pairing with rice.
Protein Boosters
Transform this into a complete protein powerhouse by adding ½ cup cooked chickpeas or ½ cup diced tofu during the sauté step. For extra richness, stir in 2 tablespoons plain Greek yogurt at the end—it adds tanginess and creaminess.
I also love adding ¼ cup finely chopped spinach in the final minute of cooking for a nutrient boost. The Instant Pot handles these additions beautifully without altering the no-soak method.
Regional Flavor Twists
For a South Indian twist, add ½ teaspoon fennel seeds with the cumin and finish with ¼ cup toasted cashews. For a Punjabi-inspired version, include ½ teaspoon amchur (dry mango powder) and top with ¼ cup fresh cream.
The North Indian style calls for ½ teaspoon cardamom pods toasted with the cumin—crush them lightly before adding. Each variation keeps the no-soak method intact while delivering distinct regional flavors. 🗺️
Vegetable Add-Ins
Sauté ½ cup diced tomatoes with the onions for a tangy twist, or add ½ cup finely chopped bell peppers for sweetness. I often stir in ¼ cup grated zucchini or ½ cup shredded cabbage during the final 2 minutes of cooking—they soften perfectly without overpowering the dal.
For a heartier version, add ½ cup chopped sweet potatoes during the pressure cooking phase. These additions work beautifully with the no-soak method.
Herb and Garnish Variations
Swap the cilantro for ¼ cup chopped mint leaves for a refreshing Middle Eastern touch, or use ¼ cup fresh basil for an Italian-inspired flavor. Garnish with ¼ cup toasted pumpkin seeds for crunch, or drizzle with 1 teaspoon white miso paste for umami depth.
I also love finishing with ¼ cup pickled red onions—the acidity cuts through the richness perfectly. Each herb or garnish adds a unique dimension while keeping the base recipe intact. ✨
Nutrition facts
Frequently asked questions
Why does this moong dal recipe work without soaking?
The Instant Pot’s high-pressure environment creates steam that penetrates the lentils more efficiently than traditional stovetop methods. The 12-minute pressure cook breaks down the lentils’ tough outer skins while preserving their natural creaminess—no pre-soaking required. This method also cuts prep time from hours to minutes while delivering restaurant-quality texture.
Can I use regular yellow lentils instead of split moong dal?
No, this recipe specifically requires split yellow moong dal for the perfect no-soak texture. Whole yellow lentils (like masoor dal) need longer cooking times and benefit from soaking. Split moong dal cooks quickly and develops that signature velvety consistency without pre-treatment. For a similar texture, you could try split chana dal, but moong dal remains the best choice for this method.
What if my dal turns out too thick or too thin?
For thicker dal, reduce water to 2 cups and cook 14 minutes instead of 12 minutes. For thinner dal, add ½ cup water after cooking. If it’s too thin, simmer uncovered for 3-5 minutes to reduce naturally. The key is achieving a spoonable but not soupy consistency—adjust in 2-tablespoon increments for precision.
How do I make this recipe kid-friendly?
Skip the garam masala and reduce cumin to ¼ teaspoon. Add ¼ teaspoon mild paprika for color instead of spice. For extra appeal, stir in 2 tablespoons coconut milk at the end and top with ¼ cup shredded carrots or ¼ cup peas. The gentle flavors and familiar textures make this version perfect for little ones while keeping the no-soak method intact.
Can I make this recipe in a regular pot instead?
Yes, but cooking time will increase significantly. Simmer 1 cup moong dal with 3 cups water for 25-30 minutes on medium-low heat after sautéing the spices. Stir occasionally to prevent sticking and add water as needed. The Instant Pot’s pressure cooking cuts time by 75% while delivering more even cooking and better texture control.

- Braised Beef Short Ribs Recipe: Crock Pot Fall-Off-Bone Magic in 6 Hours - November 1, 2026
- Crock Pot Cocoa Recipe: Velvety Warmth With Hidden Spice Magic - November 1, 2026
- White Queso Crock Pot Recipe: Ultra-Smooth Melt Without the Grain - November 1, 2026