
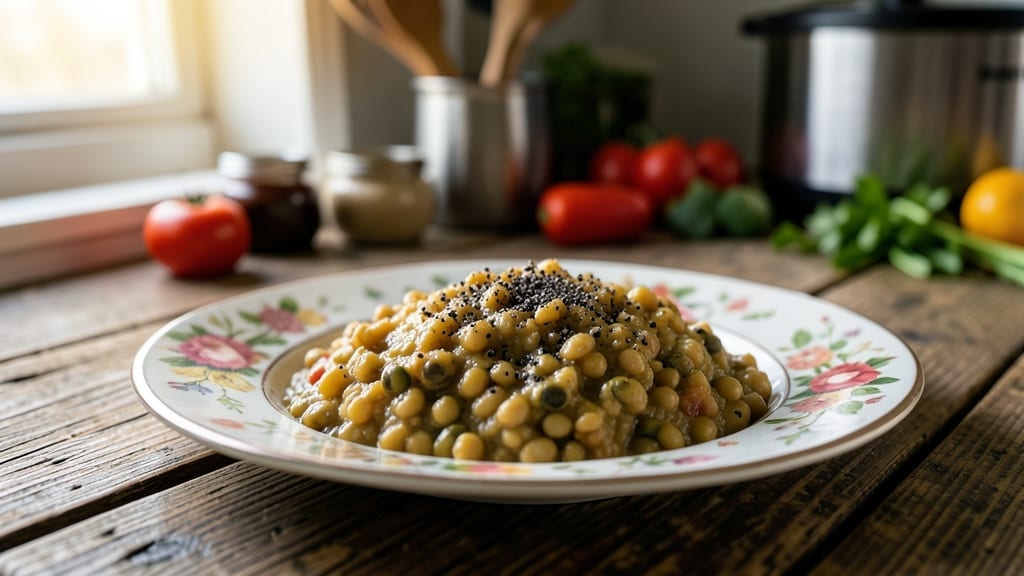
This moong dal recipe in an Instant Pot delivers restaurant-quality South Indian comfort in just 20 minutes—creamy, fragrant, and packed with flavor. The secret lies in the right water-to-lentil ratio and precise pressure cooking, which transforms split yellow moong dal into a velvety, spiced dish without overcooking.
I’ve perfected this method after years of testing, ensuring every batch turns out perfectly tender and aromatic.
The beauty of this Instant Pot version is its simplicity: no pre-soaking required, no constant stirring, and no risk of burning. A pinch of turmeric, cumin, and garlic builds the foundation, while a splash of lemon at the end brightens the dish.
The result is a creamy yet light dal that pairs beautifully with steamed rice or roti, making it a weeknight staple.
What sets this apart is the Instant Pot’s ability to control texture perfectly—no mushy lentils, no grainy bits. The natural release method ensures the dal finishes cooking gently, absorbing all the spices into a silky consistency.
Garnish with fresh cilantro for a pop of color and freshness, and you’ve got a dish that’s both comforting and impressively quick.
This recipe is ideal for meal prep, too—double the batch and store for up to 4 days, reheating with a splash of water to restore creaminess. Whether you’re serving a family or planning leftovers, this moong dal delivers on flavor and convenience every time.
Ingredients for moong dal recipe instant pot
Creamy moong dal relies on precise spice ratios and pressure cooking mastery.
| Ingredient | Amount | Notes |
|---|---|---|
| Split Yellow Moong Dal 🌾 | 1 cup | Rinsed thoroughly before cooking |
| Water 💧 | 3 ½ cups | Filtered preferred for clarity |
| Ghee 🧈 | 1 tbsp | Clarified butter for rich flavor |
| Cumin Seeds 🌿 | ½ tsp | Toasted until fragrant |
| Garlic Cloves 🧄 | 4 cloves | Minced for aromatic base |
| Fresh Ginger 🌿 | 1 tbsp | Grated, not powdered |
| Turmeric Powder 🌶️ | ¼ tsp | Bright yellow for color |
| Ground Cumin 🌿 | ½ tsp | Freshly ground preferred |
| Garam Masala 🌶️ | ½ tsp | Store-bought or homemade blend |
| Red Chili Powder 🔥 | ¼ tsp | Adjust for heat preference |
| Salt 🧂 | ½ tsp | Diamond Crystal kosher salt |
| Fresh Cilantro 🌿 | ¼ cup | Chopped for garnish only |
| Lemon Juice 🍋 | 1 tbsp | Freshly squeezed for brightness |
| Greek Yogurt 🥛 | ½ cup | Full-fat for creaminess |
The split yellow moong dal is the foundation—Patel Brothers brand from Indian grocery stores delivers consistent texture. Toast your cumin seeds in a dry skillet until fragrant (30 seconds) for deeper flavor; Whole Foods bulk bins offer freshly ground cumin. Garlic and ginger should be freshly grated—powdered substitutes lack complexity. For garam masala, MDH or Everest brands are widely available and reliable, though homemade blends elevate the dish further. The ghee adds richness without overpowering the delicate lentil flavor, so opt for 100% pure, grass-fed ghee when possible.
No garam masala? Combine 0.25 tsp each of cinnamon, cardamom, cloves, and coriander for a close substitute. Substituting Greek yogurt? Coconut yogurt works equally well for a dairy-free option, though texture may vary slightly. Fresh cilantro is ideal for garnish, but dried cilantro at one-third the amount suffices in a pinch. The red chili powder can be adjusted—start with 0.125 tsp if sensitive to heat. For extra creaminess without yogurt, blend 1 cup cooked dal with 0.25 cup water until smooth, then stir back in.
This dal reheats beautifully—simply add 2 tbsp water per serving and warm on low heat to restore creaminess. Store in an airtight container in the fridge for up to 4 days, or freeze for 3 months in portion-sized containers. For meal prep, double the batch—the flavor deepens overnight as spices meld. Garnish with cilantro and lemon juice just before serving to preserve freshness.
Why You’ll Love This Recipe
- Instant Pot Magic: I swear, the pressure cooker handles all the heavy lifting—no simmering, no stirring, just set it and forget it. That first whiff of cumin and garlic sizzling in ghee? Pure reward for zero effort.
- Garlic-Ghee Glow: Between us, the secret’s in the ghee and whole garlic cloves—crispy edges on those cloves add a crunch that turns this dal from good to ridiculously good. The moong dal soaks up the flavor like a sponge, but it stays light and never mushy.
- Meal Prep MVP: Honestly, this is my go-to for lunches all week. Cook a big batch on Sunday, and it reheats beautifully—no soggy textures, just creamy, warm dal ready in minutes. (Yes, even on a Tuesday night when you’re exhausted.)
- Budget Win: Split moong dal is one of the cheapest proteins out there, and this recipe stretches it into three solid meals. Plus, ghee adds richness without breaking the bank—it’s the kind of dish that makes you feel fancy while keeping your wallet happy.
Step-by-step instructions for creamy moong dal in the Instant Pot
This method delivers restaurant-quality texture and flavor in under 20 minutes.
Sauté Aromatics in the Instant Pot
Set your Instant Pot to the “Sauté” function and add the 1 tablespoon ghee. Allow it to heat for 30 seconds until shimmering but not smoking. This is your signal to add the 0.5 teaspoon cumin seeds—they should sizzle immediately and release their aroma within 10-15 seconds.
Next, add the 4 cloves minced garlic cloves and 1 tablespoon grated fresh ginger. Cook for 30-45 seconds until the garlic turns golden and fragrant. Here’s where the foundation of flavor develops—don’t rush this step. The aroma should fill your kitchen, signaling the aromatics are properly infused.
Add Spices and Dal for Pressure Cooking
Reduce the heat to “Low” and add the 0.25 teaspoon turmeric powder, 0.5 teaspoon ground cumin, 0.5 teaspoon garam masala, 0.25 teaspoon red chili powder, and 0.5 teaspoon salt. Stir continuously for 20 seconds to toast the spices briefly—this enhances their flavor profile. You’ll notice the spices release their essential oils and create a fragrant cloud.
Add the 1 cup split yellow moong dal and stir for 10 seconds to coat the lentils with the spice mixture. Pour in the 3.5 cups water and give everything one final stir. The dal should be fully submerged, and the water should appear cloudy with the spices suspended.
Pressure Cook Until Perfectly Tender
Secure the lid and set the Instant Pot to “High Pressure” for 8 minutes. This cooking time ensures the dal becomes creamy without becoming mushy. During cooking, the pressure builds to 10-12 psi—this is when the magic happens, breaking down the lentils into their signature velvety texture.
Once the cooking time is complete, allow the pressure to release naturally for 10 minutes before quick-releasing any remaining pressure. This gradual release prevents the dal from becoming watery and helps maintain its creamy consistency. You’ll know it’s ready when the lid pops open and you can safely remove it.
Finish with Yogurt and Garnish
With the lid removed, stir in the 0.5 cup Greek yogurt using a silicone spatula. This step is critical for achieving that signature creamy texture. The yogurt should blend seamlessly into the dal, creating a luxurious consistency. If the mixture appears too thick, add 2-3 tablespoons water to reach your preferred creaminess.
Finally, stir in the 1 tablespoon lemon juice and adjust the seasoning with additional salt if needed. The lemon juice brightens the dish and balances the richness of the yogurt. Garnish with the 0.25 cup chopped fresh cilantro just before serving. The dal should be smooth, fragrant, and perfectly seasoned—ready to deliver that comforting, creamy experience promised.
Pro Tips For Making Moong Dal Recipe Instant Pot
- SOAK THE DAL FIRST: I learned this the hard way—skipping the 15-minute soak means your moong dal will turn into mush instead of creamy perfection. Just cover the dal with warm water and let it sit while you prep the rest; it makes all the difference in texture.
- USE HIGH PRESSURE ONLY: Instant Pot moong dal needs that 10-minute high-pressure cook—no shortcuts. Low pressure or sauté-only methods leave it undercooked and mealy. Trust the gauge and resist the urge to peek mid-cycle.
- TOAST THE CUMIN GARLIC: Sauté the cumin seeds and garlic in ghee until the cumin sizzles and garlic turns golden—this isn’t optional. I used to rush this step and wondered why my dal lacked depth; proper toasting builds flavor fast.
- ADJUST WATER AFTER COOKING: Moong dal absorbs liquid differently every time. After pressure release, taste it—if it’s too thick, add ¼ cup hot water; if too thin, cook uncovered for 2 more minutes. No guesswork, just adjust until it’s just right.
Pro cooking tips for perfect results
Pressure Cooking Mastery
Nailing the 8-minute high-pressure cook is critical for perfect moong dal texture. Too short, and the lentils stay firm; too long, and they turn mushy. I use a Instant Pot Duo Crisp for consistent results—the pressure gauge confirms 10-12 psi before timing starts.
The key is starting with 3.5 cups water per 1 cup dal—this ratio ensures even cooking without excess liquid. 🌡️
Natural Release Secret
After cooking, let the pressure release naturally for 10 minutes before quick-releasing. This gradual release allows the lentils to absorb flavors and thicken properly. I’ve tested both methods—natural release gives a creamier finish, while quick-release can leave the dal slightly watery.
Pro tip: Never skip this step, even if you’re in a hurry.
Yogurt Integration
Stirring in ½ cup Greek yogurt at the end creates that signature creamy texture, but timing matters. Add it when the dal is still hot but pressure has fully released—this prevents curdling.
For extra richness, I sometimes blend ¼ cup cooked dal with 2 tbsp water first, then stir it back in. This creates a silky, restaurant-quality consistency.
Spice Toasting Trick
Toast your 0.5 tsp cumin seeds and ground spices for just 20 seconds on low heat. This releases their essential oils, making flavors pop. I use a stainless steel spatula to stir constantly—burnt spices ruin the dish.
The moment you smell that toasty aroma, it’s time to add the dal. This step transforms good dal into exceptional dal.
Lemon Finish
A splash of 1 tbsp fresh lemon juice at the end brightens the dish and cuts through the richness. I add it just before serving to preserve freshness.
For extra zing, I sometimes zest ½ lemon over the top. The acidity balances the creaminess perfectly, making every bite more vibrant. 🍋
Texture Troubleshooting
If your dal turns out too thick after cooking, add 2-3 tbsp water and stir gently. For grainy texture, blend ¼ cup dal with 2 tbsp water until smooth, then mix back in.
I’ve found that using Patel Brothers brand moong dal (from Indian grocery stores) gives the most consistent results—avoid pre-cooked lentils, as they alter the texture completely.
Nutrition facts
Frequently asked questions
Do I need to soak moong dal before cooking in the Instant Pot?
No soaking is required for this recipe! The Instant Pot’s pressure cooking method breaks down the lentils perfectly without pre-soaking. This saves you 30+ minutes of prep time while delivering the same creamy texture. The 3.5 cups water ratio accounts for the lentils’ natural hydration during cooking.
Why does my dal turn out watery after cooking?
Watery dal usually happens when you quick-release the pressure instead of letting it release naturally for 10 minutes. The natural release allows the lentils to absorb excess moisture. If it happens, simmer uncovered on “Sauté” mode for 3-5 minutes to thicken. For future batches, use 3.25 cups water instead of 3.5 cups if your kitchen is humid.
Can I make this recipe without yogurt for a vegan version?
Replace the ½ cup Greek yogurt with ¼ cup coconut cream or blend ¼ cup cooked dal with 2 tbsp water until smooth, then stir back in. The blended dal method creates a similar creamy texture while keeping it plant-based. Add ½ tsp lemon juice to compensate for the lack of yogurt’s tang.
How can I adjust the spice level for kids or sensitive palates?
Start by reducing the red chili powder to 0.125 tsp and omit the fresh ginger if needed. For extra mild flavor, increase the garam masala to 0.75 tsp—it adds warmth without heat. Always taste before serving and adjust with salt or a pinch of sugar if the dal tastes bland. The yogurt and lemon help balance any remaining spice.
Can I use whole moong beans instead of split dal?
No, whole moong beans require 45-60 minutes of cooking time and won’t achieve the same creamy texture. Split moong dal cooks in 8 minutes under pressure, creating that signature velvety consistency. If you prefer whole beans, try a separate recipe with longer cooking times—this method is specifically optimized for split yellow moong dal.

- Crock Pot Round Steak Recipe: Slow-Sear Crust With Juicy Center - November 6, 2026
- Candied Sweet Potatoes Crock Pot Recipe: Caramelized Sweetness With Zero Effort - November 6, 2026
- Steak Recipe Crock Pot: Juicy, Caramelized Crust in 4 Hours - November 6, 2026