
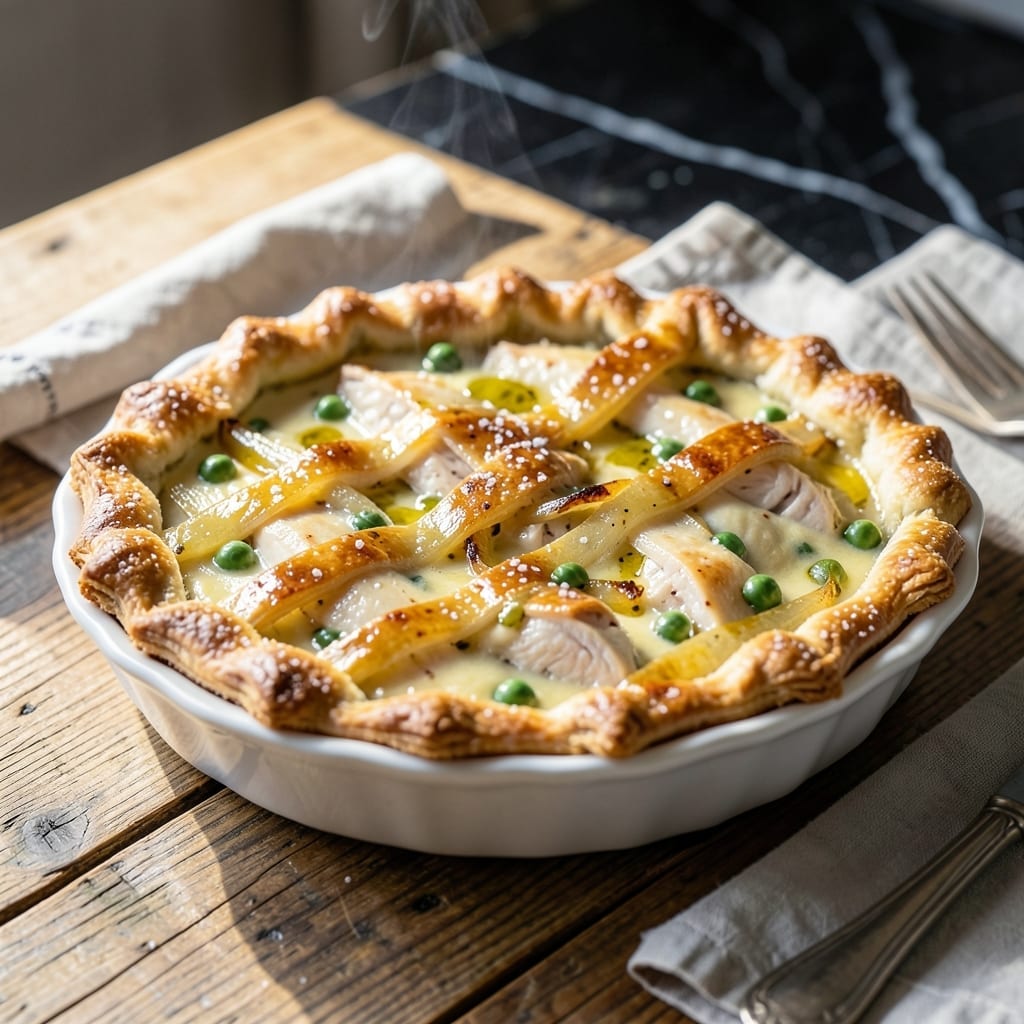
I developed this recipe to honor a classic tradition—Grandma Herring’s chicken pot pie with its signature flaky crust. The secret lies in cold butter and minimal handling of the dough.
This dish brings comfort food to a new level with tender chicken, hearty vegetables, and a creamy sauce all encased in that perfect golden crust. Every bite delivers warmth and nostalgia.
The filling comes together with simple ingredients, while the crust bakes to a flaky, golden finish. It’s a meal that feels like a hug on a plate.
Perfect for family dinners or cozy Sunday suppers. Here’s how to make this timeless classic.
Ingredients for Mrs Herring’s Chicken Pot Pie
Pantry staples and fresh produce create this timeless comfort classic with flaky crust.
| Ingredient | Amount | Notes |
|---|---|---|
| Chicken Breast 🍗 | 1 ½ lb | Boneless, skinless, diced |
| All-Purpose Flour 🌾 | 2 ½ cups | Divided for crust and filling |
| Unsalted Butter 🧈 | 1 ½ cups | Cold, cubed for flaky crust |
| Ice Water 💧 | ½ cup | For crust dough |
| Salt 🧂 | 1 ½ tsp | Divided for crust and filling |
| Yellow Onion 🧅 | 1 whole | Medium, finely diced |
| Carrots 🥕 | 2 whole | Peeled and diced |
| Celery Stalks 🥬 | 2 whole | Diced for filling |
| Frozen Peas 🌱 | 1 cup | No need to thaw |
| Garlic Cloves 🧄 | 3 cloves | Minced for sauce |
| Chicken Broth 🍲 | 2 cups | Low-sodium preferred |
| Whole Milk 🥛 | ¾ cup | For creamy sauce |
| Heavy Cream 🥛 | ½ cup | For rich filling |
| Dried Thyme 🌿 | 1 tsp | For seasoning filling |
| Black Pepper 🌶️ | ½ tsp | Freshly ground preferred |
The crust demands cold, high-quality butter—Land O’Lakes or Kerrygold are reliable choices. Minimal handling is key, so work quickly. For the chicken, boneless, skinless breasts stay tender. Most supermarkets carry these pre-diced, but whole breasts you trim yourself often yield better texture. The all-purpose flour should be unbleached for optimal crust structure.
No thyme? Poultry seasoning at half the amount works in a pinch. Fresh peas can replace frozen (add them later). For a richer filling, half-and-half instead of milk. The chicken broth can be homemade or Swanson’s low-sodium. If avoiding dairy, swap the butter for cold coconut oil, though the flavor will differ slightly.
The unbaked pie freezes beautifully for up to 3 months. Store leftovers in the fridge for 3-4 days. Reheat individual slices in the oven to maintain that flaky crust texture. Always let the filling cool completely before assembling to prevent a soggy bottom.
Why You’ll Love This Recipe
- One Bowl Magic: I love that the buttery crust comes together with just flour, butter, and ice water—no fancy equipment, no mess.
- Rich Comfort: The chicken breast stays so tender under that flaky salted crust, it feels like a warm hug in every bite.
- Feeds the Crew: I make this for Sunday suppers and it stretches perfectly for leftovers—even my picky nephew cleans his plate.
- Pantry Staples: Honestly, I always have these ingredients on hand, so it’s my go-to when I need dinner fast without a grocery run.
Step-by-Step Instructions for Chicken Pot Pie
This method delivers the flaky crust and creamy filling that made Grandma’s version legendary.
Step 1: Prepare the Flaky Crust
Cut the 1.5 cups unsalted butter into ½-inch cubes and keep them ice-cold. In a food processor, pulse the 2.5 cups all-purpose flour with ½ teaspoon salt until combined. Add the chilled butter and pulse until the mixture resembles coarse crumbs with pea-sized butter pieces visible.
With the processor running, slowly drizzle in the 0.5 cup ice water until the dough just begins to come together. Turn the dough onto a lightly floured surface and shape it into two equal discs. Wrap in plastic and refrigerate for 1 hour—this prevents the butter from melting prematurely, ensuring those coveted flaky layers.
Step 2: Cook the Filling Vegetables
Melt 2 tablespoons of the remaining unsalted butter in a large pot over medium heat. Add the diced yellow onion, carrots, and celery stalks, cooking for 6-8 minutes until the vegetables soften and the onion turns translucent.
Stir in the minced garlic cloves and 1 teaspoon dried thyme, cooking for 1 minute until fragrant. This builds the aromatic base that infuses the filling with depth. Avoid browning the vegetables; you want them tender but not caramelized for this dish.
Step 3: Build the Creamy Filling
Add the diced 1.5 lb chicken breast to the pot and cook until no longer pink, about 6-7 minutes. Sprinkle with 1 teaspoon salt and 0.5 teaspoon black pepper as it cooks. Stir in the 2 cups chicken broth, 0.75 cup whole milk, and 0.5 cup heavy cream, bringing the mixture to a gentle simmer.
Let it thicken for 5-7 minutes until the sauce coats the back of a spoon. Stir in the 1 cup frozen peas—no need to thaw them first. The sauce should be rich and velvety, with the chicken and vegetables evenly distributed. Taste and adjust seasoning if needed.
Step 4: Assemble and Bake to Golden Perfection
On a lightly floured surface, roll out one disc of dough to fit a 9-inch pie plate. Transfer the dough to the plate, pressing it into the bottom and sides. Pour in the filling and dot it with small pieces of the remaining unsalted butter for extra richness.
Roll out the second disc and place it over the filling. Crimp the edges to seal, then cut several slits in the top crust to allow steam to escape. Bake at 375°F for 45-50 minutes until the crust is golden brown and the filling is bubbling. Let it cool for 10 minutes before serving to allow the filling to set.
Pro Tips For Making Mrs Herring’S Chicken Pot Pie
- Chill the Dough: Let the crust rest in the fridge for at least 30 minutes before rolling—it keeps the butter from melting too fast and makes it way easier to handle.
- Poach the Chicken: Simmer the chicken breast in salted water for 12-15 minutes until just cooked, then shred it. Boiling dries it out, and undercooking leaves it rubbery.
- Use Ice-Cold Water: The pie crust only needs 3-4 tablespoons of ice water—any more and the dough gets tough. I learned this the hard way after my first few crusts came out chewy.
- Vent the Top: Cut a few small slits in the top crust before baking. It lets steam escape so your pie doesn’t turn into a soggy mess.
Essential Equipment for mrs herrings chicken pot pie
Dough Preparation Tools
I swear by my Cuisinart food processor for the crust—it cuts cold butter into flour in seconds without warming the dough. A pastry cutter works too if you prefer hands-on control. Always use ice water from the fridge to keep everything frigid. 💡
Rolling and Shaping
A large wooden rolling pin gives you even pressure for consistent thickness. Roll on a floured silicone mat to prevent sticking. I keep a 9-inch pie plate nearby to check sizing as I roll—this ensures perfect coverage.
Cooking Essentials
For the filling, a 5-quart Dutch oven (I love Le Creuset) provides even heat distribution. A wooden spoon won’t scratch your pot while stirring. Measure liquids with a Pyrex glass measuring cup for accuracy.
Baking Must-Haves
A pie shield prevents the crust edges from over-browning. Place your pie on a baking sheet to catch any drips. I use an oven thermometer to confirm my oven’s at a true 375°F. ❄️
Finishing Touches
A pastry brush helps apply egg wash for that golden sheen. Use parchment paper under the pie for easy transfer. Let it cool on a wire rack to maintain that flaky bottom crust.
Optional Upgrades
For extra flair, a lattice cutter creates decorative tops. A dough docker prevents air bubbles. I keep kitchen shears handy for trimming excess dough neatly. 🔥
Nutrition Facts
Frequently Asked Questions
Can I use store-bought pie crust?
Yes, but homemade delivers that signature flaky texture. If short on time, use 1 refrigerated pie crust for the bottom and top. Just brush with egg wash for extra shine before baking.
How do I prevent a soggy bottom crust?
Prevent sogginess by baking on a preheated baking sheet at 375°F. Also, let the filling cool completely before assembling. This creates a barrier between crust and filling.
Can I make this ahead of time?
Assemble the pie and freeze unbaked for up to 3 months. Bake from frozen, adding 10-15 minutes to the baking time. Leftovers keep in the fridge for 3-4 days.

- 6 Oz Chocolate Chip Cookie Recipe: Perfectly Balanced Crispy Edges and Chewy Hearts - September 25, 2026
- 6-Inch Coffee Cake Recipe: Vanilla Bean Swirls and Buttery Streusel Topping - September 25, 2026
- 1 Hour Soup Recipe: Velvety Richness Without the Wait - September 25, 2026