
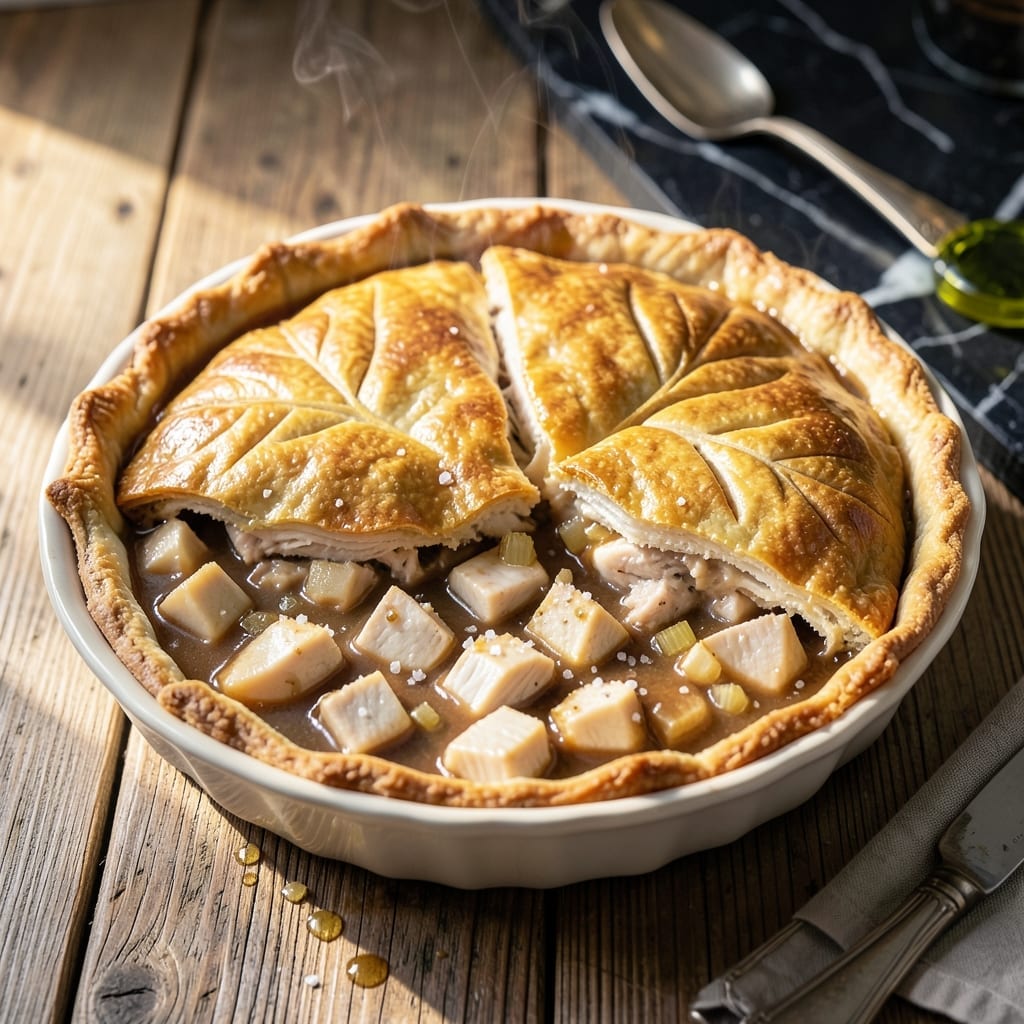
There’s nothing quite like a creamy chicken pot pie with a golden, flaky crust—especially when it’s made effortlessly in the Ninja Foodi. This method delivers a filling that’s rich and velvety, packed with tender chicken and fresh herbs.
The air-fryer function ensures a perfectly crisp top without the hassle of a traditional oven. I’ve refined this recipe to balance convenience and flavor, so you get all the comfort of a classic pot pie with modern ease.
What sets this version apart is the herb-infused filling, which stays creamy and luscious even after baking. The crust turns out shatteringly crisp, while the inside remains tender and full of savory depth.
Ideal for a cozy weeknight dinner or a comforting weekend meal. Here’s how to make it.
Ingredients for Ninja Chicken Pot Pie
Pantry staples and fresh herbs create that classic creamy filling with crisp golden crust.
| Ingredient | Amount | Notes |
|---|---|---|
| Boneless Skinless Chicken Breast 🍗 | 1 ½ lb | Diced into 1-inch pieces |
| Unsalted Butter 🧈 | ½ cup | Divided for filling and crust |
| All-Purpose Flour 🌾 | ⅓ cup | For thickening filling |
| Whole Milk 🥛 | 1 ½ cups | Full-fat for creaminess |
| Chicken Broth 🍲 | 1 ½ cups | Low-sodium preferred |
| Yellow Onion 🧅 | 1 whole | Medium, finely diced |
| Garlic Cloves 🧄 | 3 cloves | Minced for depth |
| Frozen Mixed Vegetables 🥕 | 2 cups | Peas, carrots, corn blend |
| Fresh Thyme 🌿 | 2 tsp | Chopped for herb infusion |
| Fresh Rosemary 🌿 | 1 tsp | Finely chopped for aroma |
| Salt 🧂 | 1 tsp | Kosher or sea salt |
| Black Pepper 🌶️ | ½ tsp | Freshly ground preferred |
| Refrigerated Pie Crust 🥧 | 2 sheets | Or homemade if preferred |
| Large Egg 🥚 | 1 whole | For egg wash on crust |
The chicken quality matters here. Boneless, skinless breasts stay tender—avoid pre-cut strips (they dry out). Whole milk is non-negotiable for the velvety texture; low-fat won’t give you that lush filling. For the crust, Pillsbury refrigerated sheets work perfectly in the Ninja Foodi. Fresh herbs are ideal, but dried at one-third the amount saves a grocery run.
No fresh thyme or rosemary? Poultry seasoning covers both in a pinch. Short on broth? Water plus bouillon cube works, though the flavor won’t be as deep. The mixed veggies can be fresh equivalents—just dice them small so they cook evenly. For extra richness, swap half the milk for heavy cream (trust me on this one).
Assemble and bake right away, or refrigerate the unbaked pie for up to 24 hours. Leftovers keep 3-4 days in the fridge. The filling thickens as it cools—reheat in the air fryer to revive the crust’s crispness.
Why You’ll Love This Recipe
- One Pan Magic: I toss everything into the Ninja, and it does the work—no extra bowls or mess.
- Rich, Creamy Filling: The butter and milk create a velvety sauce that coats every bite.
- Weeknight Hero: Honestly, it’s my go-to for busy evenings when I need dinner fast.
- Feeds the Family: One batch makes enough for leftovers, and the kids actually finish their plates.
Step-by-Step Instructions for Ninja Chicken Pot Pie
Master the technique for a flaky crust and velvety filling that works perfectly in your air fryer.
Step 1: Cook the Chicken and Aromatics
Dice the 1.5 lb Boneless Skinless Chicken Breast into 1-inch pieces and season with 1 tsp Salt and 0.5 tsp Black Pepper. Heat 2 tablespoons of the 0.5 cup Unsalted Butter in a skillet over medium-high heat until melted.
Add the chicken and cook for 5-6 minutes until lightly golden and no longer pink inside. Remove the chicken and set aside. In the same skillet, add the finely diced 1 whole Yellow Onion and cook for 3-4 minutes until soft and translucent.
Stir in the minced 3 cloves Garlic Cloves, chopped 2 tsp Fresh Thyme, and finely chopped 1 tsp Fresh Rosemary, cooking for 30 seconds until fragrant.
Step 2: Create the Creamy Filling
Sprinkle the 0.33 cup All-Purpose Flour over the onion mixture and stir for 1 minute to cook off the raw flour taste. Gradually whisk in the 1.5 cups Chicken Broth and 1.5 cups Whole Milk until smooth.
Bring to a simmer and cook for 3-4 minutes until the mixture thickens enough to coat the back of a spoon. Stir in the 2 cups Frozen Mixed Vegetables and the cooked chicken. Cook for another 2 minutes to heat through completely.
Remove from heat and let the filling cool slightly while you prepare the crust.
Step 3: Assemble and Air-Fry to Perfection
Unroll the 2 sheets Refrigerated Pie Crust and use one sheet to line your air fryer basket, pressing it gently into the bottom and up the sides. Spoon the filling into the crust, mounding slightly in the center.
Cut the second sheet into strips and arrange in a lattice pattern over the filling. Press the edges to seal. Whisk the 1 whole Large Egg and brush it over the crust for a golden finish. Cut a few small slits in the top to allow steam to escape.
Step 4: Air-Fry Until Golden and Bubbly
Air-fry at 375°F for 18-22 minutes, checking at the 15-minute mark to ensure even browning. The crust should be deep golden brown and the filling should be bubbling hot in the center.
If the top browns too quickly, tent loosely with foil. Let the pot pie rest for 5 minutes before serving to allow the filling to set. Each portion should have a crisp, flaky crust with a rich, creamy interior bursting with herbs and tender chicken.
Pro Tips For Making Ninja Chicken Pot Pie
- Poach the Chicken: Simmer the chicken breasts in the chicken broth for 12-15 minutes until just cooked through—this keeps them juicy and infuses the broth with extra flavor for the filling.
- Chill the Dough: If making your own crust, refrigerate the dough for at least 30 minutes before rolling it out; it prevents shrinking and makes it easier to handle, especially with all that butter.
- Avoid Lumpy Gravy: Whisk the flour into the melted butter for a full minute before slowly adding the milk and broth—this creates a smooth roux and eliminates clumps in your filling.
- Use Leftover Broth: After poaching the chicken, reserve the broth for the filling—it adds depth and saves you from opening another can or box.
Flavor Customization for This ninja chicken pot pie
Herb Swaps
Swap the fresh herbs for 1 tsp dried thyme and ½ tsp dried rosemary if that’s what you have on hand. I’ve done this in a pinch, and while it’s slightly less vibrant, it still delivers that warm, earthy depth. Just bloom them in the butter for 30 seconds to wake up the flavors. 🌿
Creamier Filling
For an ultra-decadent filling, replace ½ cup of the whole milk with heavy cream. This small change makes the sauce luxuriously velvety, perfect for special occasions. The extra fat also helps the filling stay rich and stable as it cools.
Spicy Kick
Add ½ tsp cayenne pepper or 1 diced jalapeño to the filling for a subtle heat that cuts through the creaminess. I love how the spice balances the richness without overpowering the herbs. It’s a game-changer for those who like a little fire.
Extra Veggies
Mix in 1 cup diced mushrooms or ½ cup diced celery with the onions for added texture and depth. Sauté them until tender before adding the garlic. This boosts the veggie content without altering the creamy consistency.
Cheesy Twist
Sprinkle ½ cup shredded cheddar or Gruyère over the filling before adding the top crust. The cheese melts into the filling, creating gooey pockets that pair beautifully with the flaky crust. It’s a cozy upgrade that feels indulgent.
Top Crust Flavor
Brush the top crust with 1 tbsp melted butter mixed with ½ tsp garlic powder before the egg wash. This adds a subtle savory note that complements the herby filling. The crust browns beautifully and tastes irresistibly rich. 💛
Nutrition Facts
Frequently Asked Questions
Can I use store-bought rotisserie chicken?
Yes! Use 2 cups of shredded rotisserie chicken to save time. Skip the first cooking step and add it directly to the filling. This cuts prep to under 15 minutes.
What if my filling is too thin?
Mix 1 tablespoon cornstarch with 1 tablespoon cold water and stir into the filling. Simmer for 2-3 minutes until it thickens to coat a spoon. Avoid over-thickening as it sets more while cooling.
Can I make this without the Ninja Foodi?
Assemble in a pie dish and bake at 375°F for 30-35 minutes in a conventional oven. Check for golden crust and bubbling filling.
How do I prevent a soggy bottom crust?
Pre-bake the bottom crust alone for 5 minutes at 375°F before adding filling. This creates a barrier against moisture. Also, ensure filling is slightly cooled before assembly.

- 6 Oz Chocolate Chip Cookie Recipe: Perfectly Balanced Crispy Edges and Chewy Hearts - September 25, 2026
- 6-Inch Coffee Cake Recipe: Vanilla Bean Swirls and Buttery Streusel Topping - September 25, 2026
- 1 Hour Soup Recipe: Velvety Richness Without the Wait - September 25, 2026