
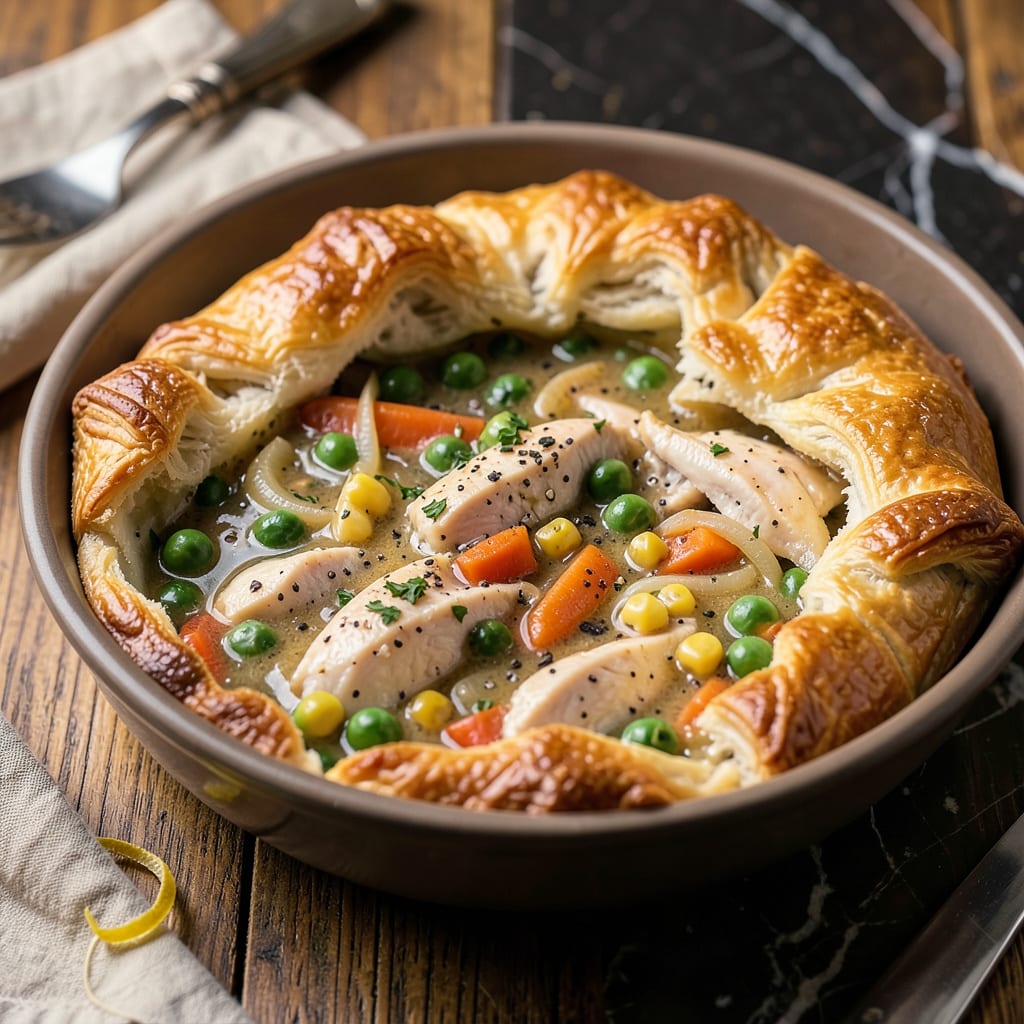
This Ninja Foodi chicken pot pie delivers the ultimate comfort food experience—flaky crust and creamy filling—without the fuss of traditional baking. The pressure cooker function ensures perfectly tender chicken and vegetables in half the time, while the air crisp feature creates that coveted golden-brown crust we all love.
The beauty of this method lies in its efficiency. Everything cooks in one pot, from sautéing aromatics to pressure-cooking the filling and crisping the crust. No need to dirty multiple dishes or monitor the oven. The result is a homemade pot pie with restaurant-quality texture and flavor, ready in under an hour.
Ingredients for Ninja Foodi Chicken Pot Pie
Everything for that creamy filling and flaky crust—just grab these staples and your Ninja Foodi does the rest.
| Ingredient | Amount | Notes |
|---|---|---|
| Boneless, Skinless Chicken Breasts 🍗 | 1 ½ lb | Cut into 1-inch cubes |
| Frozen Mixed Vegetables 🥦 | 2 cups | Peas, carrots, corn, green beans |
| Yellow Onion 🧅 | 1 whole | Diced into small pieces |
| Garlic Cloves 🧄 | 3 cloves | Minced for sautéing |
| All-Purpose Flour 🌾 | ⅓ cup | For thickening the filling |
| Chicken Broth 🍲 | 1 ½ cups | Low-sodium preferred |
| Heavy Cream 🥛 | ½ cup | Full-fat for creaminess |
| Unsalted Butter 🧈 | 4 tbsp | Divided for cooking and crust |
| Puff Pastry Sheet 🥧 | 1 sheet | Thawed according to package |
| Dried Thyme 🌿 | 1 tsp | Or substitute fresh thyme |
| Dried Rosemary 🌿 | ½ tsp | Crushed between fingers |
| Salt 🧂 | 1 tsp | Divided for seasoning |
| Black Pepper 🌶️ | ½ tsp | Freshly ground preferred |
| Olive Oil 🫒 | 1 tbsp | For sautéing aromatics |
| Egg 🥚 | 1 whole | For egg wash on crust |
[recipeingredientscaler]
The chicken and puff pastry are the MVPs here. Boneless, skinless breasts stay tender under pressure—thighs work too but might need trimming. For the pastry, Pepperidge Farm is my go-to (find it in the freezer aisle at Walmart or Kroger). Pro tip: let it thaw in the fridge overnight, not on the counter. The heavy cream is non-negotiable for that velvety filling (trust me, milk just won’t cut it).
No puff pastry? Store-bought pie crust works in a pinch—just cut into strips for a lattice top. Swap the frozen veggie mix for fresh chopped carrots, peas, and potatoes if you’ve got time (cut them small so they cook fast). Out of thyme? Poultry seasoning at half the amount covers all the herb bases. The broth can be homemade or boxed—Swanson’s or Kitchen Basics are solid choices.
Prep the filling ingredients while the Ninja Foodi preheats—saves time. Leftover pot pie keeps 3-4 days in the fridge (reheat in the air fryer for crispy crust). The unbaked pastry sheet freezes for up to 3 months, so grab an extra. I always make a double batch of filling and freeze half for next time (just add 5 minutes to the pressure cook time).
Why You’ll Love This Recipe
- One-Pot Magic: I toss the chicken, frozen veggies, and a quick onion-garlic sauté right into the Ninja Foodi—no extra bowls, no messy transfer. The flour thickens everything while it pressure cooks, so I’m not babysitting a roux on the stove.
- That Golden Crust Trick: Here’s what sold me—the buttery, flaky crust stays crisp on top while the filling turns silky from the chicken juices and garlic. My kids fight over the corner pieces where the crust gets extra browned.
- Freezer-to-Table Hero: Honestly, I double the batch and freeze half before baking. Pop it straight from freezer to Foodi on busy nights, add 10 minutes, and it’s like I planned ahead. (Yes, even on a Tuesday night.)
- $10 Feeds Four: Boneless chicken breasts on sale + store-brand frozen veggies = my go-to when the wallet’s tight. One pound of chicken stretches with the flour-thickened sauce, and nobody complains—especially with that crust.
Step-by-Step Instructions for Ninja Foodi Chicken Pot Pie
Here’s how to get that perfect golden crust and creamy filling using your Ninja Foodi.
Step 1: Sauté the Chicken and Aromatics
Start by setting your Ninja Foodi to Sauté mode on High. When the display reads HOT, add the olive oil and 2 tablespoons of the unsalted butter. Let it melt and get foamy – that’s when you know it’s ready for the chicken.
Add the 1.5 lb boneless, skinless chicken breasts (cut into 1-inch cubes) in a single layer. Don’t overcrowd the pot – work in batches if needed. Cook for 5-6 minutes, stirring occasionally, until the chicken is no longer pink on the outside. You’ll know it’s ready when the pieces develop a light golden color on the edges.
Remove the chicken with a slotted spoon and set it aside. In the same pot, add the diced yellow onion and cook for 3 minutes until it starts to soften and become translucent. Add the minced garlic cloves and cook for another 30 seconds until fragrant – you’ll smell that wonderful garlic aroma when it’s ready.
Step 2: Create the Creamy Filling
Sprinkle the 0.33 cup all-purpose flour over the onions and garlic, stirring constantly for 1 minute to cook off the raw flour taste. This creates a roux that will thicken your filling beautifully. The mixture should look like wet sand when it’s ready.
Slowly pour in the 1.5 cups chicken broth, whisking continuously to prevent lumps from forming. Add the dried thyme, dried rosemary, salt, and black pepper. Stir in the 2 cups frozen mixed vegetables and the cooked chicken. Bring everything to a simmer.
Once simmering, stir in the 0.5 cup heavy cream and the remaining 2 tablespoons unsalted butter. Let it cook for 3-4 minutes until the sauce thickens enough to coat the back of a spoon. You’re looking for a creamy consistency that’s rich but still pourable – it will thicken more as it cooks with the pastry.
Step 3: Prepare and Add the Puff Pastry
While the filling simmers, unroll your puff pastry sheet on a lightly floured surface. If you’re using a standard Ninja Foodi pot (6.5 quart), the sheet should fit perfectly with just a little overhang. For smaller models, you might need to trim it slightly – just leave about 1-inch overhang all around.
Beat the egg with 1 tablespoon water to make an egg wash. Brush this lightly over the entire surface of the puff pastry – this gives you that beautiful golden-brown finish. Cut a few small slits in the center to allow steam to escape during cooking.
Carefully place the puff pastry over the hot filling, letting the edges hang over the sides. Don’t worry about making it perfect – the rustic look adds to the homemade charm. The pastry should float on top of the filling, not sink into it.
Step 4: Pressure Cook to Perfection
Secure the pressure lid on your Ninja Foodi and set the valve to Seal. Cook on High Pressure for 8 minutes. It takes about 10 minutes to come to pressure, then the cooking time will start counting down. You’ll hear the pressure building – that’s normal!
When the cooking time is up, let the pressure release naturally for 5 minutes, then quick-release any remaining pressure. The pot pie is done when the pastry is deep golden brown and puffed up beautifully. You’ll see the filling bubbling slightly through the slits you cut earlier.
Let it rest for 5 minutes before serving – this helps the filling set slightly so it doesn’t all run out when you cut into it. The pastry should be crisp and flaky on top, while the filling underneath remains creamy and rich. Each spoonful should give you a perfect balance of tender chicken, vegetables, and that wonderful creamy sauce.
Storing and Reheating This Recipe
Refrigerator Storage
Once cooled to room temperature (about 2 hours), transfer your pot pie to an airtight container. I use glass containers with snap-tight lids to keep everything fresh. The filling stays creamy for 3-4 days in the fridge, though the puff pastry loses some crispness. Honestly, I think it tastes even better the next day as flavors meld together. ❄️
Freezer Storage
For longer storage, freeze individual portions in freezer-safe containers for up to 3 months. I recommend Souper Cubes or similar silicone molds—they’re perfect for single servings. The puff pastry doesn’t freeze well once baked, so I freeze just the filling and make fresh pastry when reheating. Label with the date—trust me, you’ll forget otherwise!
Reheating in Ninja Foodi
Place leftovers in your Ninja Foodi with 1 tablespoon water in the bottom. Use the Air Crisp function at 350°F for 8-10 minutes to restore that crispy crust. If you’re reheating just the filling, 3 minutes on Sauté mode with a splash of broth keeps it creamy. I always check the center with a spoon—it should be steaming hot throughout. 🔥
Oven Reheating
Preheat your oven to 375°F and place pot pie portions on a baking sheet. Cover loosely with foil to prevent drying, then bake for 15-20 minutes. For the last 5 minutes, remove the foil to crisp the pastry. This method works great if you’re reheating multiple servings at once. The crust won’t be quite as flaky as fresh, but it’s still delicious.
Microwave Quick Fix
For a single serving in a hurry, microwave on 70% power for 2-3 minutes, stirring halfway. The pastry will soften, but the filling stays creamy. I add a pat of butter on top before microwaving—it helps restore some richness. Not ideal for texture, but perfect when you’re short on time. ⏰
Reviving the Crust
If your stored pot pie crust loses its crispness, here’s my trick: place portions under the broiler for 1-2 minutes while watching closely. Alternatively, use your toaster oven at 400°F for 3-4 minutes. The key is high, dry heat to bring back that golden crunch without drying out the filling. Works like magic every time!
Nutrition Facts
Frequently Asked Questions
Can I use frozen chicken for this recipe?
Yes, but thaw it completely first in the fridge overnight. Frozen chicken releases too much liquid during cooking, which can make your filling watery. If you’re in a hurry, use the defrost setting on your microwave, then pat the chicken dry before cubing.
Why did my puff pastry stay soggy?
This usually happens when steam gets trapped. Cut 3-4 slits in the pastry before cooking, and don’t skip the egg wash—it creates a protective barrier. Also, ensure your filling is thick enough before adding the pastry; it should coat the back of a spoon.
Can I make this ahead of time?
Prepare the filling up to 2 days ahead and store it in the fridge. Assemble and cook the pot pie when ready. For the pastry, keep it unrolled in the fridge until needed—it stays fresh for 3 days in its packaging.
What if I don’t have heavy cream?
Substitute with half-and-half or whole milk mixed with 1 tablespoon melted butter per cup. The filling won’t be quite as rich, but it’ll still be delicious. Avoid low-fat milk—it can make the sauce too thin.
How do I clean my Ninja Foodi after making this?
Let the pot cool slightly, then fill with warm, soapy water and let soak for 15 minutes. Use a nylon scrubber for stuck bits—the non-stick coating is durable but avoid metal utensils. The lid and sealing ring are dishwasher-safe on the top rack.

- 8 Bean Soup Recipe Crock Pot: Hearty Vegetable Medley in One Pot - September 25, 2026
- 4C Bread Crumbs Meatballs Recipe: Crispy Crust and Juicy Centers - September 25, 2026
- 6 Oz Chocolate Chip Cookie Recipe: Perfectly Balanced Crispy Edges and Chewy Hearts - September 25, 2026