
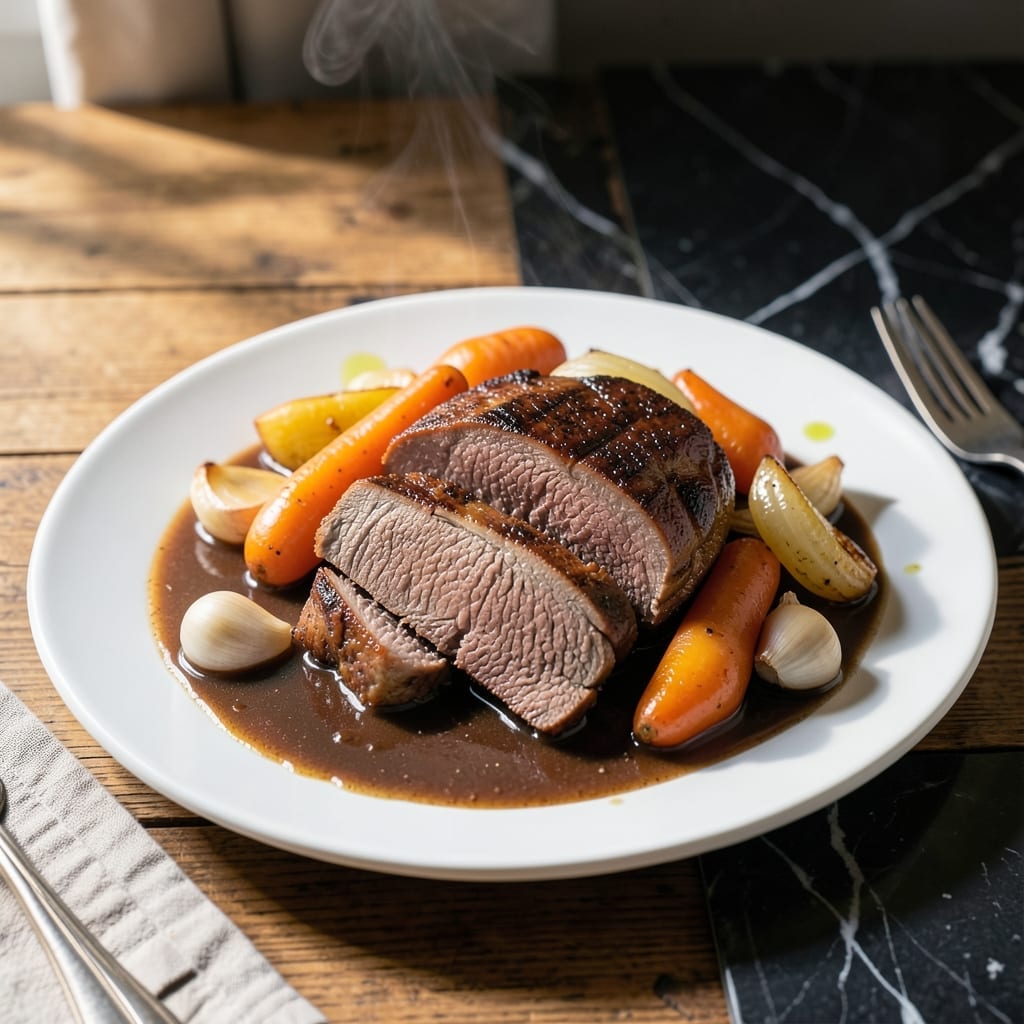
This Ninja Foodi pot roast delivers tender, fall-apart beef with root vegetables, all in one appliance. The pressure cooker function transforms tough cuts into melt-in-your-mouth perfection in a fraction of traditional time.
I developed this method to maximize flavor while keeping cleanup minimal. The searing step builds a deep fond that becomes the base for a rich, savory gravy. Root vegetables cook alongside the beef, absorbing all those delicious juices.
What you get is a complete meal with tender beef, carrots, potatoes, and onions in a velvety sauce. The Ninja Foodi’s versatility means you can sear, pressure cook, and keep warm all in one pot.
Perfect for Sunday dinner or a comforting weeknight meal. The results rival any slow-cooked version.
Ingredients for Ninja Foodi Pot Roast
Everything you need for a complete pot roast meal in one appliance. Simple, hearty, and packed with flavor.
| Ingredient | Amount | Notes |
|---|---|---|
| Beef Chuck Roast 🥩 | 3 lb | Well-marbled, trimmed of excess fat |
| Kosher Salt 🧂 | 2 tsp | Diamond Crystal preferred for even seasoning |
| Black Pepper 🌶️ | 1 tsp | Freshly ground for best flavor |
| Garlic Cloves 🧄 | 6 cloves | Peeled and smashed for robust flavor |
| Yellow Onions 🧅 | 2 whole | Medium-sized, quartered with skin on |
| Carrots 🥕 | 4 whole | Large, cut into 3-inch chunks |
| Yukon Gold Potatoes 🥔 | 1 ½ lb | Halved if small, quartered if large |
| Beef Broth 💧 | 2 cups | Low-sodium preferred for seasoning control |
| Tomato Paste 🍅 | 2 tbsp | For depth in the gravy base |
| Worcestershire Sauce 🫒 | 1 tbsp | Adds umami complexity to the sauce |
| Dried Thyme 🌿 | 1 tsp | Crushed between fingers to release oils |
| Dried Rosemary 🍃 | 1 tsp | Crushed for maximum aroma |
| Bay Leaves 🌿 | 2 whole | Removed before serving |
| Olive Oil 🫒 | 2 tbsp | For searing the beef |
| Red Wine 🍷 | ½ cup | Dry variety for deglazing |
The beef is the star here. Chuck roast with good marbling is non-negotiable—it breaks down beautifully under pressure. Costco and Whole Foods both carry well-marbled options, but your local butcher can hook you up with a perfect piece too. The Yukon Golds hold their shape better than Russets (which can get mealy), and their buttery flavor pairs perfectly with the beef.
Out of red wine? Substitute with additional beef broth plus 1 tbsp balsamic vinegar for similar depth. No fresh garlic? Garlic powder at one-third the amount works in a pinch, but fresh is worth it. If you can’t find Yukon Golds, red potatoes are a solid backup. The Worcestershire sauce adds that signature savory kick—Annie’s makes a great vegetarian version if needed.
Leftovers taste even better the next day—4-5 days in the fridge or 3 months frozen. The gravy thickens as it cools, so thin with a splash of broth when reheating. I always make extra; this freezes beautifully for easy future meals.
Why You’ll Love This Recipe
- Set It and Forget It: I toss in the chuck roast, onions, and garlic, press a button, and the Ninja Foodi does the rest while I do literally anything else.
- Garlic-Infused Comfort: The slow-cooked garlic and onions turn the beef so tender it falls apart, and the juices are basically liquid gold for dipping.
- Sunday Dinner, Any Day: Between us, I’ve served this for lazy Sundays and impromptu dinner parties—always disappears first.
- Leftovers for Days: Honestly, it tastes even better the next day in sandwiches or over mashed potatoes, and my wallet loves the stretch.
Step-by-Step Instructions for Ninja Foodi Pot Roast
Here’s how I achieve fall-apart tender beef with rich, savory vegetables every time.
Step 1: Sear the Beef Chuck Roast to Lock in Flavor
Select the “Sear/Sauté” function on your Ninja Foodi and set to medium-high heat. Add the 2 tbsp olive oil and let it shimmer. Pat the 3 lb Beef Chuck Roast dry with paper towels, then season aggressively on all sides with the 2 tsp Kosher Salt and 1 tsp Black Pepper.
Place the roast in the pot and sear undisturbed for 4-5 minutes per side until a deep, mahogany crust forms. This creates the Maillard reaction that builds complex flavor. You’ll know it’s ready to flip when it releases easily from the pot. Transfer the beef to a plate and set aside.
Step 2: Build the Aromatic Base with Vegetables and Deglazing
In the same pot, add the 2 whole Yellow Onions (quartered with skin on), 4 whole Carrots (cut into 3-inch chunks), and 6 cloves Garlic Cloves (peeled and smashed). Sauté for 3-4 minutes until the onions begin to soften and develop color.
Pour in the 0.5 cup Red Wine and scrape the browned bits from the bottom with a wooden spoon—this is where the magic happens. Let it simmer for 2 minutes until reduced by half. Stir in the 2 tbsp Tomato Paste, 1 tbsp Worcestershire Sauce, 1 tsp Dried Thyme, 1 tsp Dried Rosemary, and 2 whole Bay Leaves.
Step 3: Pressure Cook to Tender Perfection
Return the seared beef to the pot along with the 1.5 lb Yukon Gold Potatoes (halved or quartered depending on size). Pour in the 2 cups Beef Broth, ensuring the liquid covers the bottom but doesn’t exceed the max fill line. Secure the pressure cooker lid and set to high pressure for 60 minutes.
Once the cooking cycle completes, allow a natural pressure release for 15 minutes, then quick-release any remaining pressure. The beef should be fork-tender at this point—test it by inserting a fork and twisting gently; it should pull apart with no resistance.
Step 4: Reduce the Gravy and Serve
Carefully remove the beef and vegetables to a serving platter. If the gravy is too thin, select the “Sear/Sauté” function again and simmer the liquid for 5-7 minutes until it reaches your desired consistency. Remove and discard the bay leaves before serving.
Slice the beef against the grain and arrange it with the vegetables. Spoon the rich, reduced gravy over the top. The onions should be meltingly tender, the carrots and potatoes perfectly cooked through, and the beef so tender it nearly dissolves on your tongue. Serve immediately while hot.
Pro Tips For Making Ninja Foodi Pot Roast
- Sear the Chuck: I learned this the hard way—skipping the sear gives you a bland, gray roast. Crank the Ninja Foodi to “Sear/Sauté” and brown that chuck roast on all sides for 3-4 minutes per side before pressure cooking.
- Smash the Garlic: Sounds weird, but it works: lightly crush the garlic cloves with the side of your knife before tossing them in. It releases way more flavor into the pot without burning.
- Don’t Overfill: After burning three batches, I finally figured out the Ninja Foodi needs at least 1 cup of liquid but no more than 2/3 full—any more and you’ll get the dreaded “burn” error.
- Use Cold Water: For a faster sear and less sticking, pat the chuck roast bone-dry and use cold water or beef broth when deglazing—hot liquid can warps the pot and slows the sear.
Make-Ahead Tips for This Dish
Prep Ahead Strategy
You can prep all your vegetables the night before—peel and chop the carrots, onions, and potatoes, then store them in separate containers in the fridge. This saves 15-20 minutes on cooking day. I keep mine in glass containers to prevent odors.
Season the Roast Early
Season your 3 lb Beef Chuck Roast with the 2 tsp Kosher Salt and 1 tsp Black Pepper up to 12 hours before cooking. This dry brine penetrates the meat deeper, enhancing flavor and tenderness. Just cover and refrigerate until ready to sear. 💡
Pre-Measure Ingredients
Measure out your 2 tbsp Tomato Paste, 1 tbsp Worcestershire Sauce, and spices the night before. Store in small bowls or ramekins covered with plastic wrap. This mise en place approach keeps cooking day stress-free and efficient.
Partial Cooking Method
Complete the searing and deglazing steps in the morning, then pause cooking. Refrigerate the pot with all ingredients until 2-3 hours before serving. Finish with the 60-minute pressure cook cycle as usual. The flavors will develop even more.
Gravy Prep Tip
If making this for a crowd, prepare the gravy base ahead. After cooking, strain and reduce the liquid, then store separately. Reheat and pour over freshly cooked beef and veggies to maintain the best texture. This works for up to 3 days in advance. ❄️
Reheating for Crowds
For parties, cook the roast a day early. Slice and store in the gravy in the fridge. Reheat in your Ninja Foodi using the “Slow Cook” function on low for 1-2 hours. The beef stays moist, and the flavors meld beautifully.
Nutrition Facts
Frequently Asked Questions
Can I use a different cut of beef?
Chuck roast works best, but beef brisket or bottom round are good alternatives. Avoid lean cuts like sirloin—they won’t get as tender under pressure. Marbling is key for that fall-apart texture.
Do I need to brown the meat first?
Always sear the beef first! This builds a flavorful crust and fond for rich gravy. Skip this step, and your roast will lack depth. The 4-5 minutes per side is worth it.
Can I cook this with frozen beef?
Yes, but thaw first for even cooking. If in a rush, add 10-15 minutes to the high pressure time. Never pressure cook frozen meat without extra liquid.
How do I thicken the gravy?
Simmer uncovered on “Sear/Sauté” for 5-7 minutes after cooking. For faster results, mix 1 tbsp cornstarch with cold water and stir in.

- 6 Oz Chocolate Chip Cookie Recipe: Perfectly Balanced Crispy Edges and Chewy Hearts - September 25, 2026
- 6-Inch Coffee Cake Recipe: Vanilla Bean Swirls and Buttery Streusel Topping - September 25, 2026
- 1 Hour Soup Recipe: Velvety Richness Without the Wait - September 25, 2026