
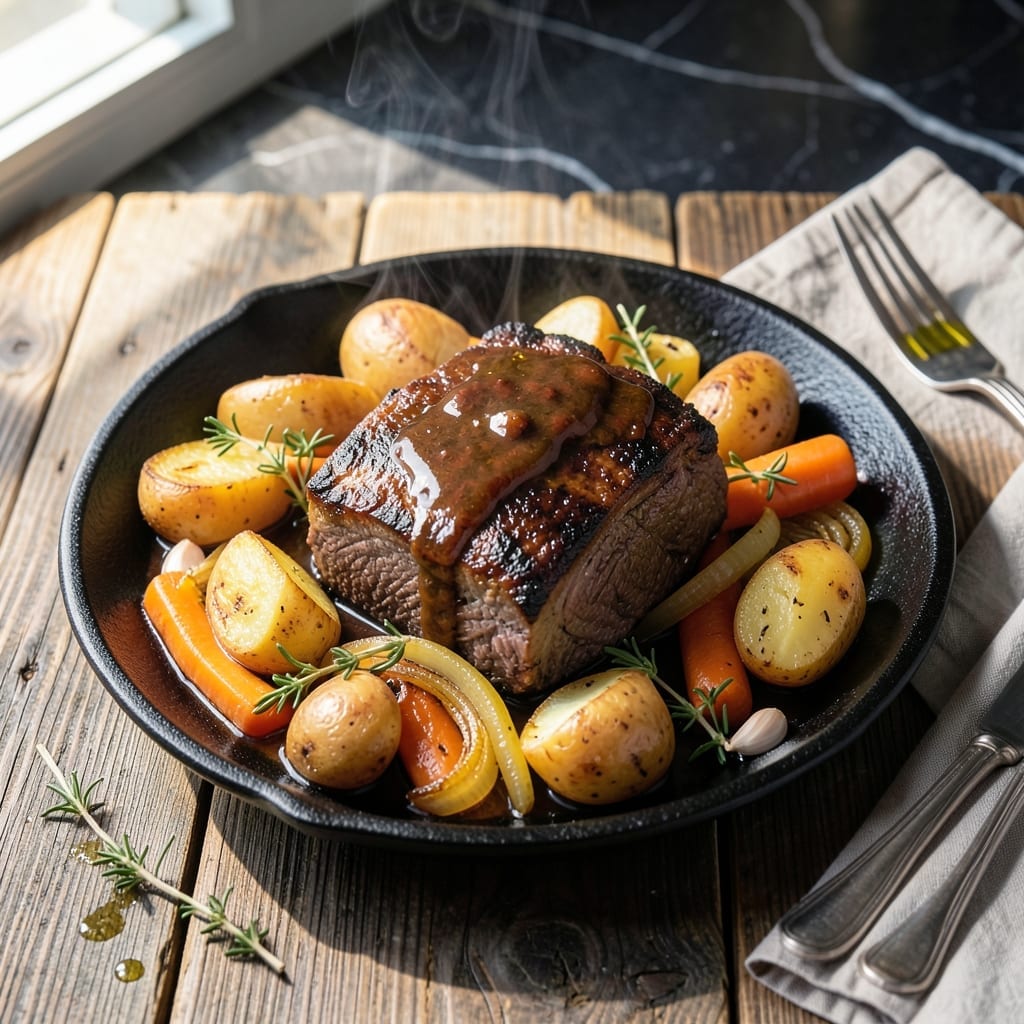
I used to think pot roast required all day in the oven, but my Ninja pressure cooker changed everything.
This method delivers fall-apart tender beef with rich, caramelized flavors in a fraction of the time. The pressure cooker locks in moisture while breaking down tough cuts into melt-in-your-mouth perfection.
Vegetables soak up the beefy broth, turning potatoes and carrots into flavor-packed bites. No babysitting required—just set the timer and let the cooker do its magic.
You’ll get a complete meal that tastes like it simmered for hours, ready when you need it. Here’s how to make it happen.
Ingredients for Ninja Pressure Cooker Pot Roast
Pantry staples meet fresh veggies for a hearty, comforting meal in no time.
| Ingredient | Amount | Notes |
|---|---|---|
| Chuck Roast 🥩 | 3 lb | Well-marbled, trimmed of excess fat |
| Russet Potatoes 🥔 | 1 ½ lb | Peeled and cut into chunks |
| Carrots 🥕 | 4 whole | Peeled and cut into thick pieces |
| Yellow Onion 🧅 | 1 whole | Large, roughly chopped |
| Garlic Cloves 🧄 | 4 cloves | Minced for depth of flavor |
| Beef Broth 💧 | 2 cups | Low-sodium preferred for control |
| Red Wine 🍷 | ½ cup | Dry variety like Cabernet |
| Tomato Paste 🍅 | 2 tbsp | For rich, deep flavor |
| Worcestershire Sauce 🥫 | 1 tbsp | Adds umami complexity |
| Dried Thyme 🌿 | 1 tsp | Crushed between fingers |
| Dried Rosemary 🌿 | 1 tsp | Crushed for better release |
| Bay Leaf 🍃 | 1 whole | Fresh or dried works |
| Olive Oil 🫒 | 2 tbsp | For searing the beef |
| Salt 🧂 | 1 ½ tsp | Kosher or sea salt |
| Black Pepper 🌶️ | 1 tsp | Freshly ground preferred |
The beef is the hero here. Chuck roast with good marbling breaks down beautifully under pressure—avoid lean cuts like sirloin. I grab mine from Costco for the best value, but any grocery store with a solid butcher counter will do. Look for a piece that’s bright red (not brown) with visible fat streaks. 3 lbs feeds four with leftovers for sandwiches tomorrow.
No red wine? Beef broth with a splash of balsamic vinegar works in a pinch. Swap the potatoes for sweet potatoes if you’re feeling adventurous. Dried herbs at half the amount if you’re using fresh. The tomato paste is non-negotiable though—it’s what gives the sauce its deep, rich color. If you’re out, Trader Joe’s sells it in convenient tubes.
Leftovers taste even better the next day. Store in the fridge for up to 4 days or freeze for 3 months. Pro tip: shred the beef before storing—makes reheating and serving a breeze. Always let it cool completely before refrigerating (don’t skip this part).
Why You’ll Love This Recipe
- Set It and Forget: The pressure cooker does all the work while I prep the rest of dinner.
- Feeds a Crowd: I make this for Sunday suppers, and it’s just as good reheated for lunch the next day.
Instructions
Here’s the method I use to turn tough chuck into fall-apart tender beef with rich, savory flavor.
Step 1: Sear the Chuck Roast to Lock in Flavor
Set your Ninja Pressure Cooker to Sauté mode on high heat. Add the 2 tbsp olive oil and let it get shimmering hot. Pat the 3 lb chuck roast dry with paper towels—this ensures a good sear. Season both sides with 1.5 tsp salt and 1 tsp black pepper.
Sear the roast for 4-5 minutes per side until deeply browned. Don’t move it around too much—let it develop a rich crust. This step builds the foundation of flavor for your pot roast. Once browned, transfer the beef to a plate and set aside.
Step 2: Build the Flavor Base with Aromatics
In the same pot with the rendered fat, add the roughly chopped yellow onion, 4 whole carrots, and 4 cloves garlic. Sauté for 3-4 minutes until the onion starts to soften and turn translucent. The carrots will still be firm—that’s fine.
Stir in the 2 tbsp tomato paste, 1 tbsp Worcestershire sauce, 1 tsp dried thyme, 1 tsp dried rosemary, and 1 whole bay leaf. Cook for 1 minute until the tomato paste darkens slightly and becomes fragrant. This blooms the spices and deepens the flavor.
Step 3: Deglaze and Pressure Cook
Pour in the 0.5 cup red wine and scrape the bottom of the pot with a wooden spoon to release all the browned bits. Let the wine simmer for 1-2 minutes until it reduces by half. Then add the 2 cups beef broth and stir to combine.
Return the seared chuck roast to the pot along with the 1.5 lb russet potatoes. Secure the pressure cooker lid and set the valve to Seal. Cook on high pressure for 60 minutes. The potatoes should be fork-tender and the beef should yield easily to pressure.
Step 4: Natural Release and Serve
Let the pressure release naturally for 15 minutes, then carefully switch the valve to Vent to release any remaining pressure. Open the lid and remove the bay leaf. The beef should be incredibly tender—if it isn’t, seal the pot again and cook for an additional 10-15 minutes.
Transfer the chuck roast to a cutting board and shred or slice it against the grain. Serve the beef with the potatoes, carrots, and the rich, savory cooking liquid spooned over the top. The meat should melt in your mouth with every bite.
Pro Tips For Making Ninja Pressure Cooker Pot Roast
- Sear the Chuck First: I learned this the hard way—browning the chuck roast in the pressure cooker before adding liquids creates a deep, rich fond that makes the gravy taste like it simmered all day.
- Cut Potatoes Larger: Russets turn to mush if diced too small in the pressure cooker; aim for 2-inch chunks so they hold their shape and soak up flavor without dissolving.
- Skip the Overfill: Resist the urge to cram in extra veggies—the Ninja’s max fill line is there for a reason, and exceeding it means uneven cooking or a pressure error.
- Use Cold Water: After searing, deglaze with ½ cup cold water to stop the cooking process instantly and lift all those browned bits—hot water just steams them away.
Dietary Considerations for This Dish
Gluten-Free Adaptation
This dish is naturally gluten-free as written, since all ingredients—beef, vegetables, broth, and spices—contain no gluten. Just double-check your beef broth and Worcestershire sauce labels, as some brands add gluten-containing thickeners. I prefer Annie’s or Pacific Foods broths for peace of mind. 💡
Low-Carb Version
To reduce carbs, swap the 1.5 lb russet potatoes for 1 lb radishes or turnips. They hold up well under pressure and soak up the flavors beautifully. You could also add extra carrots or cauliflower florets for bulk without the carb load.
Dairy-Free Notes
There’s no dairy in this recipe, so it’s already dairy-free! The richness comes from the beef and its juices, so no substitutions are needed. If you’re serving with bread or rolls, just opt for a dairy-free variety.
Lower-Sodium Option
Use low-sodium beef broth and reduce the added salt to 1 tsp total. Skip the Worcestershire sauce or replace it with coconut aminos for a lower-sodium alternative. The dish will still be packed with flavor from the searing and aromatics.
Vegetarian Alternative
Swap the beef for 3 lb portobello mushrooms or jackfruit. Sear the mushrooms first to develop depth, then pressure cook for 15 minutes. Use vegetable broth instead of beef broth, and add a splash of soy sauce for umami. 🌱
Nutrition Facts
Frequently Asked Questions
Can I use a different cut of beef?
Stick with tough, marbled cuts like brisket or short ribs. Avoid lean cuts like sirloin—they won’t break down as well. Chuck roast is ideal for its fat content and flavor.
What if my beef isn’t tender after cooking?
Seal the pot again and cook for an additional 10-15 minutes on high pressure. Older or leaner cuts may need extra time to become fork-tender.
Can I add other vegetables?
Try parsnips, celery, or mushrooms. Add hearty veggies at the start and delicate ones like peas during the last 5 minutes.
How do I store leftovers?
Let cool completely, then store in an airtight container in the fridge for up to 4 days or freeze for 3 months. Reheat gently to preserve tenderness.

- 6 Oz Chocolate Chip Cookie Recipe: Perfectly Balanced Crispy Edges and Chewy Hearts - September 25, 2026
- 6-Inch Coffee Cake Recipe: Vanilla Bean Swirls and Buttery Streusel Topping - September 25, 2026
- 1 Hour Soup Recipe: Velvety Richness Without the Wait - September 25, 2026