
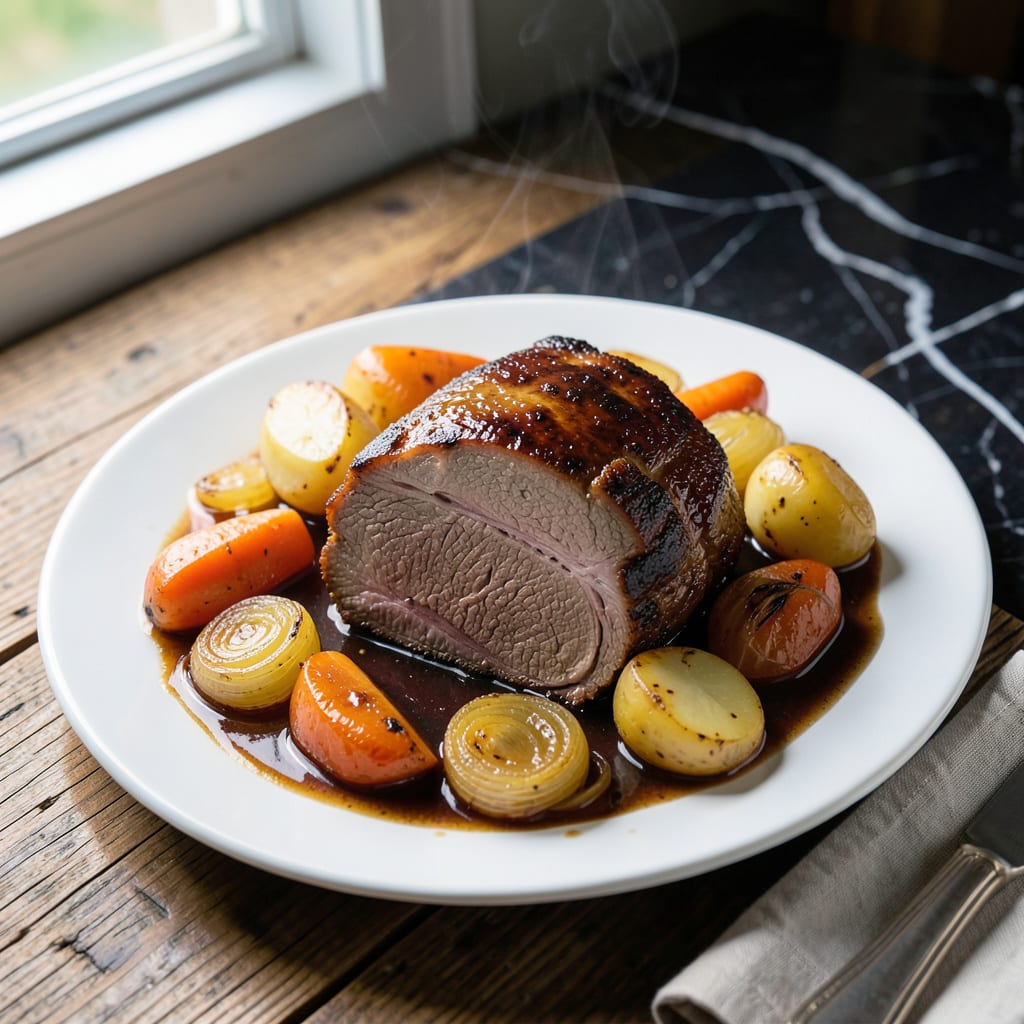
This pot roast delivers set-and-forget convenience with tender results every time. The Nuwave multi-cooker handles the heavy lifting, transforming tough cuts into melt-in-your-mouth perfection.
With simple prep and precise temperature control, you’ll achieve deeply flavored meat and vegetables. The hands-off approach makes it ideal for busy days without sacrificing quality.
Ingredients for Nuwave Pot Roast
Tough cuts turn tender with these simple, flavor-packed ingredients in your multi-cooker.
| Ingredient | Amount | Notes |
|---|---|---|
| Chuck Roast 🥩 | 3 lb | Well-marbled, trimmed of excess fat |
| Carrots 🥕 | 4 whole | Peeled, cut into 2-inch chunks |
| Yellow Onions 🧅 | 2 whole | Large, quartered |
| Yukon Gold Potatoes 🥔 | 1 ½ lb | Peeled, cut into large chunks |
| Beef Broth 🥣 | 2 cups | Low-sodium preferred |
| Red Wine 🍷 | ½ cup | Dry variety like Cabernet |
| Tomato Paste 🍅 | 2 tbsp | For depth of flavor |
| Garlic Cloves 🧄 | 5 cloves | Minced or smashed |
| Worcestershire Sauce 🫒 | 2 tbsp | Adds umami complexity |
| Dried Thyme 🌿 | 1 tsp | Or 1 tbsp fresh thyme |
| Dried Rosemary 🍃 | 1 tsp | Crushed between fingers |
| Bay Leaves 🌿 | 2 whole | Removed before serving |
| Olive Oil 🫒 | 2 tbsp | For searing roast |
| Kosher Salt 🧂 | 1 ½ tsp | Plus more to taste |
| Black Pepper 🌶️ | 1 tsp | Freshly cracked preferred |
The chuck roast is non-negotiable here—look for good marbling at Costco or your butcher counter. It’s the fat that renders down and keeps the meat moist during the long cook. I always grab a piece that’s at least 3 pounds (bigger is fine, just adjust time). The beef broth matters too—Better Than Bouillon is my go-to for depth without the salt overload.
No red wine? Extra beef broth with a splash of balsamic vinegar works in a pinch. Swap Yukon Golds for russets or sweet potatoes if that’s what you’ve got. Fresh herbs can replace dried at a 1:3 ratio (so 1 tbsp fresh thyme for 1 tsp dried). The tomato paste is worth the can—squeeze tubes (like from Amoretti) keep forever in the fridge.
Leftovers taste even better the next day. Store in an airtight container for up to 4 days in the fridge, or freeze for 3 months. The potatoes soak up all that juicy flavor—perfect for quick reheating.
Why You’ll Love This Recipe
- Set and Forget: I just toss the chuck roast, carrots, onions, and potatoes in the NuWave, pour over the beef broth, and let it work its magic—no babysitting required.
- Fall-Apart Tender: The chuck roast slow-cooks so perfectly it practically melts in your mouth, and the Yukon Golds soak up all that rich, beefy flavor.
- Feeds the Whole Crew: Honestly, this one pot wonder serves my family of five with enough left for lunches the next day.
- Budget-Friendly Comfort: A cheap cut of chuck turns into a showstopper, and those simple veggies stretch the meal without stretching my wallet.
Step-by-Step Instructions for NuWave Pot Roast
This hands-off method delivers fall-apart tender meat with rich, deeply flavored vegetables.
Step 1: Sear and Season the Chuck Roast
Set your NuWave to SEAR function at 400°F. Pat the 3 lb chuck roast dry with paper towels—this ensures a proper sear. Season all sides generously with the 1.5 tsp kosher salt and 1 tsp black pepper, pressing the seasoning into the meat so it adheres well.
Add the 2 tbsp olive oil to the NuWave pot. When the oil shimmers, sear the chuck roast on all sides for 3-4 minutes per side until deeply browned. You want a rich crust—this builds the flavor foundation for your dish. Remove the roast and set aside temporarily.
Step 2: Build the Flavor Base
With the NuWave still on SEAR, add the 2 whole yellow onions, 4 whole carrots, and 1.5 lb Yukon Gold potatoes to the pot. Sauté for 5 minutes, stirring occasionally, until the onions begin to soften and develop some color. This step enhances their natural sweetness and prevents a raw taste in the final dish.
Stir in the 2 tbsp tomato paste, 5 cloves garlic cloves, 1 tsp dried thyme, 1 tsp dried rosemary, and 2 whole bay leaves. Cook for 1-2 minutes until fragrant—you’ll smell the herbs bloom, which means their oils are releasing and the flavors are intensifying.
Step 3: Deglaze and Add Liquids
Pour in the 0.5 cup red wine and use a wooden spoon to scrape up all the browned bits from the bottom of the pot. These fond bits are packed with flavor and will dissolve into the sauce. Let the wine simmer for 2-3 minutes until reduced by half.
Add the 2 cups beef broth and 2 tbsp Worcestershire sauce, stirring to combine. The liquid should come about halfway up the vegetables. Return the seared chuck roast to the pot, nestling it into the vegetables and liquid. This ensures even cooking and maximum flavor infusion.
Step 4: Pressure Cook to Perfection
Secure the NuWave lid and set the valve to SEALING. Select the PRESSURE function and set the timer for 60 minutes on HIGH. The pot roast will cook under pressure, breaking down the connective tissue and transforming the meat into a tender, juicy masterpiece.
Once the cooking cycle completes, let the pressure release naturally for 15 minutes, then quick-release any remaining pressure. Open the lid carefully, tilting it away from your face to avoid the hot steam. The chuck roast should be fork-tender—easily pulling apart with minimal effort.
Step 5: Rest and Serve
Remove the 2 whole bay leaves and discard them. Transfer the chuck roast to a cutting board and let it rest for 10 minutes before slicing or shredding. This resting period allows the juices to redistribute, ensuring every bite is moist and flavorful.
Serve the pot roast with the vegetables and a generous ladle of the cooking liquid spooned over the top. The sauce should be rich and deeply flavored, with the vegetables tender but still holding their shape. This dish tastes even better the next day, as the flavors continue to meld together.
Pro Tips For Making Nuwave Pot Roast
- Sear the Chuck First: I learned this the hard way—searing the chuck roast in the NuWave for 5-7 minutes per side before slow cooking locks in way more flavor. The Maillard reaction on that beef is what gives your pot roast depth.
- Cut Potatoes Evenly: After ending up with half-mushy, half-crunchy potatoes too many times, I now cut Yukon Golds into 2-inch chunks so they cook through at the same rate as the carrots and onions.
- Skip the Cold Broth: Sounds weird, but it works: use room temperature or warm beef broth instead of cold straight from the fridge—it helps the NuWave maintain steady cooking temps from the start.
- Rest Before Slicing: Give the chuck roast a solid 10 minutes under foil after cooking—yes, even if you’re starving—otherwise all those juices you worked for will end up on the cutting board.
Make-Ahead Tips for Leftovers
Overnight Prep
Trim and season the 3 lb chuck roast the night before. Store it in the fridge in a sealed container with the dry rub. This lets the salt penetrate deeply for more flavorful meat. I also prep all vegetables and store them separately.
Morning Assembly
In the morning, simply sear the pre-seasoned roast in your NuWave at 400°F for 3-4 minutes per side. Then add all prepped ingredients and liquids. This cuts active morning prep to under 10 minutes. 💡
Slow Cook Option
Instead of pressure cooking, use the NuWave SLOW COOK function on LOW for 8 hours. Add all ingredients at once in the morning. The flavors develop beautifully while you’re at work.
Partial Prep
If short on time, just prep the vegetables the night before. Store them submerged in cold water in the fridge to prevent browning. The next day, your searing and assembly will still go quickly.
Make-Ahead Sauce
The cooking liquid makes incredible gravy. After cooking, strain and reduce it on the SEAR function for 10 minutes. Store gravy separately for up to 4 days and reheat gently before serving.
Freezer Meal
Assemble everything raw in a freezer bag—roast, veggies, and liquids. Freeze flat for up to 3 months. Thaw overnight in the fridge, then pressure cook as usual. ❄️
Nutrition Facts
Frequently Asked Questions
What if my meat isn’t tender after cooking?
Undercooked pot roast needs more time. Return it to the NuWave with extra 1 cup broth and pressure cook for another 20-30 minutes. Tough cuts like chuck require time to break down properly.
Can I use a different cut of beef?
Brisket or round roast work, but avoid lean cuts like sirloin. They lack the fat and connective tissue that make pot roast so tender. Stick with well-marbled options for best results.
How do I thicken the cooking liquid?
After removing the meat, set NuWave to SEAR and simmer the liquid uncovered for 10 minutes. For faster results, mix 1 tbsp cornstarch with water before stirring in.

- 4C Bread Crumbs Meatballs Recipe: Crispy Crust and Juicy Centers - September 25, 2026
- 6 Oz Chocolate Chip Cookie Recipe: Perfectly Balanced Crispy Edges and Chewy Hearts - September 25, 2026
- 6-Inch Coffee Cake Recipe: Vanilla Bean Swirls and Buttery Streusel Topping - September 25, 2026