
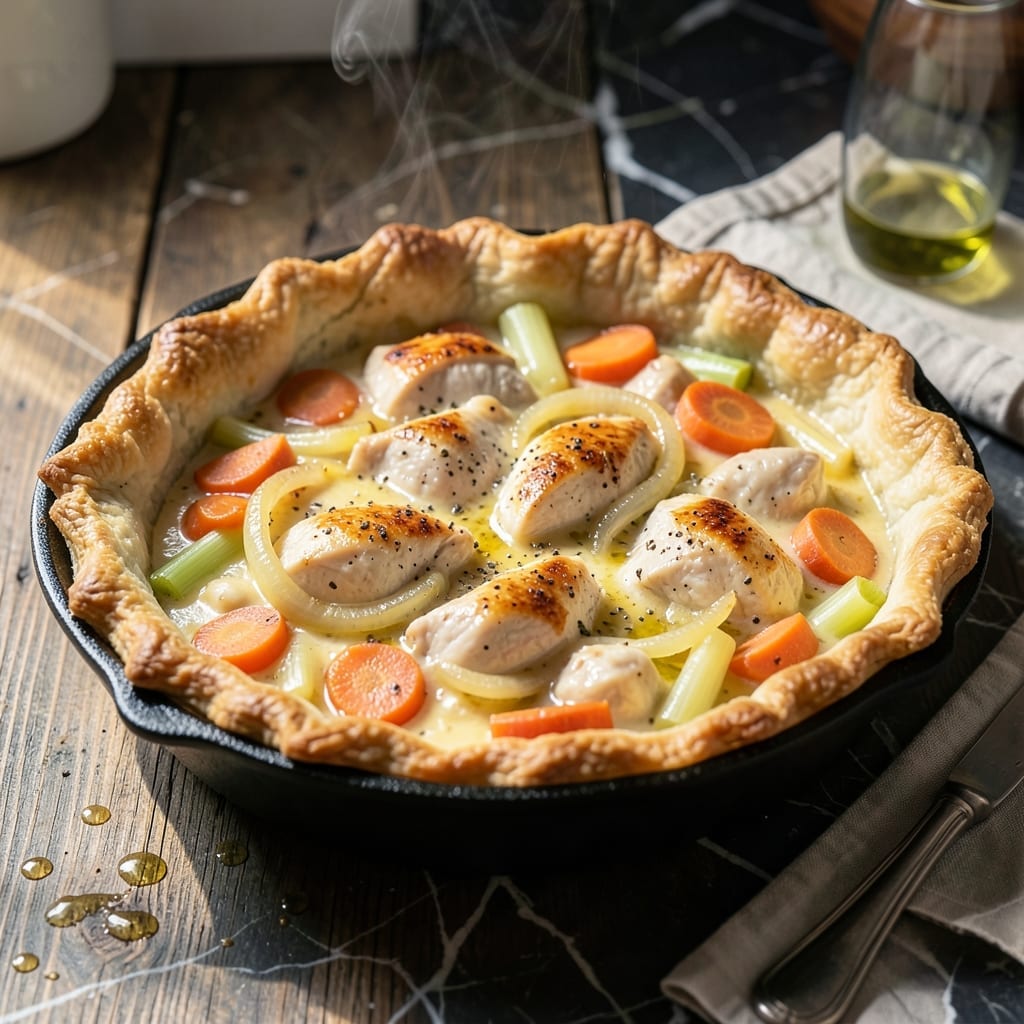
There’s something deeply satisfying about a flaky crust enveloping a creamy chicken filling, all made in one pan for easy cleanup. This recipe transforms classic comfort food into a practical weeknight meal without sacrificing quality.
The secret lies in layering store-bought pie crust over a rich vegetable and chicken mixture, then baking until golden. I’ve streamlined the process to maintain all the traditional flavors while simplifying the method.
You’ll achieve that perfect balance of crisp pastry and thick, velvety filling in under an hour. The aroma alone makes this dish worth the effort.
Serve straight from the pan for a meal that feels special but requires minimal work. Here’s how to make it happen.
Ingredients for One Pan Chicken Pot Pie
Store-bought crust meets fresh ingredients for that classic comfort food in one pan.
| Ingredient | Amount | Notes |
|---|---|---|
| Store-Bought Pie Crust 🥧 | 1 package | Thawed if frozen, two crusts |
| Boneless Skinless Chicken Breasts 🍗 | 1 ½ lb | Cut into bite-sized pieces |
| Unsalted Butter 🧈 | ½ cup | Divided for cooking and roux |
| Yellow Onion 🧅 | 1 whole | Medium, finely diced |
| Carrots 🥕 | 2 whole | Medium, peeled and diced |
| Celery Stalks 🌿 | 2 whole | Diced for flavor base |
| All-Purpose Flour 🌾 | ⅓ cup | For thickening the filling |
| Chicken Broth 🥣 | 1 ½ cups | Low-sodium preferred |
| Heavy Cream 🥛 | ½ cup | Full-fat for creaminess |
| Frozen Peas 🌱 | 1 cup | No need to thaw |
| Garlic Cloves 🧄 | 3 cloves | Minced for depth of flavor |
| Dried Thyme 🍃 | 1 tsp | Crushed between fingers |
| Salt 🧂 | 1 tsp | Diamond Crystal kosher recommended |
| Black Pepper 🌶️ | ½ tsp | Freshly ground preferred |
| Large Egg 🥚 | 1 whole | For egg wash on crust |
The pie crust is the foundation—Pillsbury refrigerated works perfectly, but any all-butter brand delivers superior flakiness. For the chicken, bone-in thighs can replace breasts for richer flavor (adjust cooking time). Whole Foods or Trader Joe’s carry quality low-sodium broth. The heavy cream is non-negotiable for that velvety texture; avoid light versions as they may curdle during baking.
No chicken? Rotisserie chicken (about 3 cups shredded) saves time. Vegetable swaps: mushrooms or corn for carrots, fennel for celery. Dried rosemary at half the amount can stand in for thyme. For a gluten-free version, use King Arthur’s GF flour blend for the roux and a GF pie crust. The egg wash can be skipped, but it gives that professional golden sheen.
Assemble and bake immediately for best crust texture. Leftovers keep 3-4 days refrigerated, though the crust softens. Reheat covered at 350°F for 15-20 minutes. The filling actually thickens more overnight, making leftovers even better the next day.
Why You’ll Love This Recipe
- One Pan Wonder: I toss everything on a single sheet pan—chicken, carrots, onions—and the pie crust crisps right on top. One pan, minimal cleanup.
- Buttery Comfort: The butter and veggies create this rich, savory filling that’s pure comfort in every bite. Honestly, it’s the kind of flavor that lingers.
- Weeknight Hero: I make it on busy Tuesdays, but it’s fancy enough for Sunday dinner with guests. Between us, no one guesses how simple it was.
- Leftovers for Days: The filling thickens up overnight, so the next day’s lunch tastes even better. I’ll be real: I sometimes double the batch just for this.
Step-by-Step Instructions for One Pan Chicken Pot Pie
Master the technique for a creamy filling beneath a flaky, golden crust in a single pan.
Step 1: Sear the Chicken and Sauté the Vegetables
Heat 2 tablespoons of the unsalted butter in a 12-inch oven-safe skillet over medium-high heat. Add the bite-sized pieces of boneless skinless chicken breasts, season with ½ teaspoon salt and ¼ teaspoon black pepper, and cook for 5-6 minutes until lightly browned. The chicken should release easily from the pan when fully seared.
Transfer the chicken to a plate. In the same skillet, add the remaining unsalted butter. Once melted, add the finely diced yellow onion, diced carrots, and diced celery stalks. Cook for 4-5 minutes until the onion is translucent and the carrots begin to soften. Stir in the minced garlic cloves and dried thyme, cooking for 30 seconds until fragrant.
Step 2: Create the Creamy Filling
Sprinkle the all-purpose flour over the vegetable mixture and stir to coat evenly. Cook for 1 minute to remove the raw flour taste. Slowly pour in the chicken broth while whisking constantly to prevent lumps. Bring to a simmer and cook for 2 minutes until the mixture thickens slightly.
Stir in the heavy cream, remaining ½ teaspoon salt, and remaining ¼ teaspoon black pepper. Return the chicken to the skillet along with any accumulated juices. Add the frozen peas—no need to thaw—and stir to combine. Simmer for 3-4 minutes until the chicken is cooked through and the filling is thick and bubbly.
Step 3: Assemble and Bake the Pot Pie
Remove the skillet from heat and let the filling cool for 5 minutes. This prevents the crust from becoming soggy. Unroll the store-bought pie crust over the filling, tucking the edges down into the skillet. Cut 4-5 slits in the center to allow steam to escape.
Whisk the large egg with 1 tablespoon water and brush evenly over the crust. This egg wash ensures a golden brown finish. Place the skillet on the center rack of a preheated 375°F oven and bake for 30-35 minutes until the crust is deep golden brown and the filling is bubbly.
Step 4: Rest and Serve
Let the pot pie rest for 10 minutes before serving. This allows the filling to set slightly, making it easier to portion. Use a spoon to scoop through the crust, ensuring each serving includes a generous amount of the creamy chicken and vegetable mixture.
The filling should be thick and rich, with tender chicken and vegetables in every bite. The crust should be flaky and golden, providing the perfect textural contrast to the creamy base.
Pro Tips For Making One Pan Chicken Pot Pie
- Pre-Cook the Chicken: Dice the chicken into 1/2-inch pieces and sear them first in the butter until just cooked through—I learned this the hard way after ending up with dry, rubbery chicken in the filling.
- Sauté the Veggies Longer: Cook the onion and carrots until they’re soft and starting to caramelize, about 8-10 minutes. Sounds tedious, but it builds the deep flavor that makes the filling taste rich.
- Vent the Crust: Cut a few small slits in the top pie crust before baking so steam can escape—skip this and you’ll end up with a soggy, undercooked top.
- Use Cold Crust: Keep the store-bought pie crust chilled until the very last moment before placing it on top. After burning three batches, I finally figured out that warm dough just melts into the filling.
Essential Equipment for Great one pan chicken pot pie
Oven-Safe Skillet
This is non-negotiable—you need a 12-inch oven-safe skillet. I swear by my Lodge cast iron for even heat distribution and that perfect golden crust. A stainless steel skillet works too, but cast iron gives superior browning.
Mixing Bowls
Have a medium bowl ready for whisking your egg wash. I use Pyrex glass bowls because they’re sturdy and easy to clean. You’ll also want a small bowl for holding the seared chicken before it goes back into the skillet.
Wooden Spoon
A wooden spoon is ideal for stirring the roux and scraping up any browned bits from the pan. It won’t scratch your skillet like metal utensils might. I keep one dedicated to my cast iron for this very reason.
Whisk
For making your egg wash, a small whisk ensures the egg and water blend smoothly. I prefer the OXO Good Grips whisk—its ergonomic handle makes quick work of this simple task. 💛
Pastry Brush
Invest in a silicone pastry brush for applying the egg wash evenly. I love the Ateco silicone brush—it’s heat-resistant and easy to clean. This step is what gives your crust that beautiful, professional-looking sheen.
Sharp Knife
A chef’s knife is essential for dicing vegetables and cutting the crust slits. I use an 8-inch Wüsthof for precision. Keep it sharp for safety and efficiency. A dull knife makes prep work frustrating and dangerous.
Nutrition Facts
Frequently Asked Questions
Can I use chicken thighs instead of breasts?
Yes, boneless thighs work beautifully and stay juicier. Adjust cooking time to 6-7 minutes per side when searing, as they take slightly longer to cook through. Their richer flavor enhances the filling even more.
Why does my crust get soggy on the bottom?
This happens if the filling is too hot when adding the crust. Always let it cool for 5 minutes first. Also, ensure your skillet is truly oven-safe and preheated properly.
How can I make this gluten-free?
Swap regular crust for a gluten-free pie crust and use King Arthur GF flour blend for the roux. The texture will be slightly different but still delicious. Check all labels for hidden gluten.
Can I prepare this ahead of time?
Assemble the dish completely, cover, and refrigerate up to 24 hours before baking. Add 5-10 minutes to the baking time if cooking straight from the fridge.

- 6 Oz Chocolate Chip Cookie Recipe: Perfectly Balanced Crispy Edges and Chewy Hearts - September 25, 2026
- 6-Inch Coffee Cake Recipe: Vanilla Bean Swirls and Buttery Streusel Topping - September 25, 2026
- 1 Hour Soup Recipe: Velvety Richness Without the Wait - September 25, 2026