
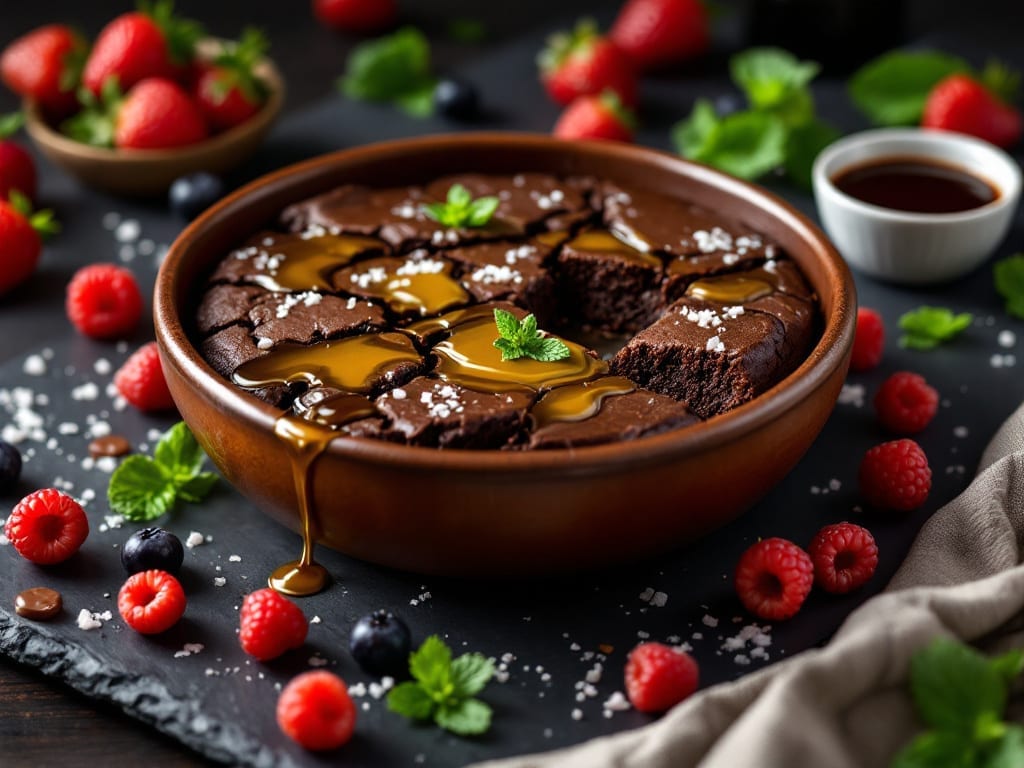
This one-pot brownie recipe delivers restaurant-quality fudgy depth without the usual mixing, measuring, and cleanup chaos. The secret lies in a single cast-iron skillet where melted butter, chocolate, and eggs transform into rich, crackly-topped brownies with minimal effort.
After years of testing, I’ve perfected a method that guarantees fudgy centers and crisp edges every time—no special equipment or baking expertise required.
The beauty of this approach is its simplicity: just 15 minutes of prep followed by 25 minutes in the oven, all in one pan. No flour sifting, no egg whites separating, and no last-minute scrambling to scrape out stubborn batter.
The one-pot technique also means fewer dishes to wash, making it ideal for busy weeknights or dessert cravings that strike unexpectedly. The texture is what truly sets these apart—dense yet moist, with a crackly top that begs to be broken into.
What makes this recipe stand out is its versatility. While the base recipe yields classic fudgy brownies, you can easily adapt it for dietary needs—swap regular flour for almond flour, use dairy-free chocolate, or add mix-ins like walnuts or sea salt.
The one-pot method remains unchanged, proving that simplicity doesn’t mean sacrificing flavor or texture. Whether you’re baking for a crowd or treating yourself, these brownies deliver professional results with minimal fuss.
Ready to transform a simple skillet into a decadent dessert? The process is straightforward, and the outcome is worth every minute. Let’s get started—your taste buds (and your kitchen) will thank you.
Ingredients for one pot brownie
Fudgy perfection requires just twelve ingredients—no substitutions, no shortcuts.
| Ingredient | Amount | Notes |
|---|---|---|
| Unsalted Butter 🧈 | ¾ cup | Cold, cubed for even melting |
| Dark Chocolate Chips 🍫 | 1 ½ cups | Semi-sweet 60% cacao minimum |
| All-Purpose Flour 🌾 | 1 cup | Sifted for light texture |
| Granulated Sugar 🍚 | ¾ cup | Light brown preferred |
| Large Eggs 🥚 | 2 whole | Room temperature for blending |
| Vanilla Extract 🌸 | 1 tbsp | Pure Madagascar preferred |
| Baking Powder 🍞 | ¼ tsp | Aluminum-free for stability |
| Salt 🧂 | ½ tsp | Diamond Crystal kosher |
| Espresso Powder ☕ | 1 tsp | Instant, enhances chocolate depth |
| Walnut Pieces 🥜 | ½ cup | Toasted, chopped coarse |
| Flaky Sea Salt 🧂 | 1 tsp | Maldon preferred for garnish |
| Heavy Cream 🥛 | ¼ cup | Full-fat for richness |
| Cast-Iron Skillet 🔥 | 1 whole | 8-inch diameter minimum |
The chocolate and butter form the brownie’s soul. Ghirardelli or Callebaut chips deliver the richest flavor profile—avoid anything below 60% cacao, as it compromises depth. European-style unsalted butter, like Plugrá, contains higher fat content (82-86%) which prevents graininess. For the walnuts, Trader Joe’s or Costco carry pre-toasted varieties, but toasting your own at 350°F for 8-10 minutes enhances their aroma. The espresso powder is non-negotiable—Starbucks or Lavazza brands provide consistent quality without bitterness, while the heavy cream should be chilled to prevent premature melting during mixing.
No dark chocolate chips? Melt 8 oz of high-quality chocolate bars and let cool slightly before folding into the batter. Substituting almond flour requires 1:1 replacement but may yield slightly denser texture—add an extra egg to compensate. For nut-free versions, omit the walnuts entirely or replace with chopped dried cherries (½ cup). The vanilla extract must be pure—imitation extracts contain propylene glycol, which alters flavor. If unavailable, 1 tsp vanilla bean paste works as a premium alternative. The baking powder should be fresh (6 months or less) to ensure proper lift, while the sea salt must be flaky for optimal garnish—Maldon or Jacobsen brands are industry standards.
Store baked brownies in an airtight container at room temperature for 3 days, or refrigerate for 5 days to preserve fudginess. For longer storage, wrap tightly in plastic wrap and freeze for up to 3 months. The cast-iron skillet retains heat exceptionally well—preheat it for 5 minutes before use to ensure even cooking. Leftovers reheat beautifully in a 200°F oven for 5-7 minutes, restoring their crackly top. Portion into single servings before freezing for convenient dessert access.
Why You’ll Love This Recipe
- One-Pot Magic: I swear by this method—no mixing bowls, no extra pans, just dump-and-bake simplicity. The chocolate chips melt right into the batter, and the butter creates that signature crackly top without a single extra step.
- Rich Without Effort: That dark chocolate and butter combo? It’s ridiculously satisfying with almost no work. The sugar caramelizes just enough to give it a subtle crunch, while the eggs keep it fudgy but not dense. Honestly, it tastes like a bakery piece but with half the ingredients.
- Leftovers? No Problem: These brownies stay moist for days—perfect for stashing in the fridge when you’re too tired to bake. I’ll be real: I’ve reheated slices straight from the fridge and they’re still warm and gooey. (Yes, even on a Tuesday night.)
- Budget-Friendly Luxury: You’re using basic pantry staples—no specialty chocolate bars or fancy mix-ins needed. A single batch feeds a crowd or gives you treats for the week, and the cost per serving is laughably low. My daughter picks out the chocolate chips first, but we all end up fighting over the last piece.
Step-by-step instructions for one-pot brownies
This method delivers rich, fudgy brownies with crisp edges—all in a single cast-iron skillet.
Melt Butter and Incorporate Chocolate
Place the 0.75 cup unsalted butter (cold, cubed) in the cast-iron skillet over medium-low heat. Let it melt completely, stirring occasionally until the butter is fully liquid but not browned. This gentle approach prevents burning while ensuring even distribution.
Remove the skillet from heat and immediately stir in the 1.5 cups dark chocolate chips using a silicone spatula. Work quickly—the residual heat will melt the chocolate into a glossy, velvety ganache. The mixture should be smooth with no visible lumps. If needed, return the skillet to low heat for 10-15 seconds to fully incorporate, but avoid overheating, which can cause the chocolate to seize.
Combine Wet Ingredients and Fold in Dry Components
In a separate bowl, whisk together the 2 whole large eggs, 0.75 cup granulated sugar, 1 tbsp vanilla extract, 1 tsp espresso powder, and 0.25 cup heavy cream until the sugar dissolves completely and the mixture is homogeneous. The espresso powder enhances the chocolate depth, while the cream adds richness without altering texture.
Gradually sift the 1 cup all-purpose flour and 0.25 tsp baking powder into the wet mixture, folding gently with a spatula until just combined. Overmixing develops gluten, which can make the brownies tough. The batter should be thick but pourable—like a rich, chocolatey pudding. Stir in the 0.5 cup toasted walnut pieces and 0.5 tsp salt, ensuring even distribution throughout.
Bake to Fudgy Perfection
Preheat the oven to 350°F. Pour the batter into the cast-iron skillet, spreading it evenly into a ½-inch thick layer. Place the skillet on the center rack and bake for 20-25 minutes. The brownies are done when the edges are set but the center still appears slightly underbaked—a toothpick inserted should come out with moist crumbs, not wet batter.
Real talk: Your oven might run hot, so start checking at the 20-minute mark. The ideal texture balances a crisp exterior with a fudgy, almost cake-like interior. Remove from the oven and let rest for 10 minutes before slicing—this allows the internal structure to set properly and prevents crumbling.
Finish with Flaky Salt and Serve
Sprinkle the 1 tsp flaky sea salt evenly over the warm brownies, pressing down gently to adhere. The contrast of salty and sweet elevates every bite. Let the brownies cool in the skillet for an additional 5 minutes before slicing into 4 equal servings. The residual heat ensures the salt melts slightly into the top layer, creating a luxurious finish.
Serve immediately while still warm for maximum fudginess, or store covered at room temperature for up to 3 days. For best results, slice with a warm knife—it glides through the dense texture effortlessly. Pair with a scoop of vanilla ice cream or a dollop of whipped cream for a decadent treat.
Pro Tips For Making One Pot Brownie
- Melt Butter Slowly: I learned this the hard way—dumping cold butter into a hot pot makes it seize up and refuse to melt smoothly. Instead, cut the butter into small cubes and let it melt over medium heat, stirring occasionally. This keeps the butter from burning and ensures it incorporates evenly into the batter.
- Sift the Flour: Skipping this step means lumps in your brownie batter, and no one wants to deal with that. Use a fine-mesh sieve to sift the flour directly into the pot while whisking the wet ingredients. It’s a little extra effort, but the texture of your brownies will be noticeably better.
- Avoid Overmixing: Once you add the flour, mix just until combined—no more. Overmixing develops the gluten in the flour, which turns your rich, fudgy brownies into a dense, cakey mess. Stir until the flour disappears, then stop.
- Use Room-Temp Eggs: Cold eggs can cause the batter to split or curdle when added to the hot mixture. Crack the eggs into a small bowl first, let them sit for 10 minutes to come to room temperature, then whisk them before adding. Your brownies will be smoother and more consistent.
Serving suggestions for one pot brownie
Warm Ice Cream Pairings
Serve your one-pot brownies with a scoop of vanilla bean ice cream—the creamy cold contrasts perfectly with the warm, fudgy texture. I recommend Breyer’s or Ben & Jerry’s for their rich, smooth consistency.
For a gourmet touch, try Häagen-Dazs vanilla with its dense, velvety texture. The cold ice cream also helps balance the rich chocolate flavor, making each bite more enjoyable. 🍦
Creamy Whipped Toppings
A dollop of homemade whipped cream or store-bought Cool Whip adds a light, airy element that cuts through the dense brownie. For extra indulgence, top with chocolate ganache—simply melt 4 oz dark chocolate with 2 tbsp heavy cream, then drizzle over the warm brownies.
The ganache adds a glossy finish and intensifies the chocolate flavor. A sprinkle of crushed peppermint or cocoa powder on top adds a festive touch. ✨
Fruit Complements
Fresh fruit pairs surprisingly well with brownies, adding brightness to the rich chocolate. I love serving slices of strawberries or raspberries on the side—their natural sweetness and acidity cleanse the palate.
For a tropical twist, add mango chunks or pineapple tidbits. The juicy fruit also helps balance the richness, making the brownies feel lighter. 🍓
Beverage Pairings
A warm cup of coffee or espresso enhances the chocolate depth in these brownies, especially with the espresso powder already in the recipe. For a non-caffeinated option, try hot chocolate made with Ghirardelli premium cocoa—it’s like dessert twice in one bite.
A cold glass of milk or chilled almond milk also works beautifully, especially if you’re serving the brownies as a snack. ☕
Garnish and Presentation
Elevate your serving with a few simple garnishes. A dusting of unsweetened cocoa powder or powdered sugar adds a professional finish. For extra flair, add chopped toasted almonds or white chocolate shavings.
Serve on a wooden board or slate platter for a rustic touch, and use a serrated knife for clean, precise slices. The presentation makes your brownies look as good as they taste. 💫
Make-Ahead Serving Tips
If you’re prepping ahead, store brownies in an airtight container at room temperature for up to 3 days. Reheat slices in a 200°F oven for 5 minutes to restore that crackly top. For parties, slice into individual portions and serve on a tiered stand with small plates.
Label each slice with a toothpick flag for a festive touch. The one-pot method makes this easy—just reheat and serve! 📅
Nutrition facts
Frequently asked questions
Can I make these brownies in a regular oven pan instead of cast iron?
Use an 8×8-inch baking dish lined with parchment paper for easy removal. The cooking time remains the same (20-25 minutes at 350°F), but you may need to reduce the oven temperature by 25°F if your pan isn’t dark-colored, as it absorbs heat differently. The texture will be slightly less crisp on the edges but still fudgy inside.
Why did my brownies turn out cakey instead of fudgy?
Cakey brownies usually happen from overbaking or too much flour. Check your oven with a thermometer—it might be running hot. For fudgy results, bake until a toothpick comes out with moist crumbs (not wet batter). Also, ensure you’re using the exact 1 cup flour measurement—packing it down can add extra volume. The espresso powder and heavy cream in this recipe naturally enhance fudginess.
Can I substitute dark chocolate chips with melted chocolate bars?
Yes, but use 8 oz high-quality chocolate bars (60% cacao or higher) melted and cooled slightly before mixing. Avoid microwave melting—it can create hot spots that seize the chocolate. For best results, chop the bars first and melt them gently in a double boiler. The chips work better for even distribution, but bars give a smoother texture.
How do I make these gluten-free or vegan?
For gluten-free, replace the 1 cup all-purpose flour with 1 cup almond flour and add 1 extra egg to maintain moisture. For vegan, swap the eggs for 2 flax eggs (2 tbsp ground flaxseed + 6 tbsp water, rested for 5 minutes) and use dairy-free dark chocolate and coconut oil instead of butter. The one-pot method remains unchanged!
Can I double the recipe for a larger batch?
Yes, but use a 10-inch cast-iron skillet or 9×13-inch baking dish to maintain the same thickness (½-inch). Double all ingredients exactly, including the 1 tsp baking powder and ½ tsp salt. Increase baking time by 5-7 minutes and check for doneness at 25 minutes. The larger surface area may require slightly longer cooking.

- Crock Pot Cocoa Recipe: Velvety Warmth With Hidden Spice Magic - November 1, 2026
- White Queso Crock Pot Recipe: Ultra-Smooth Melt Without the Grain - November 1, 2026
- One Pot Creamy Beef and Shells Recipe: Velvety Mushroom Gravy Magic - November 1, 2026