
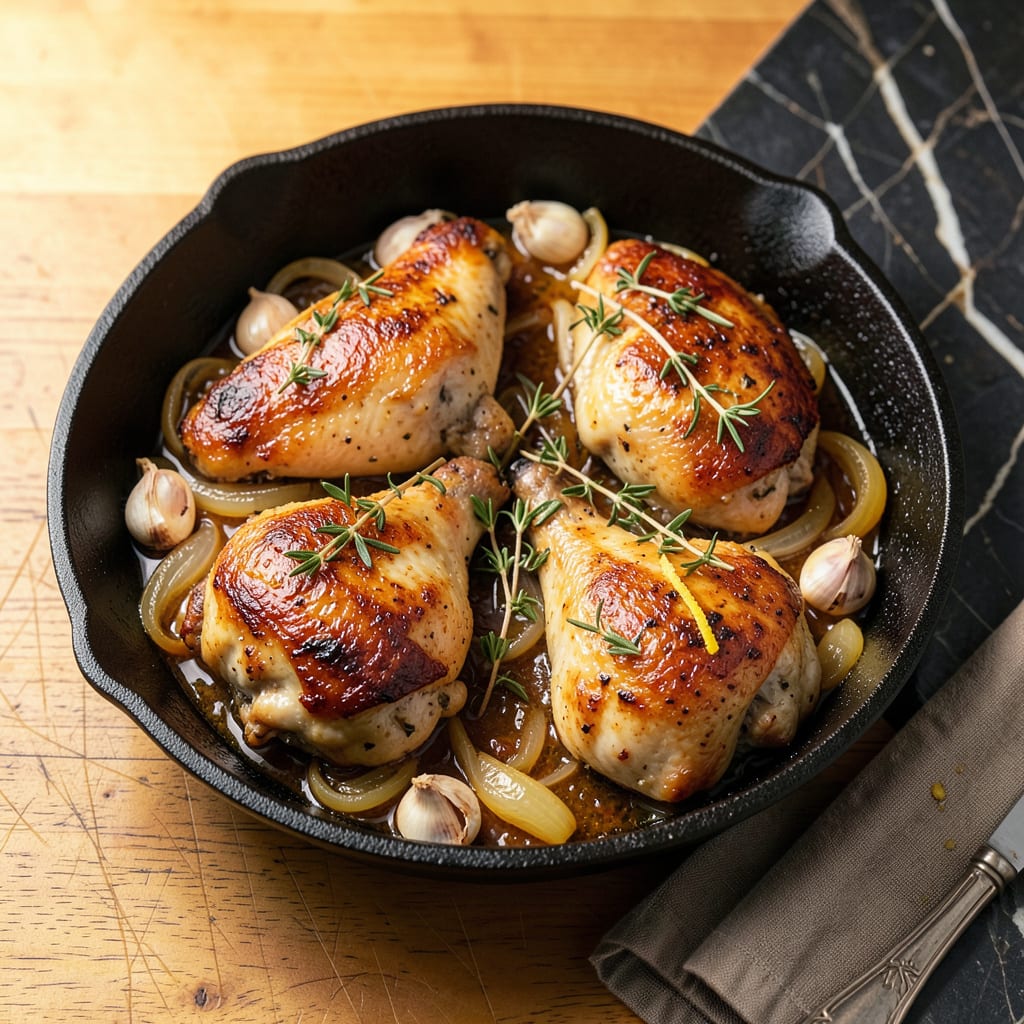
This one-pot chicken recipe delivers juicy thighs and perfectly tender vegetables with minimal effort and maximum flavor. Developed for busy weeknights, the method relies on precise timing and layering techniques to ensure every component cooks evenly in a single pot.
The secret lies in searing the chicken first to lock in moisture, then building flavors with aromatics before adding hearty vegetables and broth. In just 30 minutes, you’ll have a complete meal with rich, developed flavors and virtually no cleanup—ideal for when time is short but quality matters.
Ingredients for One Pot Chicken
Optimal flavor and texture begin with these carefully selected ingredients, ensuring juicy chicken and perfectly tender vegetables in every bite.
| Ingredient | Amount | Notes |
|---|---|---|
| Bone-in, Skin-on Chicken Thighs 🍗 | 1 ½ lb | Pat dry for optimal searing |
| Kosher Salt 🧂 | 1 ½ tsp | Diamond Crystal preferred for precision |
| Freshly Ground Black Pepper 🌶️ | 1 tsp | Coarse grind for texture |
| Extra-Virgin Olive Oil 🫒 | 2 tbsp | Divided for searing and sautéing |
| Unsalted Butter 🧈 | 1 tbsp | European-style for richer flavor |
| Yellow Onion 🧅 | 1 whole | Medium dice for even cooking |
| Garlic Cloves 🧄 | 4 cloves | Minced to uniform consistency |
| Dried Thyme 🌿 | 1 tsp | Rubbed between palms to release oils |
| Smoked Paprika 🌶️ | 1 tsp | Spanish variety for depth |
| Baby Red Potatoes 🥔 | 12 oz | Halved for uniform doneness |
| Carrots 🥕 | 2 whole | Cut into 1-inch chunks |
| Low-Sodium Chicken Broth 💧 | 1 ½ cups | Homemade or premium brand |
| Fresh Flat-Leaf Parsley 🌿 | ¼ cup | Chopped for bright finish |
| Lemon 🍋 | ½ whole | Zested and juiced |
[recipeingredientscaler]
The chicken thighs are critical for moisture retention—bone-in, skin-on varieties from Whole Foods or a trusted butcher yield superior results. Diamond Crystal kosher salt provides precise seasoning control due to its flake structure. For the potatoes, select firm, waxy varieties (red or Yukon Gold) to maintain shape during cooking. European-style butter, such as Plugrá, enhances the searing process with its higher fat content and lower water percentage.
Substitutions must preserve the dish’s integrity: boneless thighs may be used but require reduced cooking time. Sweet paprika can replace smoked, though depth will diminish. For broth, vegetable stock works at a 1:1 ratio, while white wine (dry varieties) may substitute half the broth quantity. Carrots may be swapped for parsnips, maintaining the 1-inch chunk specification. Always use fresh garlic—jarred varieties lack the necessary aromatic potency.
Storage considerations optimize preparation: chicken thighs remain fresh for 2 days refrigerated or 9 months frozen. Potatoes and carrots should be stored separately in cool, dark conditions (not refrigerated) for up to 2 weeks. Prepared broth may be refrigerated for 5 days or frozen for 6 months. The completed dish reheats exceptionally well, with flavors intensifying over 3 days of refrigeration.
Why You’ll Love This Recipe
- One Pot Magic: I swear by this for nights when I can’t face a sink full of dishes. Bone-in thighs sear in the same pot they’ll finish cooking in—just swap the stovetop for the oven, and you’re done. One pot, one spatula, zero regrets.
- Crispy Meets Juicy: That skin-on thigh is the hero here. The butter and olive oil team up to get it crackling crisp while the meat stays absurdly tender inside. Honestly, I’ve made this three times this month just for that contrast.
- Weeknight to Weekend: This is my Tuesday lifesaver and my lazy Sunday centerpiece. Serve it with crusty bread for soaking up the pan juices, or shred the leftovers into tacos the next day. Between us, it’s even better cold straight from the fridge at midnight.
- Budget-Friendly Luxury: Bone-in thighs cost half what breasts do, but taste twice as rich. A little salt, pepper, and that butter basting trick makes them feel fancy without the price tag. I’ll be real: this is how I fake a restaurant-worthy meal when my wallet’s thin.
Step-by-Step Instructions for One Pot Chicken with Vegetables
This streamlined method delivers perfectly seared chicken and fork-tender vegetables in a single pot.
Step 1: Season and Sear the Chicken Thighs
Pat the 1.5 lb bone-in, skin-on chicken thighs completely dry with paper towels. This ensures maximum browning and crispy skin development. Season both sides evenly with the 1.5 tsp kosher salt and 1 tsp freshly ground black pepper, pressing the seasoning into the skin for better adhesion.
Heat 1 tbsp extra-virgin olive oil in a large, heavy-bottomed pot over medium-high heat until shimmering. Add the chicken thighs skin-side down and cook undisturbed for 6-8 minutes until the skin is deep golden brown and releases easily from the pot. Flip and cook for an additional 4-5 minutes until the second side develops a rich caramelization. Transfer the chicken to a plate and set aside.
Step 2: Build the Aromatic Base
Reduce heat to medium and add the remaining 1 tbsp extra-virgin olive oil and 1 tbsp unsalted butter to the pot. Once the butter melts, add the medium-diced yellow onion and cook for 4-5 minutes, stirring occasionally, until softened and translucent.
Add the minced garlic cloves, 1 tsp dried thyme, and 1 tsp smoked paprika. Cook for 1 minute, stirring constantly, until the garlic becomes fragrant but hasn’t taken on any color. Be vigilant here—burnt garlic will impart bitterness to the entire dish. The thyme should release its earthy aroma, signaling it’s properly toasted.
Step 3: Incorporate Vegetables and Deglaze
Add the halved baby red potatoes and 1-inch carrot chunks to the pot, stirring to coat them in the aromatic mixture. Pour in the 1.5 cups low-sodium chicken broth, using a wooden spoon to scrape up any browned bits from the bottom of the pot. These fond particles contain concentrated flavor that will enrich your final sauce.
Return the chicken thighs to the pot, nestling them among the vegetables. The liquid should come about halfway up the chicken. Bring the mixture to a gentle simmer, then reduce heat to medium-low. Cover and cook for 15 minutes, allowing the potatoes to become fork-tender while the chicken finishes cooking through.
Step 4: Finish and Balance the Dish
Remove the lid and increase heat to medium. Simmer uncovered for 5-7 minutes to reduce the liquid slightly and concentrate the flavors. The sauce should coat the back of a spoon but remain pourable. During this time, zest the 0.5 lemon directly into the pot, then cut the zested lemon in half and add the juice.
The acidity from the lemon will brighten the dish and balance the richness. Taste and adjust seasoning if needed, though the initial salting should be sufficient. Remove from heat and let rest for 5 minutes before serving. This brief rest allows the juices in the chicken to redistribute, ensuring each bite remains succulent.
Step 5: Garnish and Serve
Sprinkle the 0.25 cup chopped fresh flat-leaf parsley over the dish just before serving. The parsley adds a fresh, herbal note that complements the smoky paprika and earthy thyme. Serve directly from the pot, ensuring each portion includes both chicken and vegetables.
The chicken should be tender with skin that offers a satisfying crispness, while the potatoes and carrots yield easily to a fork. The sauce will have reduced to a velvety consistency that clings to all components. For optimal presentation, spoon extra sauce over each serving at the table.
Essential Equipment for Perfect Results
Heavy-Duty Pot
The foundation of this recipe is a 5-6 quart Dutch oven or heavy-bottomed pot. I swear by my Le Creuset enameled cast iron—it distributes heat evenly and retains it perfectly for searing and simmering. The tight-fitting lid is crucial for trapping steam during the cooking process. 🔥
Wooden Spoon
You’ll need a sturdy wooden spoon for deglazing the pot after searing the chicken. I prefer one with a flat edge to really scrape up all those flavorful browned bits. The OXO Good Grips wooden spoon is my go-to—it’s comfortable and won’t scratch your pot’s surface.
Sharp Chef’s Knife
A quality 8-inch chef’s knife makes quick work of prepping the vegetables. I use my Wüsthof Ikon for everything from dicing onions to halving potatoes. Keep it sharp—dull knives make prep work frustrating and unsafe. The right knife transforms chopping from chore to pleasure.
Instant-Read Thermometer
While not absolutely required, a digital instant-read thermometer takes the guesswork out of doneness. I use the ThermoWorks Thermapen to check that chicken reaches 165°F internally. It’s especially helpful if you’re new to cooking chicken thighs with bone-in.
Citrus Juicer
For getting every last drop from your 0.5 lemon, a small handheld juicer makes the job effortless. The OXO citrus squeezer fits perfectly over half a lemon and catches seeds. You’ll be surprised how much more juice you get compared to squeezing by hand.
Cutting Board
A large, stable wooden cutting board (at least 12×18 inches) gives you plenty of space for prepping all ingredients at once. I love my John Boos maple board—it’s gentle on knives and has a juice groove to catch any chicken drippings while you work. ✨
Nutrition Facts
Frequently Asked Questions
Can I use boneless chicken instead?
Yes, but adjust the cooking time to 10-12 minutes after adding the broth. Boneless thighs cook faster and may dry out if overcooked. Keep the skin on if possible for better flavor and moisture retention.
What if my potatoes aren’t tender after 15 minutes?
If the potatoes still feel firm, cover and cook for an additional 5-7 minutes on low heat. Check the liquid level—add ¼ cup broth if needed to prevent burning. Potato size affects cooking time, so ensure uniform chunks.
Can I make this ahead of time?
The dish reheats beautifully! Store in an airtight container for up to 3 days in the fridge. Reheat gently on the stovetop with a splash of broth to restore moisture. Flavors actually deepen overnight.
Why is my sauce too thin?
Uncover and simmer for 3-5 extra minutes to reduce the liquid. For quicker thickening, mix 1 tsp cornstarch with cold water and stir in during the final step. Avoid high heat, which can cause separation.

- 8 Bean Soup Recipe Crock Pot: Hearty Vegetable Medley in One Pot - September 25, 2026
- 4C Bread Crumbs Meatballs Recipe: Crispy Crust and Juicy Centers - September 25, 2026
- 6 Oz Chocolate Chip Cookie Recipe: Perfectly Balanced Crispy Edges and Chewy Hearts - September 25, 2026