
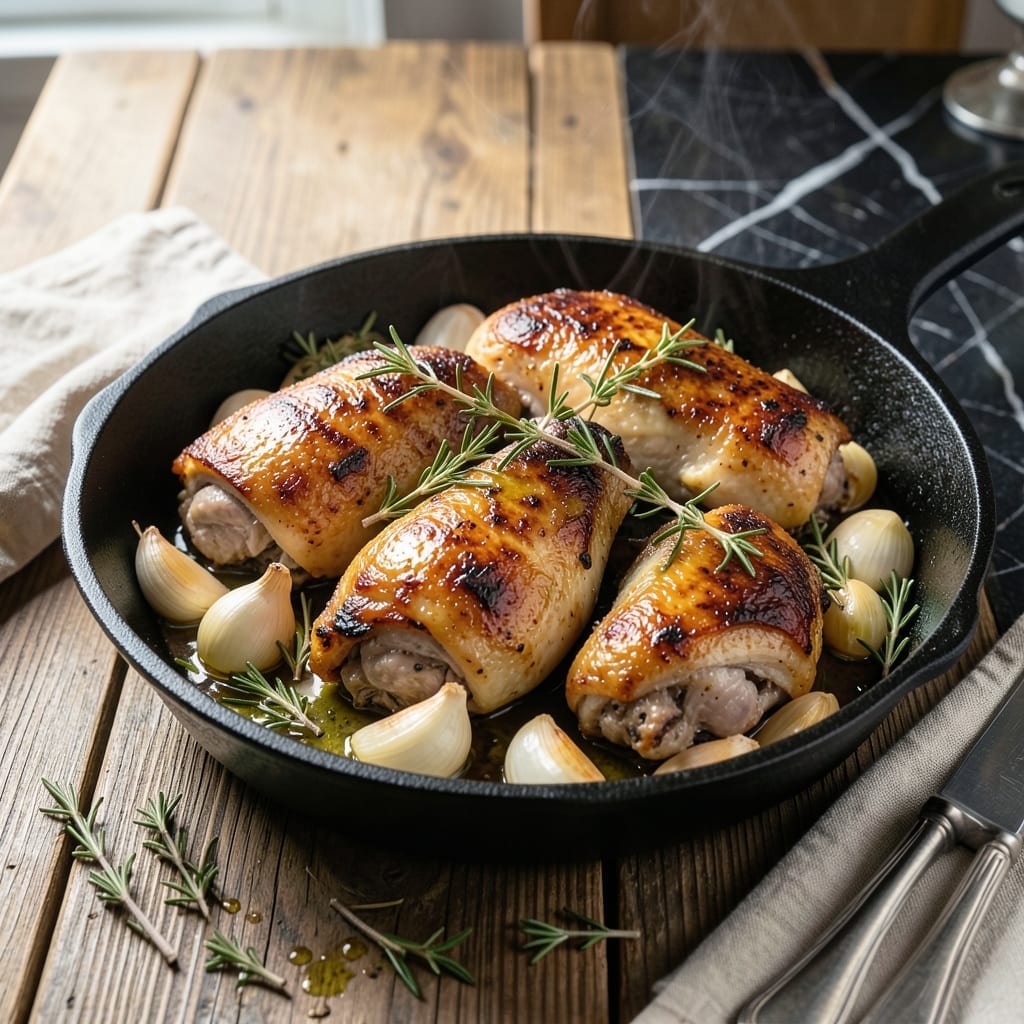
This one-pan method delivers crispy skin and juicy meat without the cleanup of traditional recipes. I developed this technique to maximize flavor while minimizing effort, and it’s become my go-to for weeknight dinners.
The secret lies in starting with skin-on, bone-in thighs and searing them first to render fat and create a golden crust. Then, everything finishes in the same pot, allowing the meat to stay moist while the skin stays perfectly crispy.
You’ll end up with tender, flavorful chicken and a pan sauce that’s rich with caramelized drippings. It’s a foolproof way to achieve restaurant-quality results at home with minimal fuss.
Serve with your favorite sides for a complete meal. Here’s how to make it.
Ingredients for One Pot Chicken Thigh
Skin-on thighs, fresh herbs, and pantry staples come together for this foolproof weeknight meal.
| Ingredient | Amount | Notes |
|---|---|---|
| Chicken Thighs 🍗 | 2 lb | Skin-on, bone-in preferred |
| Kosher Salt 🧂 | 1 ½ tsp | Diamond Crystal preferred |
| Black Pepper 🌶️ | 1 tsp | Freshly ground |
| Garlic Cloves 🧄 | 4 cloves | Minced for pan sauce |
| Fresh Thyme Sprigs 🌿 | 4 sprigs | Leaves stripped from stems |
| Fresh Rosemary Sprigs 🌿 | 2 sprigs | Leaves stripped from stems |
| Olive Oil 🫒 | 2 tbsp | Extra-virgin for searing |
| Chicken Stock 🥘 | 1 cup | Low-sodium preferred |
| Lemon 🍋 | 1 whole | Zested and juiced |
| Unsalted Butter 🧈 | 2 tbsp | For finishing pan sauce |
| Shallot 🧅 | 1 whole | Finely diced |
| Dijon Mustard 🟡 | 1 tbsp | For depth in pan sauce |
The chicken thighs are non-negotiable here—skin-on, bone-in gives you that crispy skin and juicy meat the intro promises. I grab mine from Whole Foods or Costco (their organic thighs are always well-sized). Look for pieces with even thickness so they cook at the same rate. The herbs? Fresh thyme and rosemary make all the difference (the dried stuff just doesn’t have the same punch).
No fresh herbs? Dried thyme and rosemary at half the amount work in a pinch. Out of chicken stock? Water plus a bouillon cube gets you close. Shallots can be swapped for a small yellow onion (just dice it fine). The Dijon mustard adds a nice tang—whole-grain mustard works too if that’s what you’ve got. Don’t skip the lemon zest though (it brightens up the whole dish).
Leftovers keep beautifully—actually taste better the next day. Store in an airtight container for up to 4 days in the fridge, or freeze for 3 months. The pan sauce thickens as it cools, so just reheat gently with a splash of water.
Why You’ll Love This Recipe
- One Pan Magic: I toss everything in, cover it, and let the oven do the work—no juggling pots or pans.
- Garlic-Thyme Perfection: The garlic cloves and fresh thyme infuse the chicken with a rich, aromatic depth that’s hard to beat.
- Weeknight Hero: Between us, this is my go-to for busy evenings when I need something hearty and unfussy.
- Budget-Friendly Feast: Chicken thighs are affordable, and this recipe stretches them into a meal that feels like a splurge.
Step-by-Step Instructions for One Pot Chicken Thighs
Here’s how to get crispy skin and juicy meat using just one pan.
Step 1: Season and Sear the Chicken Thighs
Pat the 2 lb Chicken Thighs dry with paper towels—this is non-negotiable for crispy skin. Season both sides aggressively with the 1.5 tsp Kosher Salt and 1 tsp Black Pepper, pressing the seasoning into the meat so it adheres well.
Heat the 2 tbsp Olive Oil in a large, heavy skillet (cast iron works beautifully) over medium-high heat until shimmering. Add the chicken thighs skin-side down and sear undisturbed for 6-8 minutes until the skin is deep golden brown and crisp. Flip and sear the other side for 4-5 minutes until equally browned. Transfer the chicken to a plate and set aside.
Step 2: Build the Flavor Base in the Same Pan
Pour off all but 1 tbsp of the rendered fat from the skillet. Lower the heat to medium and add the finely diced Shallot. Sauté for 2-3 minutes until softened and translucent, stirring occasionally to prevent burning.
Add the 4 cloves Garlic Cloves, the stripped leaves from the 4 sprigs Fresh Thyme Sprigs and 2 sprigs Fresh Rosemary Sprigs, and cook for 30 seconds until the garlic is fragrant. Be careful not to let it brown—burnt garlic turns bitter.
Step 3: Deglaze and Simmer for Maximum Flavor
Pour in the 1 cup Chicken Stock and scrape the bottom of the pan with a wooden spoon to release all those flavorful browned bits. Stir in the 1 tbsp Dijon Mustard and bring the mixture to a gentle simmer.
Return the chicken to the skillet, skin-side up, along with any accumulated juices. Reduce heat to medium-low, cover, and let it simmer for 15-20 minutes until the chicken is cooked through and the internal temperature reaches 165°F.
Step 4: Finish with Bright, Creamy Pan Sauce
Transfer the chicken to a serving platter and tent loosely with foil. Increase the heat to medium-high and let the pan sauce reduce by about half—this should take 3-4 minutes. Stir in the zest and juice from the Lemon and the 2 tbsp Unsalted Butter, whisking until the butter melts and the sauce becomes glossy and slightly thickened.
Pour the sauce over the chicken and serve immediately. The skin should stay crisp while the meat remains impossibly juicy, and every bite should be coated in that rich, herby pan sauce.
Pro Tips For Making One Pot Chicken Thigh
- Pat Thighs Dry: I learned this the hard way—wet chicken steams instead of sears. Use paper towels to dry the thighs thoroughly before seasoning, or you’ll miss that crispy skin.
- Start Skin-Side Down: High heat first, skin-side down for 6-7 minutes without moving. This guarantees a golden crust and locks in juices—resist the urge to peek.
- Smash the Garlic: Skip mincing—just smash the cloves with the flat of your knife. They’ll infuse the oil with flavor without burning, and you can remove them before serving.
- Use Thyme Stems: Sounds weird, but it works: toss in the whole thyme sprigs, stems and all. They’re easier to remove later and release more aroma than picked leaves.
Troubleshooting one pot chicken thigh
Skin Not Crispy
If your skin isn’t getting crispy, it’s likely because the pan wasn’t hot enough initially. Heat your olive oil until it’s shimmering before adding the chicken, and don’t move the pieces for the first 6-8 minutes. Also, pat the chicken thighs extremely dry before seasoning—moisture is the enemy of crispiness. 🔥
Sauce Too Thin
If your pan sauce is watery, let it reduce longer after removing the chicken. Increase the heat to medium-high and let it simmer for 3-4 minutes until it coats the back of a spoon. The butter at the end also helps thicken it naturally.
Garlic Burns Easily
Burnt garlic turns bitter quickly. Lower your heat to medium when cooking the shallot, and add the garlic only for the last 30 seconds. Stir constantly to prevent hot spots in your pan.
Chicken Sticks to Pan
If the chicken sticks when searing, your pan might not be hot enough, or you’re trying to flip too soon. Wait until the skin releases naturally from the pan—it will when it’s properly crisped. Use a cast iron skillet for best results.
Herbs Overpowering
Fresh herbs can be strong. If the flavor seems too intense, balance it with an extra splash of chicken stock or a squeeze of lemon juice. Remember, thyme and rosemary are potent, so use a light hand when adding.
Uneven Cooking
If some pieces cook faster than others, ensure they’re similar in size. Thicker pieces need more time. Use a meat thermometer to check that all pieces reach 165°F internally. This is the only sure way to know they’re done. 💡
Nutrition Facts
Frequently Asked Questions
Can I use boneless thighs instead?
Yes, but they cook faster and won’t have the same juiciness. Reduce simmering time to 10-12 minutes and check internal temp reaches 165°F to avoid drying out.
What pan works best for this?
A heavy cast iron skillet or stainless steel pan gives the best sear. Avoid nonstick as it doesn’t develop fond for the sauce. A deep skillet helps contain splatters.
How do I prevent the sauce from breaking?
Keep heat at medium-low when adding butter. Whisk constantly and remove from heat immediately if it looks separated. The Dijon mustard helps emulsify it.
Can I make this ahead?
The dish tastes even better the next day. Store in an airtight container for up to 4 days. Reheat gently on the stove with a splash of water.

- 4C Bread Crumbs Meatballs Recipe: Crispy Crust and Juicy Centers - September 25, 2026
- 6 Oz Chocolate Chip Cookie Recipe: Perfectly Balanced Crispy Edges and Chewy Hearts - September 25, 2026
- 6-Inch Coffee Cake Recipe: Vanilla Bean Swirls and Buttery Streusel Topping - September 25, 2026