
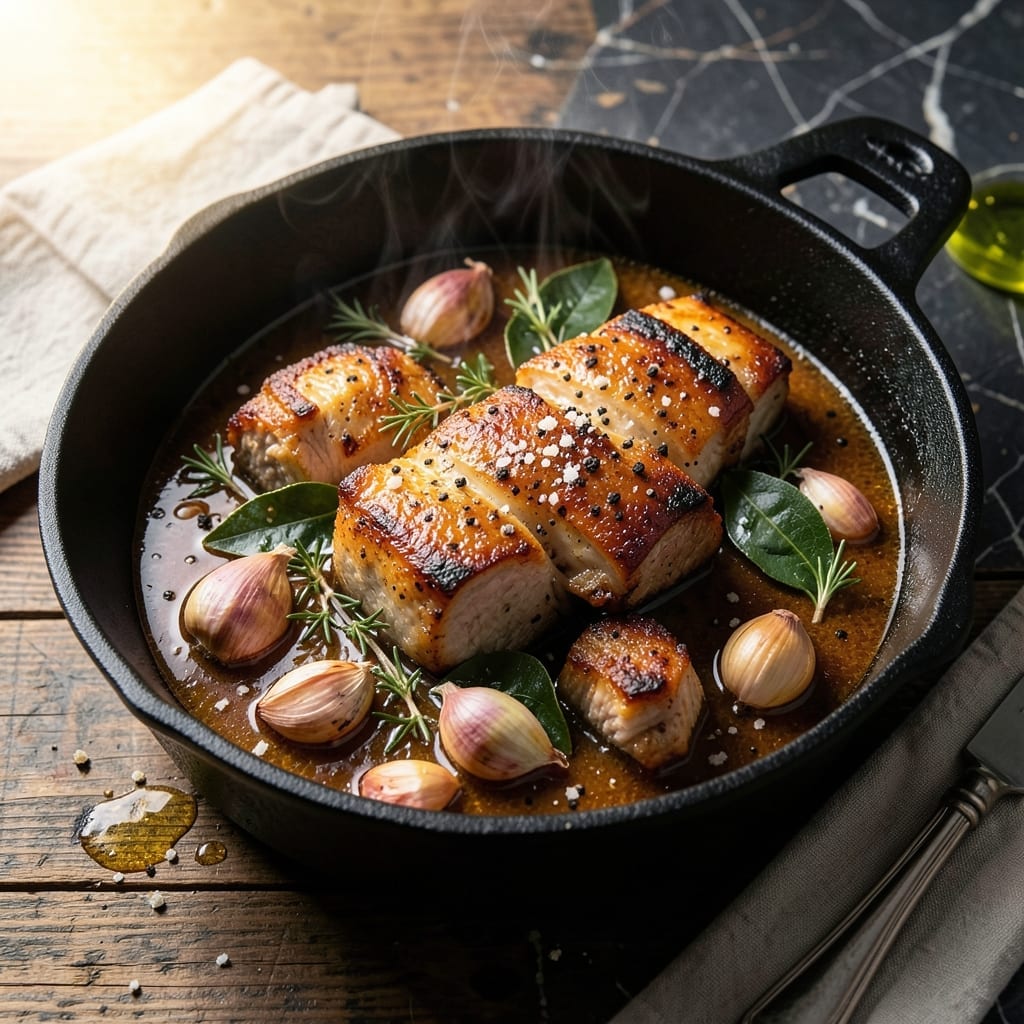
I’ve burned through my share of pork belly disasters, but this one-pot method finally nailed it. Crispy skin on top, melt-in-your-mouth layers underneath—no fancy equipment needed.
The trick is starting low and slow, then finishing with a blast of heat to blister the skin. Everything happens in one pot, so cleanup is a breeze. It’s the kind of dish that feels special but doesn’t require all-day effort.
What you get is pork belly so tender it falls apart at the touch, with skin that shatters between your teeth. The fat renders down into the meat, keeping every bite rich and juicy.
Perfect for impressing guests or treating yourself to restaurant-quality results at home.
Ingredients for One Pot Pork Belly
One pot, a few hours, and you’re rewarded with the crispiest skin and richest pork belly.
| Ingredient | Amount | Notes |
|---|---|---|
| Pork Belly 🥓 | 2 lb | Skin-on, cut into 2-inch chunks |
| Kosher Salt 🧂 | 2 tbsp | Plus extra for finishing |
| Black Pepper 🌶️ | 1 tsp | Freshly ground preferred |
| Garlic Cloves 🧄 | 6 cloves | Smashed, not minced |
| Fresh Thyme Sprigs 🌿 | 4 whole | Plus extra for garnish |
| Bay Leaves 🍃 | 2 whole | Dried or fresh |
| Apple Cider Vinegar 🍏 | 2 tbsp | For crisping skin |
| Water 💧 | 1 cup | For braising liquid |
| Olive Oil 🫒 | 1 tbsp | For searing |
| Honey 🍯 | 2 tbsp | For glaze (optional) |
| Soy Sauce 🥢 | 2 tbsp | Low-sodium preferred |
| Red Pepper Flakes 🌶️ | ½ tsp | Adjust for heat preference |
The pork belly is the star here—look for skin-on slabs with even fat marbling at Whole Foods or your local butcher. Avoid pre-cut pieces (they dry out). I get mine from Costco when they have it—great quality for the price. The skin should be dry and firm, not slimy. Let it sit uncovered in the fridge overnight if you can (dries the skin for maximum crispiness).
No fresh thyme? Dried thyme at half the amount works, but fresh really shines here. Swap apple cider vinegar for rice vinegar or white vinegar—same acidity, slightly different flavor. Skipping the honey? Maple syrup or brown sugar gives a similar glaze. For a different twist, add a splash of fish sauce (if you’re not strict vegetarian) to the braising liquid.
Leftovers keep 4-5 days in the fridge and reheat surprisingly well—pop under the broiler for 3-4 minutes to re-crisp the skin. Freezes for 3 months (slice before freezing for easy portions). The fat solidifies when cold, so let it sit at room temp 20 minutes before reheating.
Why You’ll Love This Recipe
- One Pot Magic: I toss everything in, walk away, and let the oven do the work—no babysitting required.
- Garlic-Thyme Perfection: The pork belly soaks up the garlic and thyme, turning into the most tender, flavorful bites.
- Crowd Pleaser: I serve this at gatherings, and it’s always the first thing to disappear.
- Budget-Friendly Feast: Pork belly stretches far, and the leftovers (if any) taste even better the next day.
Step-by-Step Instructions for One Pot Pork Belly
Here’s my foolproof method for achieving that perfect balance of crispy skin and tender meat in one pot.
Step 1: Season and Sear the Pork Belly
Pat the 2 lb Pork Belly chunks dry with paper towels. This is crucial—moisture prevents proper browning. Season all sides aggressively with the 2 tbsp Kosher Salt and 1 tsp Black Pepper. I like to really work the seasoning into every crevice.
Heat the 1 tbsp Olive Oil in a heavy Dutch oven over medium-high heat. Add the pork belly skin-side down and sear undisturbed for 5-6 minutes until the skin turns deep golden brown. Flip and sear the other sides for 2-3 minutes each. Transfer to a plate—you’ll add it back later.
Step 2: Build the Flavor Base
In the same pot, add the 6 cloves Garlic Cloves, 4 whole Fresh Thyme Sprigs, and 2 whole Bay Leaves. Cook for 1 minute until the garlic just starts to color. Here’s the thing—don’t let it burn or it’ll turn bitter.
Pour in the 2 tbsp Apple Cider Vinegar and scrape up all those browned bits from the bottom. This step is magic—it deglazes the pan and starts building that complex flavor base. Add the 2 tbsp Soy Sauce and 0.5 tsp Red Pepper Flakes, then stir to combine.
Step 3: Braise and Glaze
Return the pork belly to the pot skin-side up. Add the 1 cup Water, making sure it comes about halfway up the pork. Bring to a simmer, then cover and reduce heat to low. Braise for 1.5 hours—the pork should be fork-tender when done.
Uncover and drizzle the 2 tbsp Honey over the top. Increase heat to medium-high and cook for another 10-15 minutes, basting occasionally, until the skin is crispy and caramelized and the liquid reduces to a glossy glaze. Watch it closely—this is when the magic happens.
Step 4: Rest and Serve
Let the pork belly rest in the pot for 10 minutes before serving. This allows the juices to redistribute and the skin to crisp up even more. The glaze should be thick enough to coat the back of a spoon, with all those beautiful flavors melded together.
Serve the pork belly with some of that incredible braising liquid spooned over the top. Each piece should have layers that are both crispy on the outside and melt-in-your-mouth tender inside. Garnish with extra thyme sprigs if you’re feeling fancy.
Pro Tips For Making One Pot Pork Belly
- Score the Skin: Use a sharp knife to cut 1/4-inch slits in the pork belly skin before seasoning. I learned this the hard way—it lets the fat render out properly and gives that crispy finish everyone wants.
- Pat It Dry: Blot the pork belly thoroughly with paper towels before salting. Sounds weird, but it works: wet skin steams instead of crisps, and nobody wants soggy pork belly.
- Start Hot, Finish Low: Sear the pork belly over high heat first to get that golden crust, then drop to 300°F to slow-cook the fat until tender. After burning three batches, I finally figured out this is the only way.
- Smash the Garlic: Lightly crush the garlic cloves with the side of your knife before adding them whole. My grandmother swore by this, and she was right: it releases the flavor without burning the bits.
Dietary Considerations for This Dish
Keto-Friendly Option
This dish fits perfectly into a keto diet with just one adjustment. Skip the 2 tbsp Honey glaze entirely, as it contains about 17g carbs per tablespoon. The pork belly itself has 0g carbs and is packed with healthy fats that keep you satiated.
Gluten-Free Adaptation
For a gluten-free version, simply swap the 2 tbsp Soy Sauce for tamari or a certified gluten-free soy sauce. Brands like San-J Tamari work beautifully and maintain the same umami depth without any gluten concerns.
Low-Sodium Version
Reduce the 2 tbsp Kosher Salt by half and use low-sodium soy sauce or coconut aminos. You’ll still get great flavor from the garlic, thyme, and vinegar. Taste as you go and adjust seasoning at the end.
Dairy-Free Naturally
This recipe is naturally dairy-free as written. No butter, milk, or cheese is used in the preparation. The only thing to watch for is cross-contamination if you’re highly sensitive to dairy.
Vegetarian Alternative
While pork belly is the star here, you can recreate similar textures with mushroom caps or eggplant steaks. Use the same cooking method but reduce braising time to 45 minutes. The flavor won’t be identical, but the technique still works well. 💪
Allergen Notes
This recipe contains soy from the soy sauce. For nut allergies, ensure your vinegar and spices are processed in nut-free facilities. Always check labels to be safe.
Nutrition Facts
Frequently Asked Questions
Do I need to score the skin before cooking?
Yes, scoring helps render fat and crisp the skin evenly. Use a sharp knife to make 1/4-inch cuts in a crosshatch pattern, being careful not to cut into the meat. This step ensures maximum crispiness.
Can I use a different pot if I don’t have a Dutch oven?
A heavy-bottomed pot with a tight lid works too. The key is even heat distribution and retention. Avoid thin pots—they can burn the bottom. Medium-high heat control is crucial.
Why did my pork belly turn out tough?
This usually means it didn’t braise long enough. The 1.5-hour cook time is essential for breaking down the fat and collagen. Also, ensure the liquid covers at least halfway up the meat.
How do I reheat leftovers without losing crispiness?
Place pieces on a wire rack in a 400°F oven for 8-10 minutes. The rack allows air circulation to re-crisp the skin. Microwaving will make it soggy.

- 6 Oz Chocolate Chip Cookie Recipe: Perfectly Balanced Crispy Edges and Chewy Hearts - September 25, 2026
- 6-Inch Coffee Cake Recipe: Vanilla Bean Swirls and Buttery Streusel Topping - September 25, 2026
- 1 Hour Soup Recipe: Velvety Richness Without the Wait - September 25, 2026