
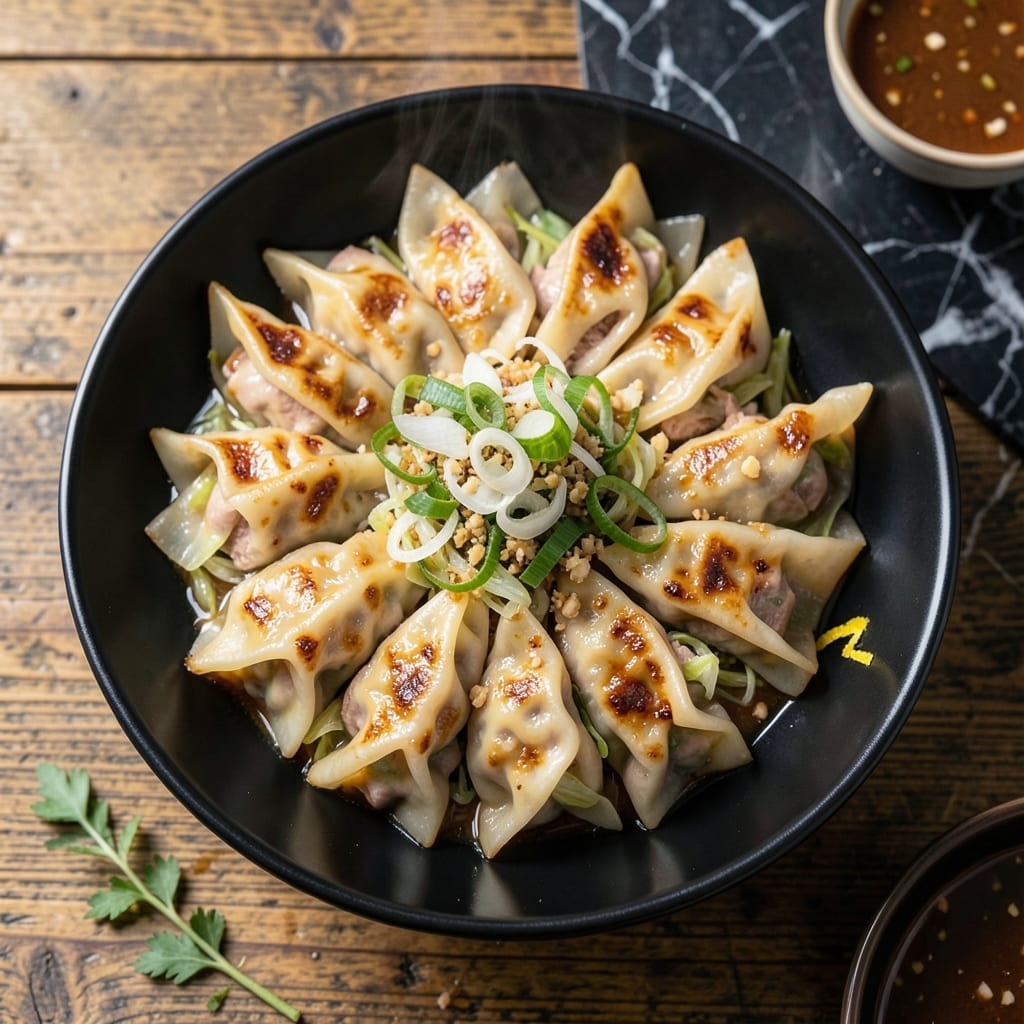
There’s a simple method to achieving crispy, golden-brown potstickers with juicy centers—all in one pot. This technique eliminates the need for multiple pans and complicated flipping, delivering restaurant-quality results with minimal effort.
The key is searing the dumplings in hot oil to develop a crisp base, then adding liquid to steam them through. This creates the perfect contrast: a shatteringly crispy bottom and a tender, juicy filling inside.
You’ll end up with potstickers that release easily from the pan, with a delicate balance of textures in every bite. The one-pot approach ensures even cooking and maximum flavor development.
Serve with a tangy dipping sauce for the full experience. Here’s how to make them perfectly every time.
Ingredients for One Pot Potsticker
These ingredients deliver that perfect crispy bottom and juicy center in one pot.
| Ingredient | Amount | Notes |
|---|---|---|
| Ground Pork 🥩 | 1 lb | Or substitute ground chicken or turkey |
| Napa Cabbage 🥬 | 2 cups | Finely shredded, packed |
| Green Onions 🧅 | 4 whole | Thinly sliced, white and green parts separated |
| Garlic Cloves 🧄 | 3 cloves | Minced finely |
| Fresh Ginger 🌿 | 1 tbsp | Grated or minced |
| Soy Sauce 🫒 | 2 tbsp | Low-sodium preferred |
| Sesame Oil 🫒 | 1 tsp | Toasted variety for depth |
| Rice Vinegar 💧 | 1 tbsp | Unseasoned for balance |
| Potsticker Wrappers 🥟 | 24 pieces | Round dumpling wrappers, thawed if frozen |
| Neutral Oil 🫒 | 2 tbsp | For searing, like vegetable or canola |
| Water 💧 | ½ cup | For steaming dumplings |
| Cornstarch 🌾 | 1 tbsp | For thickening dipping sauce |
| Sugar 🍚 | 1 tsp | Optional, balances acidity |
| Salt 🧂 | ½ tsp | Adjust to taste |
| Black Pepper 🌶️ | ¼ tsp | Freshly ground |
The pork is the foundation—80/20 ground pork gives you the best juiciness and flavor. Most Asian markets carry it pre-ground, or ask your butcher to grind it fresh. Napa cabbage adds moisture without waterlogging the filling (regular green cabbage works in a pinch but may need extra salt). For the wrappers, nasoya brand is widely available and freezer-stable, but check the refrigerated section at H Mart for fresh options.
Ground chicken or turkey swaps in seamlessly for pork—just add an extra tablespoon of oil to compensate for leanness. No Napa cabbage? Bok choy or regular cabbage at half the amount (squeeze out moisture first). Tamari replaces soy sauce for gluten-free, but it’s thicker and saltier—reduce by 25%. The sesame oil is non-negotiable for that signature aroma, but any neutral oil works for searing.
Fresh wrappers keep 1 week refrigerated, 1 month frozen. The filling can be prepped 1 day ahead—store it covered. Cooked potstickers reheat best in a skillet with a splash of water to re-crisp the bottom. Leftovers stay fresh 3 days in the fridge.
Why You’ll Love This Recipe
- One Pan Magic: I toss everything—pork, cabbage, ginger—in one skillet and walk away. No stacking pots, no extra bowls.
- Umami Bomb: The pork soaks up the garlic and ginger, and that crispy bottom? Ridiculously good.
- Weeknight Hero: Between us, this is my Tuesday night lifesaver—ready before the kids finish their homework.
- Budget Stretcher: Ground pork and cabbage feed four for under ten bucks. Honestly, it’s my most reliable cheap thrill.
Step-by-Step Instructions for One Pot Potstickers
Master the technique for achieving perfectly crispy bottoms while keeping the centers juicy and tender.
Step 1: Prepare the Filling with Balanced Flavors
In a large bowl, combine the 1 lb Ground Pork with the finely shredded 2 cups Napa Cabbage, thinly sliced white parts of the 4 whole Green Onions, minced 3 cloves Garlic Cloves, and grated 1 tbsp Fresh Ginger.
Add the 2 tbsp Soy Sauce, 1 tsp Sesame Oil, 1 tbsp Rice Vinegar, 0.5 tsp Salt, and 0.25 tsp Black Pepper. Mix thoroughly with your hands or a fork until the filling is uniformly combined and slightly sticky. This ensures every bite has balanced flavor.
Step 2: Assemble the Potstickers with Precision
Lay a Potsticker Wrapper on a clean surface. Place 1 tablespoon of the filling in the center—don’t overfill, or they won’t seal properly. Dip your finger in the 0.5 cup Water and trace the edge of the wrapper to moisten it.
Fold the wrapper in half over the filling and pleat the edges firmly, pressing to seal completely. Repeat with the remaining 24 pieces Potsticker Wrappers and filling. Keep completed potstickers under a damp towel to prevent drying.
Step 3: Sear to Golden Crispness
Heat the 2 tbsp Neutral Oil in a large, heavy-bottomed skillet with a lid over medium-high heat until shimmering. Arrange the potstickers in a single layer, flat side down, without crowding. Sear undisturbed for 3-4 minutes until the bottoms are deep golden brown and crisp.
Watch for the edges to turn translucent about halfway up the sides—this visual cue confirms the filling is beginning to cook through. Resist the urge to peek too soon; the crispness depends on uninterrupted contact with the hot pan.
Step 4: Steam to Juicy Perfection
Once the bottoms are crispy, carefully add the 0.5 cup Water to the skillet—it will sizzle violently. Immediately cover with the lid to trap the steam. Reduce heat to medium and steam for 8-10 minutes until the water has mostly evaporated.
You’ll know they’re done when the wrappers appear slightly translucent and the filling feels firm when pressed gently with a spatula. The steam transforms the texture from raw to tender while preserving all the juices inside.
Step 5: Serve with Signature Dipping Sauce
While the potstickers finish, whisk together the remaining green onion tops with the 1 tbsp Cornstarch, 1 tsp Sugar, and a splash of the 0.5 cup Water to make a smooth slurry. Heat briefly in a small saucepan until thickened, then drizzle over the potstickers or serve on the side.
Transfer the potstickers to a platter, crispy side up. The contrast between the golden, crunchy bottoms and the soft, juicy tops should be visually striking. Serve immediately while hot—the texture changes as they cool.
Pro Tips For Making One Pot Potsticker
- Pre-cook the Cabbage: Salt the shredded napa cabbage and let it sit for 10 minutes before mixing with pork—I learned this the hard way after my first batch turned soggy. Squeeze out all the water to keep the filling from making the wrappers gummy.
- Chill the Filling: After mixing the pork, cabbage, green onions, garlic, and ginger, pop it in the fridge for 20 minutes. This makes the filling easier to handle and prevents it from sticking to your fingers when folding.
- Don’t Overcrowd the Pot: Resist the urge to fit all the potstickers in at once—give them at least an inch of space between each. Steaming and browning won’t work if they’re packed in too tight.
- Use a Lid for Steam: After browning the bottoms, add a splash of water and cover with a lid for 5-6 minutes. Sounds simple, but it’s the only way to guarantee the tops cook through without burning the crust.
Storing and Reheating This one pot potsticker
Refrigerator Storage
Let your potstickers cool completely before storing. I transfer mine to an airtight container with parchment paper between layers to prevent sticking. They’ll keep in the fridge for up to 3 days without sacrificing texture. ❄️
Freezer Storage
For longer storage, freeze uncooked potstickers on a baking sheet first to prevent sticking. Once solid, transfer to a freezer bag and store for up to 2 months. No need to thaw before cooking—just add 1-2 minutes extra steaming time.
Skillet Reheating
My favorite way to revive leftovers: heat 1 tbsp neutral oil in a skillet over medium heat. Add potstickers flat side down, cover with a lid, and cook for 3-4 minutes. Add 2 tbsp water to re-steam the tops. 🔥
Microwave Method
Place potstickers on a microwave-safe plate with 1 tbsp water in the center. Cover with a damp paper towel and heat for 1-2 minutes. The bottoms won’t be as crispy, but it’s the fastest option for a quick snack.
Dipping Sauce Storage
Store leftover dipping sauce separately in a small airtight container. It keeps for up to 1 week in the fridge. Stir well before using, as the cornstarch may settle. Thin with water if needed.
Nutrition Facts
Frequently Asked Questions
Can I use a nonstick pan instead of cast iron?
Yes, a nonstick pan works fine, but avoid metal utensils. Use medium-high heat and ensure the pan is fully preheated before adding oil. The crisp may be slightly less pronounced than with cast iron.
Why did my potstickers stick to the pan?
This usually happens if the pan wasn’t hot enough before adding them or if you tried to move them too soon. Let them sear undisturbed for 3-4 minutes first to develop a proper crust.
Can I make these vegetarian?
Swap the pork for finely chopped mushrooms, tofu, or a plant-based ground meat. Sauté with the aromatics first to remove excess moisture before filling.
How do I prevent the wrappers from tearing?
Don’t overfill—use exactly 1 tablespoon of filling per wrapper. Keep unused wrappers under a damp towel and seal edges firmly with a bit of water.

- 6 Oz Chocolate Chip Cookie Recipe: Perfectly Balanced Crispy Edges and Chewy Hearts - September 25, 2026
- 6-Inch Coffee Cake Recipe: Vanilla Bean Swirls and Buttery Streusel Topping - September 25, 2026
- 1 Hour Soup Recipe: Velvety Richness Without the Wait - September 25, 2026