
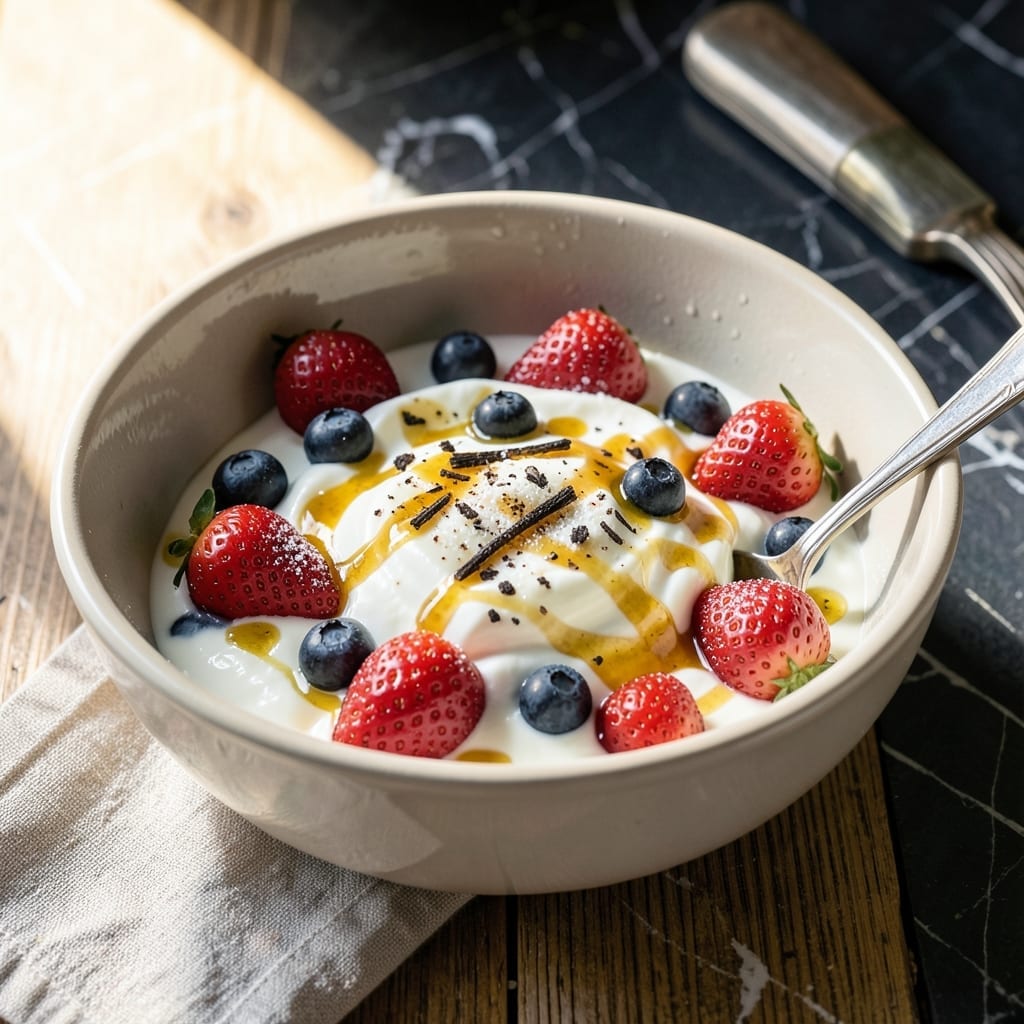
I’ve perfected homemade yogurt using just one pot and a few simple ingredients. This method eliminates the need for specialty equipment while delivering thick, creamy results every time.
The process begins with heating milk to the right temperature, then cooling it before adding a starter culture. The key is maintaining consistent warmth during fermentation, which transforms the milk into yogurt.
What you get is smooth, tangy yogurt with the perfect texture—no lumps, no separation. It’s far superior to store-bought versions, with no artificial additives.
Once strained, it’s ready to enjoy as-is or flavored to taste. This method is reliable and foolproof.
Ingredients for One Pot Yogurt
Just milk and a starter create thick, creamy homemade yogurt with ease.
| Ingredient | Amount | Notes |
|---|---|---|
| Whole Milk 🥛 | 8 cups | Full-fat for creaminess |
| Plain Yogurt Starter 🥣 | 2 tbsp | Store-bought plain, unsweetened |
| Granulated Sugar 🍚 | 1 tbsp | Optional, for sweetness |
| Vanilla Extract 🌿 | 1 tsp | Pure, for flavoring |
| Honey 🍯 | 2 tbsp | Optional, for natural sweetness |
| Fresh Berries 🍓 | 1 cup | For topping, optional |
| Heavy Cream 🥛 | ¼ cup | Optional, for richness |
| Greek Yogurt 🥣 | ½ cup | As alternative starter |
The milk is everything here. Whole milk from a trusted dairy—like Organic Valley or your local creamery—gives the richest texture. Avoid ultra-pasteurized; it won’t set properly. I source mine from Whole Foods for consistent quality. The starter can be any plain, unsweetened yogurt with live cultures, but check the label for active cultures.
No starter on hand? Greek yogurt works at a 1:1 ratio. Want it sweeter? Swap honey for maple syrup or agave. Skipping sugar? The yogurt will still ferment but taste tangier. For extra thickness, strain through cheesecloth (10-15 minutes does the trick). The berries are just for serving—fresh or frozen both work.
Stores in the fridge for 7-10 days. Keep it in a clean, airtight container. The longer it sits, the tangier it gets. Freezing isn’t recommended—it separates. Always use a clean spoon to avoid contamination.
Why You’ll Love This Recipe
- One Pot Wonder: I just dump everything in, set the timer, and walk away—no fancy equipment, no constant stirring.
- Sweet & Creamy: The honey and vanilla make it taste like dessert, but it’s still good-for-you yogurt.
- Meal Prep Magic: I make a big batch Sunday and grab it all week for breakfast, snacks, or even a smoothie base.
- Pennywise Treat: A half-gallon of whole milk turns into quarts of yogurt for the price of one store-bought cup.
Step-by-Step Instructions for One Pot Yogurt
This method guarantees thick, creamy results with minimal equipment and maximum control over texture.
Step 1: Heat and Temper the Milk
Pour all 8 cups Whole Milk into a heavy-bottomed pot and place over medium heat. Stir occasionally with a wooden spoon to prevent scorching as the milk gradually warms to 180°F—this is the pasteurization temperature.
You’ll notice small bubbles forming around the edges and steam rising from the surface when it’s ready. This heating step eliminates unwanted bacteria while preparing the milk proteins to thicken properly. Remove from heat immediately once temperature is reached.
Step 2: Cool and Inoculate with Starter
Let the milk cool undisturbed until it reaches 110-115°F—this is the sweet spot for yogurt cultures to thrive. I test this by dipping a clean finger in; it should feel warm but not hot. This cooling process typically takes 20-30 minutes at room temperature.
In a small bowl, whisk 2 tbsp Plain Yogurt Starter with 1 cup of the cooled milk until smooth. Pour this mixture back into the remaining milk and whisk gently but thoroughly to distribute the cultures evenly. The milk should look uniform with no streaks of starter visible.
Step 3: Incubate for Optimal Thickness
Cover the pot with a tight-fitting lid and wrap it in a thick towel or place it in a turned-off oven with the light on (which maintains about 100°F). Let it incubate undisturbed for 6-8 hours—the longer the time, the thicker and tangier your yogurt will become.
You’ll know it’s ready when the mixture has set with a jiggly, custard-like consistency. If you tilt the pot slightly, the yogurt should hold its shape rather than flow like liquid. At this point, you’ve successfully created the base for your creamy creation.
Step 4: Chill and Customize to Taste
Transfer the pot to the refrigerator and chill for at least 4 hours or preferably overnight. This final cooling step stops the fermentation process and allows the yogurt to develop its full thickness and flavor.
Once chilled, stir in 1 tbsp Granulated Sugar and 1 tsp Vanilla Extract if using. For serving, spoon into bowls and drizzle with 2 tbsp Honey, then top with 1 cup Fresh Berries for a fresh, fruity contrast. For extra richness, stir in 0.25 cup Heavy Cream before chilling.
Pro Tips For Making One Pot Yogurt
- Heat Milk Slowly: Bring the whole milk to 180°F over medium-low heat—rushing this step with high heat can scorch the milk and ruin your yogurt base. I learned this the hard way after two failed batches.
- Use Fresh Starter: Always check the expiration date on your plain yogurt starter; old or weak cultures won’t set properly. My grandmother swore by using a starter made within the last 7 days.
- Avoid Temperature Shocks: Let the milk cool to 110°F before adding the starter—pouring it into hot milk kills the live cultures. Sounds obvious, but I’ve ruined a batch by being impatient.
- Sweeten After Fermenting: Stir in the honey, sugar, and vanilla only after the yogurt has set—adding them earlier can interfere with the fermentation process. It’s an extra step, but it makes a real difference in texture.
Regional Styles of This Dish
Balkan Tradition
In the Balkans, yogurt is a daily staple made with whole sheep’s milk for extra richness. They often use clay pots for fermentation, which helps maintain consistent temperature. The result is a tangy, thick yogurt that’s slightly different from cow’s milk versions. 💛
Indian Dahi Style
Indian dahi is typically made with buffalo milk for a creamier texture. The process involves heating milk to 180°F, then cooling to 110°F before adding starter. They often set it in earthenware pots, which helps with temperature retention.
Middle Eastern Labneh
For a Middle Eastern twist, strain your finished yogurt in a cheesecloth for 12-24 hours to create labneh. This ultra-thick version is often rolled into balls and preserved in olive oil. It’s perfect for spreading on flatbreads or dipping vegetables.
Turkish Ayran Base
Turks use a similar one-pot method but often add a pinch of salt to their starter culture. The resulting yogurt is the base for ayran, a refreshing drink made by whisking yogurt with water and a pinch of salt. It’s a must-have with kebabs.
Greek Strained Yogurt
Greek yogurt is simply regular yogurt that’s been strained longer—usually 4-6 hours in cheesecloth. This removes more whey, creating that signature thick, creamy texture. I find it works best with whole milk for the richest results.
Nordic Skyr Style
Icelandic skyr uses a similar process but with skim milk and a longer fermentation. The result is a protein-rich, slightly sour yogurt that’s technically a cheese. It’s traditionally served with berries and a drizzle of honey. ✨
Nutrition Facts
Frequently Asked Questions
What’s the ideal milk temperature for adding starter?
Cool the milk to 110-115°F before adding the starter. This range allows yogurt cultures to thrive without being killed by excessive heat.
How long should I ferment the yogurt?
Incubate for 6-8 hours for the best texture. Longer fermentation yields thicker, tangier results, while shorter times produce milder yogurt.
Can I use a different type of milk?
Whole milk works best for creaminess, but 2% or skim can be used. Avoid ultra-pasteurized milk, as it won’t set properly.
Why did my yogurt turn out runny?
This usually happens if the milk wasn’t heated to 180°F or if the incubation temperature fluctuated. Straining through cheesecloth for 10-15 minutes can help thicken it.

- 6 Oz Chocolate Chip Cookie Recipe: Perfectly Balanced Crispy Edges and Chewy Hearts - September 25, 2026
- 6-Inch Coffee Cake Recipe: Vanilla Bean Swirls and Buttery Streusel Topping - September 25, 2026
- 1 Hour Soup Recipe: Velvety Richness Without the Wait - September 25, 2026