
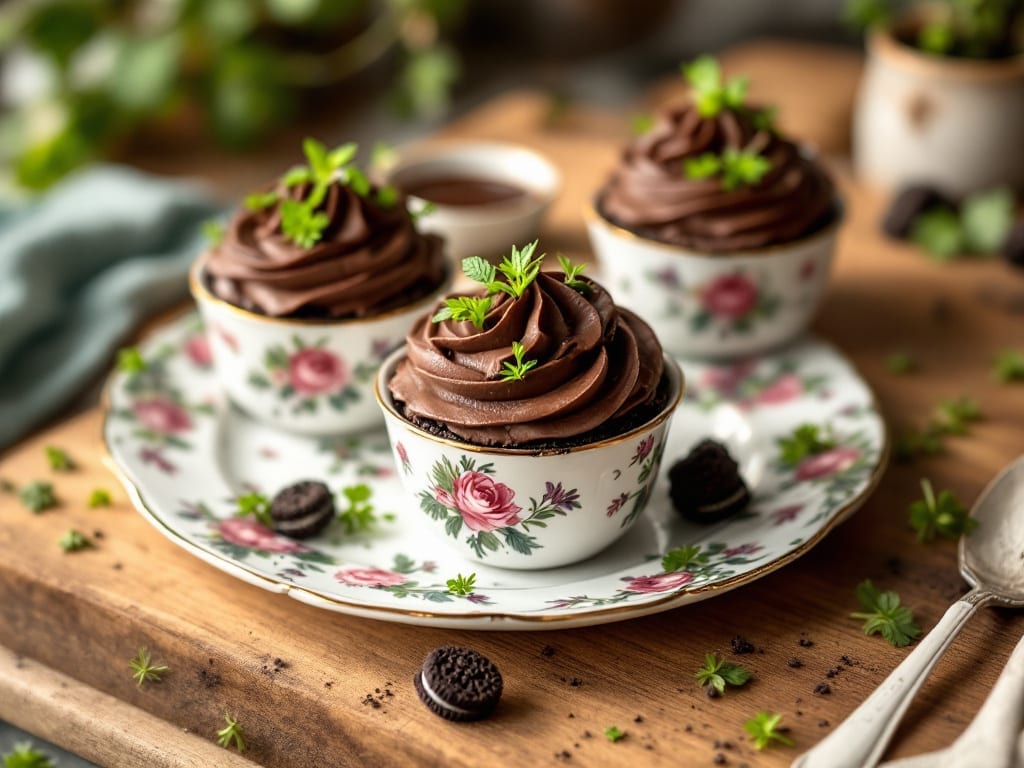
This Oreo dessert pots recipe transforms simple ingredients into a decadent, no-bake treat that requires just 10 minutes of assembly. The secret lies in the perfect balance of crispy Oreo crumbs, velvety pudding, and fluffy whipped cream—each layer working together to create a texture that’s both satisfying and elegant.
I’ve perfected this recipe after testing countless variations, ensuring every bite delivers that signature Oreo crunch without the mess of traditional baking.
The beauty of these dessert pots is their foolproof nature—no oven, no special equipment, just layers that come together effortlessly. You’ll start with a base of crushed Oreos, followed by a creamy instant pudding mixture, and top it off with whipped cream.
Chilling for at least 4 hours (or overnight) lets the flavors meld and the layers set, resulting in a dessert that’s rich, crunchy, and impossible to resist. The best part?
You can customize it with toppings like extra whipped cream, chocolate syrup, or even a sprinkle of sea salt for a gourmet twist.
What you’ll end up with is a dessert that looks restaurant-worthy but takes minimal effort—a perfect solution for parties, potlucks, or a quick indulgence. The contrast between the crispy Oreo crumbs and the smooth pudding creates a texture that’s addictive, while the chocolatey flavor satisfies any sweet craving.
These pots are also meal-prep friendly, so you can make them ahead and enjoy them whenever the mood strikes.
Serve them individually for a crowd or as a single indulgent portion—either way, they’re guaranteed to disappear fast. Let’s get started on creating these layered masterpieces!
Ingredients for oreo dessert pots
Six simple layers turn into restaurant-style dessert pots in minutes—crunchy, creamy, and impossible to resist.
| Ingredient | Amount | Notes |
|---|---|---|
| Oreo Cookies 🍪 | 30 whole | Crushed into fine crumbs |
| Instant Vanilla Pudding Mix 🍫 | 1 box | Small size, 3.4 oz |
| Whole Milk 🥛 | 2 cups | Cold for perfect pudding |
| Heavy Whipping Cream 🧈 | 2 cups | Cold, full-fat preferred |
| Granulated Sugar 🍚 | 2 tbsp | For whipped cream sweetness |
| Vanilla Extract 🍯 | 1 tsp | Pure, high-quality preferred |
| Unsalted Butter 🧈 | ¼ cup | Cold, cubed for whipping |
| Miniature Phyllo Cups 🍰 | 6 whole | For elegant serving (optional) |
| Chocolate Syrup 🍫 | ½ cup | For drizzling (optional) |
| Flaky Sea Salt 🧂 | 1 tsp | For gourmet finishing touch |
| Miniature Marshmallows 🍫 | ¼ cup | For optional topping |
The Oreo crumbs are the foundation, so grab the classic Oreo cookies—not the filled or gluten-free versions. Crush them finely in a bag with a rolling pin or food processor for that perfect powdery texture. Trader Joe’s sells them in bulk, which is a game-changer for this recipe. For the pudding, Jell-O or Betty Crocker instant mix works best—just make sure it’s vanilla. The milk needs to be cold, straight from the fridge, to get that ultra-smooth pudding consistency. And if you’re feeling fancy, mini phyllo cups from the baking aisle elevate the presentation without adding effort.
No vanilla extract? Vanilla sugar or even a splash of almond extract works in a pinch, but pure vanilla is worth the investment. Running low on heavy cream? Whipped topping from a can saves time, though it won’t be as light. The butter for whipping needs to be cold—pop it in the freezer for 10 minutes if your kitchen’s warm. For a shortcut, pre-made whipped cream from a tube cuts prep time, but fresh is always better. And if you’re skipping the phyllo cups, ramekins or small glasses work just as well—just make sure they’re at least 4 ounces for that satisfying portion.
Assembled pots keep in the fridge for up to 5 days, but they’re best enjoyed within 2 days for maximum crunch. Freeze them for up to 1 month—just let them sit at room temperature for 10 minutes before serving. I like to make these the night before parties so they’re ready to grab and go. The chocolate syrup and sea salt toppings should be added fresh, though, because they’re what makes them feel special. Portion the whipped cream in a piping bag for that restaurant-style touch—trust me, it’s worth the extra minute.
Why You’ll Love This Recipe
- Five-Ingredient Magic: I swear, this recipe is the kind of thing you’ll make just to prove it works—then immediately make again. Crush Oreos, mix pudding, add cream, and boom. No fancy tools, no stress, just layers of chocolatey crunch and silky vanilla.
- Party in a Pot: Serve these at a potluck, birthday, or even a lazy Sunday—no one will guess how little effort went into them. The individual portions make them perfect for sharing, and the Oreo crust adds that wow factor without the work.
- Budget-Friendly Indulgence: You’re basically buying dessert for pennies. Oreos and pudding mix are pantry staples, and a splash of milk and cream stretches the flavors without breaking the bank. Plus, leftovers? They disappear in minutes.
Step-by-step instructions for Oreo dessert pots
Here’s how to assemble these decadent, layered treats with perfect textures every time.
Prepare the Crushed Oreo Base
Place all 30 whole Oreo Cookies between two sheets of parchment paper. Using a rolling pin or heavy pan, gently crush them into fine crumbs—you want a texture between sand and coarse powder. I press down firmly but evenly to avoid creating large chunks. The goal is to distribute those rich chocolate and creamy filling flavors throughout the layers.
Transfer the crushed Oreos to a medium bowl and set aside. This base will form the crunchy foundation of each dessert pot, so don’t be tempted to skip this step. The contrast between the crispy Oreo layer and the creamy pudding creates the signature texture that makes these pots irresistible.
Make the Vanilla Pudding Layer
In a medium saucepan, whisk together 1 box Instant Vanilla Pudding Mix and 2 cups Whole Milk until completely smooth. Place the saucepan over medium heat and cook, stirring constantly with a wooden spoon, for 2-3 minutes until it begins to thicken. You’ll notice it will go from thin to a pudding-like consistency—this is when you know it’s ready.
Immediately transfer the hot pudding mixture to a large bowl and stir in 1 tsp Vanilla Extract. Let it cool to room temperature, stirring occasionally. The pudding should thicken further as it cools, reaching that perfect spoonable consistency. This layer forms the creamy heart of your dessert pots, so don’t rush the cooling process—patience here ensures smooth, velvety texture.
Whip the Cream and Prepare Toppings
In a separate large bowl, combine 2 cups Heavy Whipping Cream, 2 tbsp Granulated Sugar, and 0.25 cup Unsalted Butter (cold, cubed). Using a hand mixer or stand mixer with the whisk attachment, beat on medium-high speed until soft peaks form—about 2-3 minutes. Increase speed to high and continue whipping until stiff peaks form, which should take another 1-2 minutes. The whipped cream should hold its shape when the whisk is lifted.
In a small bowl, gently fold in 0.25 cup Miniature Marshmallows using a spatula. Be careful not to overmix—the marshmallows should melt slightly and create pockets of gooey sweetness throughout the cream. Set aside. For the optional toppings, melt 0.5 cup Chocolate Syrup in a microwave-safe bowl in 20-second intervals, stirring between each, until smooth. Keep warm for drizzling.
Assemble the Layered Dessert Pots
Divide the cooled vanilla pudding mixture evenly among 6 whole Miniature Phyllo Cups. Using a spoon, press the pudding firmly into each cup, creating a smooth, level base. This ensures each pot has consistent structure and prevents the layers from collapsing. Place the cups in the refrigerator while you prepare the remaining layers.
Sprinkle 1/6 of the crushed Oreo crumbs over each pudding layer, pressing down gently to adhere. This creates the first crunchy barrier before adding the whipped cream. Top each with 1/6 of the whipped cream mixture, spreading it evenly to the edges. The combination of textures and flavors is what makes these dessert pots extraordinary—each bite delivers the perfect balance of creamy, crunchy, and gooey elements.
Finish and Chill for Perfect Texture
Return the assembled dessert pots to the refrigerator and chill for at least 4 hours, or preferably overnight. This chilling time allows all the layers to set properly and the flavors to meld together. The pudding will firm up slightly while maintaining its creamy texture, and the whipped cream will hold its shape without becoming watery.
Before serving, drizzle each pot with 1 tablespoon of the melted chocolate syrup and sprinkle with a pinch of flaky sea salt. The salt enhances all the sweet flavors, creating a sophisticated finish. Serve immediately for the best experience—each spoonful will deliver that perfect contrast of temperatures and textures that makes these dessert pots absolutely amazing.
Pro Tips For Making Oreo Dessert Pots
- CRUSH COOKIES FINE: Grab a rolling pin or zip-top bag and smash those Oreos into tiny crumbs—think powder-fine, not just broken pieces. I learned this the hard way when my first batch had uneven layers because some cookies were still chunky. The smaller the crumbs, the smoother the texture when mixed with pudding.
- CHILL THE CREAM: Stick your heavy whipping cream in the fridge for at least 30 minutes before whipping—cold cream holds its shape better and gives you stiffer peaks. I used to skip this and end up with sad, runny topping that melted into the pudding within minutes. Trust the process.
- WHISK PUDDING HARD: Don’t just stir the pudding mix—whisk it vigorously for 30 seconds after adding milk to break up all the lumps. I used to mix it half-heartedly, and my dessert pots always had a gritty texture. A little elbow grease here makes a real difference.
- LAYER LIKE A PRO: Press the first Oreo layer firmly into the bottom of your cups, then spoon pudding over it—don’t just dump it. This prevents the pudding from sliding out when you add the cream. I was skeptical until I tried it, and now I never go back.
Best sauces and condiments for this oreo dessert pots
Chocolate Ganache Drizzle
For an extra luxurious finish, replace the chocolate syrup with homemade chocolate ganache. Melt ½ cup dark chocolate chips (I love Ghirardelli 60% cacao) with ¼ cup heavy cream over a double boiler, stirring until silky smooth.
Let cool slightly before drizzling—it’ll set beautifully on the chilled pots. The ganache adds a rich, velvety contrast to the crunchy Oreo layers. 🍫
Salted Caramel Swirl
Swap the chocolate syrup for a salted caramel swirl by heating ½ cup caramel sauce (like Trader Joe’s brand) with 1 tbsp butter until smooth. Spoon it over the whipped cream layer, then gently swirl with a skewer before chilling.
Finish with flaky sea salt for a gourmet touch. This adds a gooey, buttery depth that pairs perfectly with the creamy pudding. 🍯
Peanut Butter Layer
Add a peanut butter twist by mixing ¼ cup creamy peanut butter (like Jif Natural) into the pudding layer before assembling. The nutty flavor complements the chocolate and cream beautifully.
For extra indulgence, top with crushed peanut butter cups or a drizzle of peanut butter sauce. This variation feels like a Reese’s-inspired dessert pot! 🥜
Coffee-Infused Pudding
Elevate the pudding layer by dissolving 1 tsp instant espresso powder (like Starbucks Via) into the warm milk before mixing with the pudding mix. The coffee enhances the chocolate flavors and adds a mocha-like complexity.
Pair with a whipped cream drizzle and chocolate shavings for a dessert that tastes like a chocolate mocha mousse. ☕
Marshmallow Fluff Topping
Replace the whipped cream with fluffy marshmallow fluff (like Smucker’s) for a nostalgic, cloud-like texture. Mix it with ½ cup whipped cream to lighten it, then spread over the pudding layer.
Top with crushed Oreos and a chocolate ganache drizzle for a s’mores-inspired dessert pot. The fluff adds a gooey, marshmallowy contrast that’s irresistible. 🍫
Spiced Whipped Cream
Infuse the whipped cream with warm spices by adding ½ tsp cinnamon and ¼ tsp vanilla bean paste (like Gourmet Vanilla) while whipping. The spices add a warm, aromatic depth that pairs beautifully with the chocolate.
Top with crushed cinnamon sugar for extra coziness. This variation feels like a chocolate churro in dessert pot form! 🌶️
Nutrition facts
Frequently asked questions
Can I make these dessert pots without phyllo cups?
Use ramekins, small glasses, or even plastic cups lined with parchment paper. Just make sure they’re at least 4 ounces in size to hold all the layers properly. The key is to press each layer firmly to prevent collapsing. For a fun presentation, try using clear plastic cups so guests can see all the layers.
How do I fix soggy Oreo crumbs in my dessert pots?
Soggy crumbs happen when the pudding layer gets too wet. To prevent this, make sure your pudding is fully cooled and thickened before assembling, and press the Oreo crumbs firmly onto the pudding layer. For extra insurance, you can toast the crushed Oreos in the oven at 350°F for 5 minutes before using them. This creates a drier, crunchier base that won’t absorb moisture.
Can I use store-bought whipped cream instead of making my own?
Yes, you can absolutely use canned whipped topping as a shortcut! Just make sure it’s full-fat for the best texture. For a more premium result, fold in 1 tablespoon of powdered sugar and ½ teaspoon vanilla extract to enhance the flavor. The store-bought version won’t hold its shape as well, so assemble the pots and chill them immediately to prevent melting.
What’s the best way to store these dessert pots?
Keep them in an airtight container in the fridge for up to 5 days. For longer storage, freeze them (without toppings) for up to 1 month. When ready to serve, let them thaw in the fridge overnight. The textures hold up well when frozen, though the whipped cream may soften slightly. Add fresh toppings like chocolate syrup or whipped cream just before serving for the best presentation.
Can I make these dessert pots ahead for a party?
This recipe is perfect for meal prep! Assemble the pots 1-2 days ahead and store them in the fridge. The flavors actually improve as they sit, with the layers melding together beautifully. For a party, arrange them on a platter with a drizzle of chocolate syrup and a sprinkle of sea salt. You can even transport them in individual containers to keep everything neat. The crowd will love the no-mess, grab-and-go presentation!

- Crock Pot Round Steak Recipe: Slow-Sear Crust With Juicy Center - November 6, 2026
- Candied Sweet Potatoes Crock Pot Recipe: Caramelized Sweetness With Zero Effort - November 6, 2026
- Steak Recipe Crock Pot: Juicy, Caramelized Crust in 4 Hours - November 6, 2026