
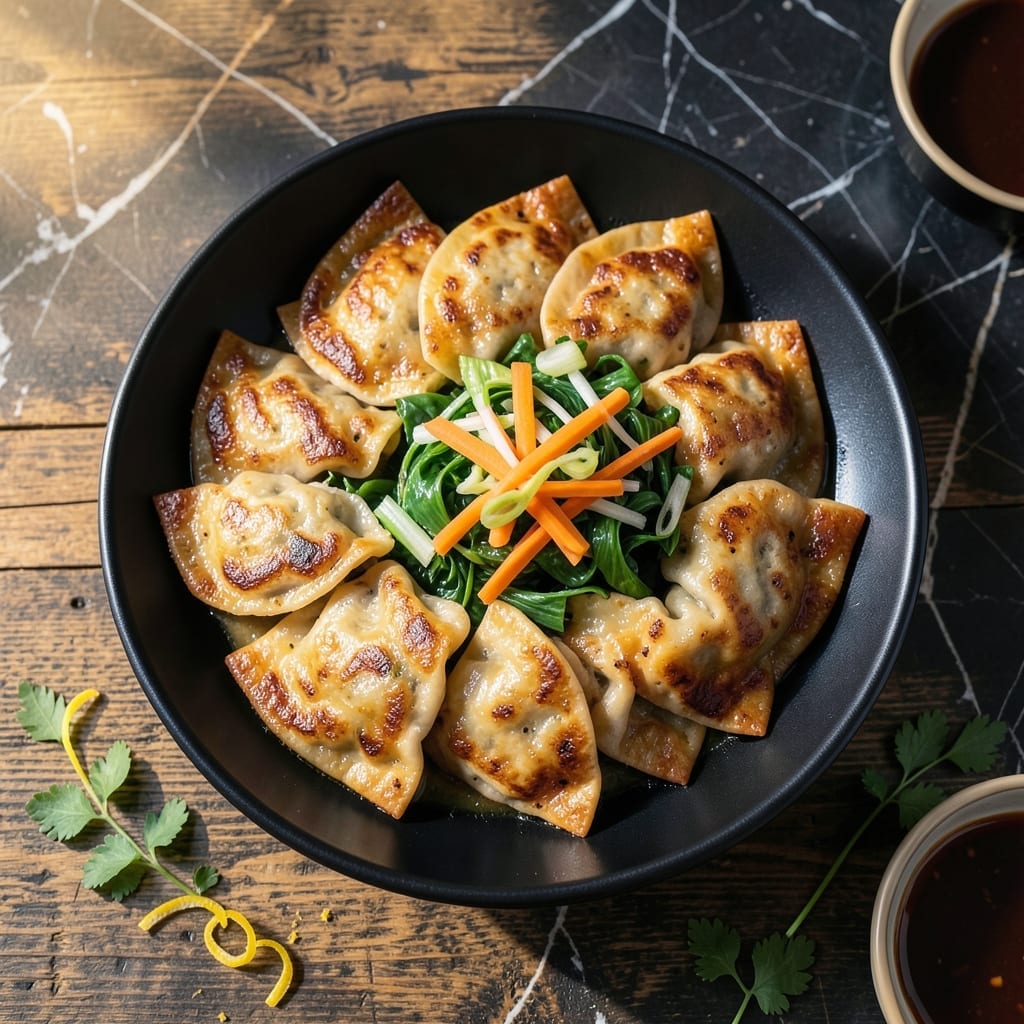
There’s a reason pot stickers are a crowd favorite—they deliver crispy golden bottoms with juicy fillings in every bite. This method ensures restaurant-quality results at home without complicated techniques.
The secret lies in the two-step cooking process: searing first for that signature crunch, then steaming to keep the insides tender. A hot pan and the right oil make all the difference in achieving that perfect texture contrast.
I’ve tested countless variations, and this approach consistently delivers. The filling stays moist and flavorful, while the bottoms develop that addictive crispness that makes them impossible to resist.
Serve these immediately with your favorite dipping sauce for an appetizer that disappears fast. Here’s how to make them right.
Ingredients for Pan Seared Pot Stickers
Pantry staples plus a quick veggie prep. Nothing complicated, just bold flavor waiting.
| Ingredient | Amount | Notes |
|---|---|---|
| Ground Pork 🥩 | 1 lb | Or substitute ground chicken |
| Napa Cabbage 🥬 | 2 cups | Finely shredded, salted and drained |
| Carrots 🥕 | ½ cup | Julienned or finely grated |
| Green Onions 🧅 | 3 whole | Thinly sliced, white and green parts separated |
| Garlic Cloves 🧄 | 3 cloves | Minced finely |
| Fresh Ginger 🌿 | 1 tbsp | Peeled and minced |
| Soy Sauce 🫒 | 2 tbsp | Low-sodium preferred |
| Sesame Oil 🫒 | 1 tsp | Toasted for best flavor |
| Rice Vinegar 🍯 | 1 tsp | Or substitute apple cider vinegar |
| Wonton Wrappers 🥟 | 24 pieces | Round or square, thawed if frozen |
| Neutral Oil 🫒 | 2 tbsp | For searing, like vegetable or canola |
| Water 💧 | ½ cup | For steaming pot stickers |
| Cornstarch 🌾 | 1 tbsp | For thickening filling |
| Salt 🧂 | ½ tsp | Adjust to taste |
| Black Pepper 🌶️ | ¼ tsp | Freshly ground |
The pork sets the flavor here. Ground pork shoulder gives the juiciest filling—avoid lean cuts or they’ll dry out. For cabbage, Napa is ideal (mild, slightly sweet), but regular green cabbage works if that’s what you’ve got. I grab mine from Asian markets—they usually have better prices on both pork and wrappers. The wrappers should be thin and pliable, not dry or brittle (check the expiration date).
No pork? Ground chicken or turkey keeps things light. Vegetarian? Mushrooms or tofu crumbled fine mimics the texture. No Napa cabbage? Bok choy or regular cabbage at half the amount. The soy sauce can be tamari for gluten-free, but skip the low-sodium if you’re using tamari (it’s already less salty). Fresh ginger is key—jarred lacks the punch.
Filling can be prepped a day ahead—store it airtight in the fridge. The wrappers? Keep them sealed in the package with a damp paper towel to prevent drying. Cooked pot stickers are best fresh, but leftovers reheat well in a dry pan for 2-3 minutes to recrisp the bottoms.
Why You’ll Love This Recipe
- One Pan Magic: I love that everything cooks in a single skillet—fill, sear, and steam without a sink full of dishes.
- Garlic-Pork Perfection: The combo of savory ground pork, fresh napa cabbage, and punchy garlic makes every bite crave-worthy.
- Freezer’s Best Friend: I double the batch and freeze half for those nights I need dinner in 10 minutes flat.
- Budget Stretcher: Ground pork and cabbage go a long way, feeding my family for less than takeout would cost.
Step-by-Step Instructions for Pan Seared Pot Stickers
This method guarantees golden crispy bottoms and juicy fillings with every bite.
Step 1: Prepare the Filling Mixture
In a large bowl, combine the 1 lb Ground Pork with 2 cups Napa Cabbage, 0.5 cup Carrots, white parts of the 3 whole Green Onions, 3 cloves minced Garlic Cloves, and 1 tbsp Fresh Ginger. I find using my hands works best here for even distribution.
Add 2 tbsp Soy Sauce, 1 tsp Sesame Oil, 1 tsp Rice Vinegar, 0.5 tsp Salt, and 0.25 tsp Black Pepper. Sprinkle 1 tbsp Cornstarch over the mixture and stir until everything is well combined and slightly sticky—the cornstarch will help bind the filling and create that perfect texture.
Step 2: Fill and Shape the Pot Stickers
Place 1 tsp of filling in the center of each Wonton Wrapper. I like to keep a small bowl of water nearby to moisten the edges. Fold the wrapper in half over the filling to create a half-moon shape, then pleat the edges firmly with your fingers to seal completely.
Press out any air pockets as you seal—this prevents them from bursting during cooking. Arrange the finished pot stickers on a parchment-lined tray, covering with a damp towel to prevent drying. This step is where you ensure each piece has that classic pot sticker look.
Step 3: Pan Sear for Crispy Bottoms
Heat 1 tbsp Neutral Oil in a large non-stick skillet over medium-high heat until shimmering. Arrange the pot stickers in a single layer, flat-side down, without crowding. I always work in batches to ensure each one gets proper browning.
Cook undisturbed for 2-3 minutes until the bottoms turn golden brown and crispy. Watch for the edges to become translucent—this tells you the filling is starting to cook through. Resist the urge to peek too early; you want that perfect sear.
Step 4: Steam for Juicy Fillings
Carefully pour 0.5 cup Water into the skillet (it will sizzle dramatically). Immediately cover with a tight-fitting lid and reduce heat to medium-low. Steam for 8-10 minutes until the water has mostly evaporated and the wrappers are translucent.
You’ll know they’re done when the filling reaches 160°F internally and the tops look cooked through. The steam creates the juicy texture inside while the sear maintains that crispy bottom you worked for in the previous step.
Step 5: Finish and Serve
Uncover and continue cooking for 1-2 minutes to allow any remaining water to evaporate and the bottoms to crisp up again. The pot stickers should release easily from the pan when properly crisped.
Transfer to a serving plate, crispy-side up. Garnish with the sliced green onion tops for a pop of color and freshness. Serve immediately while hot—the contrast between the crispy bottom and tender filling is at its peak right out of the pan.
Pro Tips For Making Pan Seared Pot Stickers
- Crisp the Bottom First: Let the pot stickers sear undisturbed in hot oil for 2-3 minutes until the bottoms turn deep golden brown—I learned this the hard way after peeking too early and ending up with pale, soggy dumplings.
- Squeeze Out Cabbage: After shredding the napa cabbage, salt it and let it sit for 5 minutes, then squeeze out every drop of water with your hands. Sounds tedious, but it prevents a watery filling that ruins the texture.
- Skip Overfilling: Use about 1 tablespoon of filling per wrapper and resist the urge to stuff them—overfilled pot stickers burst open in the pan, turning your crispy batch into a sticky mess.
- Use Cold Filling: Chill your pork and cabbage mixture for 15 minutes before assembling. My grandmother swore by this, and she was right: it makes the dumplings much easier to fold and they hold their shape better while cooking.
Regional Styles of This Recipe
Northern Chinese Style
In Beijing, pot stickers (guotie) feature a coarser filling with more cabbage and less pork. The wrappers are thicker, creating a heartier bite. I love their rustic, pleat-free folding style—just press and seal. 🗺️
Shanghai Variations
Shanghai-style uses thinner wrappers and includes shrimp in the filling for a delicate texture. The bottoms are crispier, achieved by using more oil during searing. Steam time is shorter, just 5-6 minutes.
Korean Mandu
Korean versions often add kimchi or tofu to the filling. The shape is more varied—sometimes crescent, sometimes round. They’re pan-fried then steamed, but often finished with a sweet-savory glaze. 💛
Japanese Gyoza
Japanese gyoza use thinner, round wrappers and finely minced filling. They’re typically pan-fried with a crispy lace skirt created by adding oil and flour to the pan. Garlic chili oil is the classic dipping sauce.
Taiwanese Style
Taiwanese pot stickers often include shitake mushrooms and bamboo shoots in the filling. The wrappers are slightly chewier. They’re popular at night markets, served with a vinegar-soy dipping sauce.
Nutrition Facts
Frequently Asked Questions
Can I use frozen wrappers instead of fresh?
Yes, thaw them completely in the fridge overnight. Keep them covered with a damp towel while working to prevent drying out.
Why did my pot stickers stick to the pan?
They likely needed more oil or weren’t crispy enough before steaming. Use medium-high heat and ensure the bottoms are golden before adding water.
How do I know when they’re fully cooked?
The wrappers will be translucent and the filling should reach 160°F. The bottoms should release easily when crisped properly.
Can I make these ahead of time?
Shape and freeze uncooked pot stickers on a tray, then transfer to a bag. Cook from frozen, adding 2-3 minutes extra steam time.

- 6 Oz Chocolate Chip Cookie Recipe: Perfectly Balanced Crispy Edges and Chewy Hearts - September 25, 2026
- 6-Inch Coffee Cake Recipe: Vanilla Bean Swirls and Buttery Streusel Topping - September 25, 2026
- 1 Hour Soup Recipe: Velvety Richness Without the Wait - September 25, 2026