
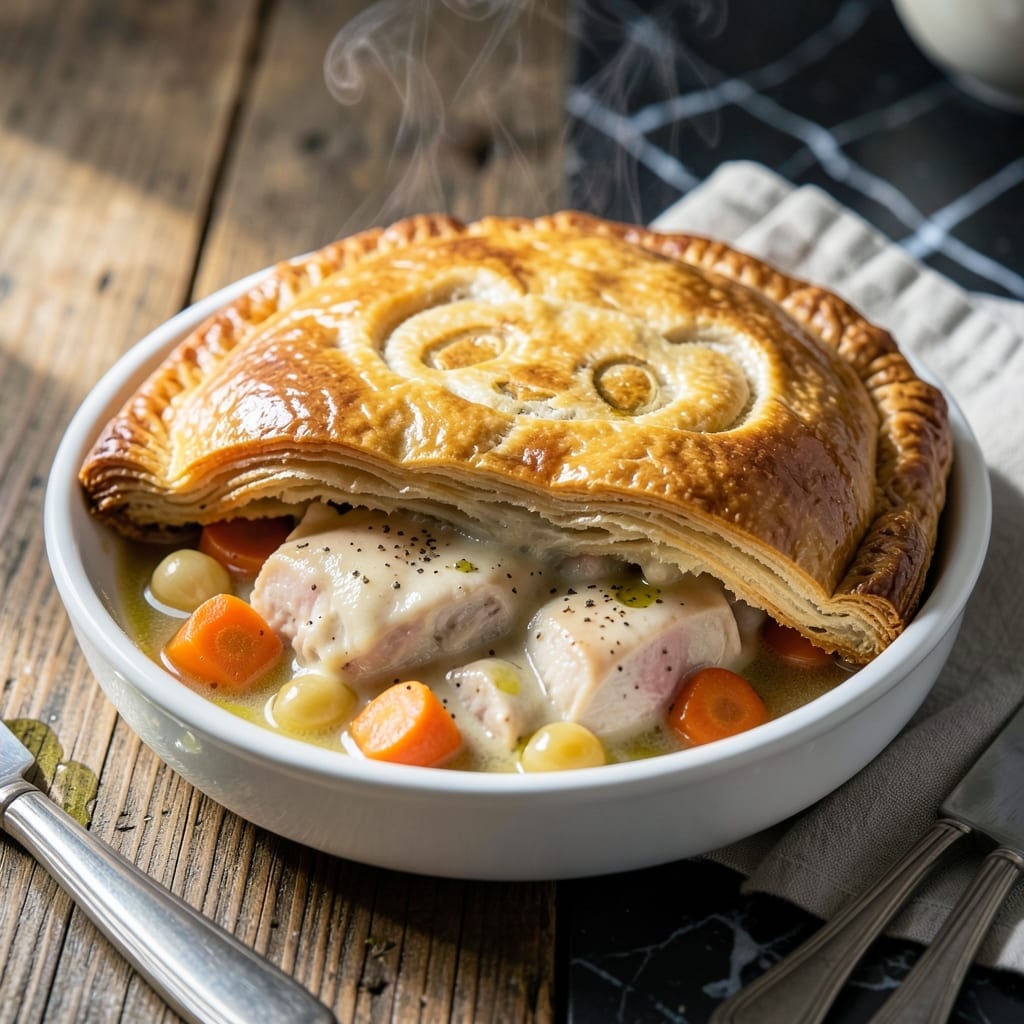
This pot pie delivers restaurant-style comfort in every flaky, golden bite. The filling bursts with tender chicken, hearty vegetables, and a velvety sauce that’s rich without being heavy.
I’ve refined this method to ensure the crust stays crisp while the inside stays creamy. The secret is a hot oven and a well-sealed edge—no soggy bottoms here.
What you get is a dish that tastes like it came from a diner but looks like it belongs in a fine-dining kitchen. The aroma alone will draw a crowd.
Serve it fresh from the oven with a side of warmth and satisfaction. Here’s how to make it right.
Ingredients for Panda Chicken Pot Pie
Restaurant-quality comfort starts with these quality ingredients for a perfect crust and rich filling.
| Ingredient | Amount | Notes |
|---|---|---|
| Chicken Breast 🍗 | 1 ½ lb | Boneless, skinless, diced |
| All-Purpose Flour 🌾 | ⅓ cup | For thickening sauce |
| Butter 🧈 | ½ cup | Unsalted, for roux |
| Chicken Broth 🥣 | 2 ½ cups | Low-sodium preferred |
| Whole Milk 🥛 | ¾ cup | Full-fat for creaminess |
| Carrots 🥕 | 2 whole | Peeled, diced |
| Celery Stalks 🌿 | 2 whole | Diced finely |
| Yellow Onion 🧅 | 1 whole | Medium, finely chopped |
| Frozen Peas 🌱 | 1 cup | No need to thaw |
| Garlic Cloves 🧄 | 2 cloves | Minced for depth |
| Fresh Thyme 🍃 | 1 tbsp | Chopped, or 1 tsp dried |
| Salt 🧂 | 1 tsp | Kosher or sea salt |
| Black Pepper 🌶️ | ½ tsp | Freshly ground |
| Pie Crust 🥧 | 2 sheets | Store-bought or homemade |
| Egg 🥚 | 1 whole | For egg wash |
The chicken is the foundation—boneless, skinless breasts stay tender and juicy. For broth, low-sodium chicken stock lets you control the seasoning. I get mine from Whole Foods or make it from scratch. The butter should be unsalted so you can adjust salt to taste. Fresh thyme adds that restaurant-style depth, but dried works in a pinch (just use one-third the amount).
No fresh thyme? Dried thyme or poultry seasoning works well. Swap milk for half-and-half for extra richness, or use whole milk if that’s what you have. The veggies can be flexible—add potatoes or mushrooms if you like. For the crust, Pillsbury refrigerated pie crust is a reliable shortcut, but homemade will impress.
Assemble and bake immediately, or refrigerate for up to 1 day before baking. Leftovers keep well for 3-4 days in the fridge. Reheat in the oven to keep the crust crisp—microwave will make it soggy.
Why You’ll Love This Recipe
- One Pan Magic: I love that everything—chicken, broth, and that buttery crust—comes together in a single skillet. No pile of dishes, just great food.
- That Crust Though: The flaky, golden top made with butter and flour is the kind of comfort I crave on chilly evenings.
- Feeds the Crew: I’ve served this at Sunday dinner and for weeknight meals—it’s filling enough that even my teenage son asks for seconds.
- Budget Winner: Chicken breast and pantry staples like flour and broth keep this dish affordable, and leftovers taste just as good the next day.
Step-by-Step Instructions for Chicken Pot Pie
Here’s the method. Straightforward, tested, works every time.
Step 1: Cook the Chicken and Vegetables
In a large pot over medium-high heat, melt ½ cup butter. Add the diced 1.5 lb chicken breast and cook until no longer pink, about 6-8 minutes. Remove the chicken and set aside.
In the same pot, add the diced 2 carrots, 2 celery stalks, and finely chopped 1 yellow onion. Cook for 5 minutes until the vegetables begin to soften. Stir in the minced 2 garlic cloves and 1 tbsp fresh thyme, cooking for another 1 minute until fragrant.
Step 2: Make the Creamy Sauce
Sprinkle ⅓ cup all-purpose flour over the vegetables and stir to coat. Cook for 1-2 minutes to remove the raw flour taste. Slowly pour in 2½ cups chicken broth and ¾ cup whole milk, whisking constantly to avoid lumps.
Bring the mixture to a simmer and cook for 5-7 minutes until it thickens enough to coat the back of a spoon. Stir in 1 tsp salt, ½ tsp black pepper, and the cooked chicken. Add 1 cup frozen peas—they’ll heat through as the filling warms.
Step 3: Assemble the Pot Pie
Preheat your oven to 375°F. Line a 9-inch pie dish with 1 sheet pie crust, pressing it gently into the bottom and sides. Trim any excess dough hanging over the edge.
Pour the chicken and vegetable filling into the crust-lined dish. It should mound slightly in the center. Top with the second pie crust, crimping the edges to seal. Cut a few small slits in the top crust to allow steam to escape during baking.
Step 4: Bake to Golden Perfection
In a small bowl, beat 1 egg and brush it evenly over the top crust. This egg wash ensures a beautiful, golden-brown finish.
Bake for 40-45 minutes until the crust is deep golden brown and the filling is bubbling. If the edges begin to brown too quickly, cover them loosely with aluminum foil. Let the pot pie rest for 10 minutes before serving—this allows the filling to set slightly for cleaner slices.
Pro Tips For Making Panda Chicken Pot Pie
- Pre-Cook the Chicken: Poach the chicken breast in the broth first—it keeps the meat juicy and infuses the liquid with extra flavor before mixing.
- Chill the Dough: Let the flour-butter crust rest in the fridge for at least 30 minutes; I learned this the hard way after my first few pies turned out tough.
- Thicken Slowly: Add the milk to the roux gradually, whisking constantly, or you’ll end up with lumps instead of a smooth, creamy filling.
- Vent the Top: Cut a few small slits in the crust before baking—steam needs to escape, or the filling will bubble over and make a mess.
Essential Equipment for This Recipe
Pie Dish Selection
I always use a 9-inch glass pie dish for even baking and easy monitoring of the crust’s browning. The transparency lets me check the bottom crust without lifting. Pyrex is my go-to brand—durable and oven-safe. 💡
Rolling Pin Necessity
Even with store-bought crust, a wooden rolling pin helps smooth out seams and ensures proper coverage. I prefer the French-style tapered pin for better control. Roll from the center outward for even thickness.
Pastry Brush
A silicone pastry brush is essential for applying egg wash smoothly. I use the OXO Good Grips brush—it’s heat-resistant and easy to clean. The bristles won’t melt or shed like cheaper plastic versions.
Sharp Paring Knife
For trimming excess dough and creating decorative edges, a sharp paring knife is indispensable. I keep a Wüsthof 3.5-inch in my drawer. It makes quick work of crimping and venting the top crust.
Cooling Rack
Once baked, transfer your pie to a wire cooling rack to prevent the bottom crust from steaming and getting soggy. I use a basic stainless steel rack that fits over my countertop. Let it rest 10 minutes before slicing. ❄️
Mixing Bowls
Prepare your filling in a large mixing bowl before transferring to the pie dish. I prefer stainless steel bowls with pour spouts—they’re lightweight and won’t absorb odors. A 3-quart bowl is the perfect size for this recipe.
Nutrition Facts
Frequently Asked Questions
Can I use pre-cooked chicken?
Yes, but reduce the cooking time to 3-4 minutes when reheating in the sauce to prevent drying out. Rotisserie chicken works great—shred 1.5 lb and add at the end.
How do I prevent a soggy bottom crust?
Pre-bake the bottom crust for 8-10 minutes before adding filling. Also, ensure your filling isn’t too wet—simmer until it coats a spoon.
Can I make this ahead of time?
Assemble the pie, cover tightly, and refrigerate for up to 1 day before baking. Add 5-10 minutes to the baking time if baking from cold.
What if my crust browns too quickly?
Tent the edges with aluminum foil halfway through baking. This protects the crust while allowing the filling to cook through.

- 6 Oz Chocolate Chip Cookie Recipe: Perfectly Balanced Crispy Edges and Chewy Hearts - September 25, 2026
- 6-Inch Coffee Cake Recipe: Vanilla Bean Swirls and Buttery Streusel Topping - September 25, 2026
- 1 Hour Soup Recipe: Velvety Richness Without the Wait - September 25, 2026