
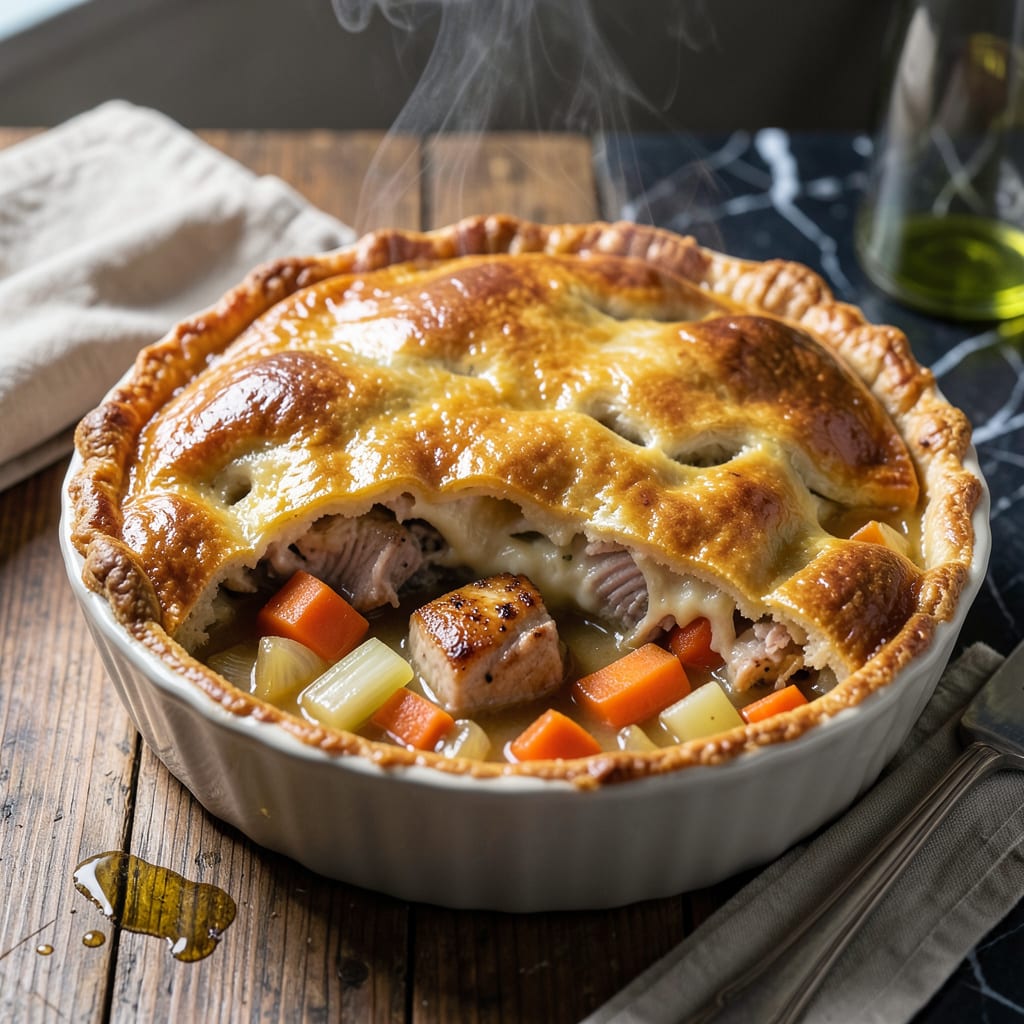
There’s something deeply satisfying about a well-made pot pie, especially when it features tender partridge in a rich, savory filling. This recipe delivers comfort in every bite, with a golden, flaky crust that perfectly encases the hearty filling.
I’ve refined this method to ensure the partridge stays moist while the crust bakes to perfection. The result is a dish that feels both rustic and elegant, perfect for a cozy dinner that warms the soul.
Ingredients for Partridge Pot Pie
Rich, savory filling meets golden crust in this hearty, comforting dish.
| Ingredient | Amount | Notes |
|---|---|---|
| Partridge Breast 🍗 | 1 ½ lb | Boneless, skinless, diced |
| Unsalted Butter 🧈 | ½ cup | For roux and filling |
| All-Purpose Flour 🌾 | ½ cup | For roux and thickening |
| Yellow Onion 🧅 | 1 whole | Medium, finely diced |
| Carrots 🥕 | 2 whole | Peeled, diced into small cubes |
| Celery Stalks 🥬 | 2 whole | Diced for aromatic base |
| Garlic Cloves 🧄 | 3 cloves | Minced for depth of flavor |
| Fresh Thyme 🌿 | 1 tbsp | Chopped, stems removed |
| Fresh Rosemary 🌿 | 1 tbsp | Chopped, stems removed |
| Chicken Stock 💧 | 2 cups | Low-sodium preferred for control |
| Heavy Cream 🥛 | ½ cup | Full-fat for richness |
| Frozen Peas 🌱 | ¾ cup | No need to thaw |
| Pie Crusts 🥧 | 2 sheets | Store-bought or homemade, thawed |
| Dijon Mustard 🟡 | 1 tbsp | For depth in filling |
| Salt 🧂 | 1 tsp | Kosher or sea salt preferred |
| Black Pepper 🌶️ | ½ tsp | Freshly ground for best flavor |
The partridge is key—opt for fresh, wild-caught from a specialty butcher like D’Artagnan or Wild Fork. Avoid pre-frozen game, as it can dry out. For the crust, store-bought puff pastry (like Pepperidge Farm) works beautifully for a flaky texture without the fuss. The thyme and rosemary should be fresh for optimal aroma—dried won’t deliver the same depth.
No partridge? Chicken thighs or pheasant make excellent substitutes with a similar texture. Short on fresh herbs? Dried at one-third the quantity, but rehydrate them in a splash of warm stock first. For the stock, homemade is ideal, but Swanson or Kitchen Basics low-sodium versions work in a pinch. The peas can be swapped for pearl onions if you prefer a different texture.
Assemble the pie just before baking—don’t let the crust sit on the filling or it’ll get soggy. Leftovers reheat well, covered, at 350°F for 15-20 minutes. The filling freezes for up to 3 months, but bake the crust fresh for best results.
Why You’ll Love This Recipe
- One Pot Wonder: I love how this comes together in a single skillet—brown the partridge, sauté the onions and carrots, then top with a buttery flour crust.
- Rich Gamey Depth: The partridge breast gives it a wild, earthy taste that’s way more interesting than chicken, and the butter makes it melt-in-your-mouth tender.
- Feeds a Crowd: Honestly, this is my go-to for Sunday suppers—it stretches easily with extra veggies and tastes even better the next day.
- Budget Stretcher: Between us, partridge is often cheaper than premium cuts, and a little goes a long way with all those hearty carrots and onions.
Step-by-Step Instructions for Partridge Pot Pie
Master these steps for a rich, comforting filling encased in perfectly flaky layers every time.
Step 1: Prepare the Aromatic Base and Game
In a heavy-bottomed pot, melt the 0.5 cup unsalted butter over medium heat. Add the finely diced yellow onion, carrots, and celery stalks, cooking for 8-10 minutes until the vegetables soften and the onion becomes translucent.
Stir in the 3 cloves garlic cloves, 1 tbsp fresh thyme, and 1 tbsp fresh rosemary, cooking for 1 minute until fragrant. Add the diced 1.5 lb partridge breast, searing for 3-4 minutes until the meat loses its raw color. This builds a deep, savory foundation for your filling.
Step 2: Create the Roux and Develop the Sauce
Sprinkle the 0.5 cup all-purpose flour over the mixture, stirring constantly for 2 minutes to cook out the raw flour taste. Slowly pour in the 2 cups chicken stock, whisking vigorously to prevent lumps from forming. The mixture should thicken noticeably as it comes to a simmer.
Once thickened, stir in the 0.5 cup heavy cream, 1 tbsp Dijon mustard, 1 tsp salt, and 0.5 tsp black pepper. Reduce the heat to low and let it simmer for 5 minutes, allowing the flavors to meld. The sauce should coat the back of a spoon with a velvety texture.
Step 3: Finish the Filling and Add Vegetables
Remove the pot from heat and stir in the 0.75 cup frozen peas. The residual heat will thaw them perfectly without overcooking. Taste and adjust seasoning if needed—the partridge should be tender and the sauce rich but balanced. This is your last chance to fine-tune the flavors before assembly.
Let the filling cool slightly for 10 minutes while you prepare the crust. This prevents the pie crust from becoming soggy when baked, ensuring that promised flaky texture. The filling should be thick enough to hold its shape when spooned.
Step 4: Assemble and Bake to Golden Perfection
Preheat your oven to 375°F. Line a 9-inch pie dish with one pie crust, pressing it gently into the bottom and sides. Spoon the filling into the crust, mounding it slightly in the center. Brush the edges of the bottom crust with a bit of water to help the top crust adhere.
Drape the second pie crust over the filling, crimping the edges to seal. Cut several small slits in the top crust to allow steam to escape. Bake for 45-50 minutes until the crust is deep golden brown and the filling is bubbling beneath. This final bake transforms it into the ultimate comfort dish.
Pro Tips For Making Partridge Pot Pie
- Sear the Partridge: Brown the partridge breast in butter first—about 3-4 minutes per side in a hot pan. I learned this the hard way: skipping this step leaves the meat dry and the filling bland.
- Chill the Dough: Rest your flour-butter crust in the fridge for at least 30 minutes before rolling. After burning three batches, I finally figured out that cold dough prevents shrinking and makes a flakier top.
- Skip Raw Carrots: Par-cook your carrots and onions for 5 minutes in the butter before adding liquid. Sounds weird, but it works: no one wants crunchy carrots in their pot pie.
- Thicken Last: Stir in your flour slurry at the very end of cooking the filling. My grandmother swore by this, and she was right: it keeps the sauce from breaking and the crust from getting soggy.
Essential Equipment for This Dish
Heavy Pot Essentials
For the filling, I swear by my Le Creuset Dutch oven—its even heat distribution prevents hot spots that could burn the roux. A 5-quart capacity gives plenty of room for all ingredients to mingle without spills. The enameled surface also makes cleanup a breeze. 🔥
Crust Tools
A 9-inch glass pie dish lets you monitor the bottom crust’s browning. I use Pyrex for its durability and even heating. For rolling out crusts, a marble pastry board stays cool, preventing butter from melting prematurely.
Precision Measuring
Accurate measurements matter for the roux and filling. I rely on OXO Good Grips measuring cups for dry ingredients and a liquid measuring cup with a spout for the chicken stock. A kitchen scale ensures perfect butter and flour ratios.
Thermometer Matters
Don’t guess on doneness—use an instant-read thermometer to check the filling reaches 165°F. I love my ThermoWorks Thermapen for its speed and accuracy. This guarantees safe, perfectly cooked partridge every time. 🌡️
Crust Finishing
A pastry brush helps apply egg wash for that golden sheen. I use a silicone brush for easy cleanup. A sharp paring knife makes clean steam vents, while a pie shield prevents over-browning if your oven runs hot.
Serving Setup
Let your pie rest 10-15 minutes before slicing. A pie server with a wide, flat edge lifts portions cleanly. I serve mine on a wooden cutting board to catch any flaky bits. 💛
Nutrition Facts
Frequently Asked Questions
Can I use chicken instead of partridge?
Chicken thighs work wonderfully as a substitute. They have a similar texture and richness. Just ensure they’re cooked to 165°F internally for safety.
How do I prevent a soggy bottom crust?
Let the filling cool for 10 minutes before assembling. Also, brush the bottom crust with a thin layer of egg wash to create a barrier against moisture.
Can I make this ahead of time?
Assemble the pie but don’t bake it. Refrigerate for up to 24 hours. Bake as directed, adding 5-10 minutes if cold. The crust stays flakier this way.

- 4C Bread Crumbs Meatballs Recipe: Crispy Crust and Juicy Centers - September 25, 2026
- 6 Oz Chocolate Chip Cookie Recipe: Perfectly Balanced Crispy Edges and Chewy Hearts - September 25, 2026
- 6-Inch Coffee Cake Recipe: Vanilla Bean Swirls and Buttery Streusel Topping - September 25, 2026