
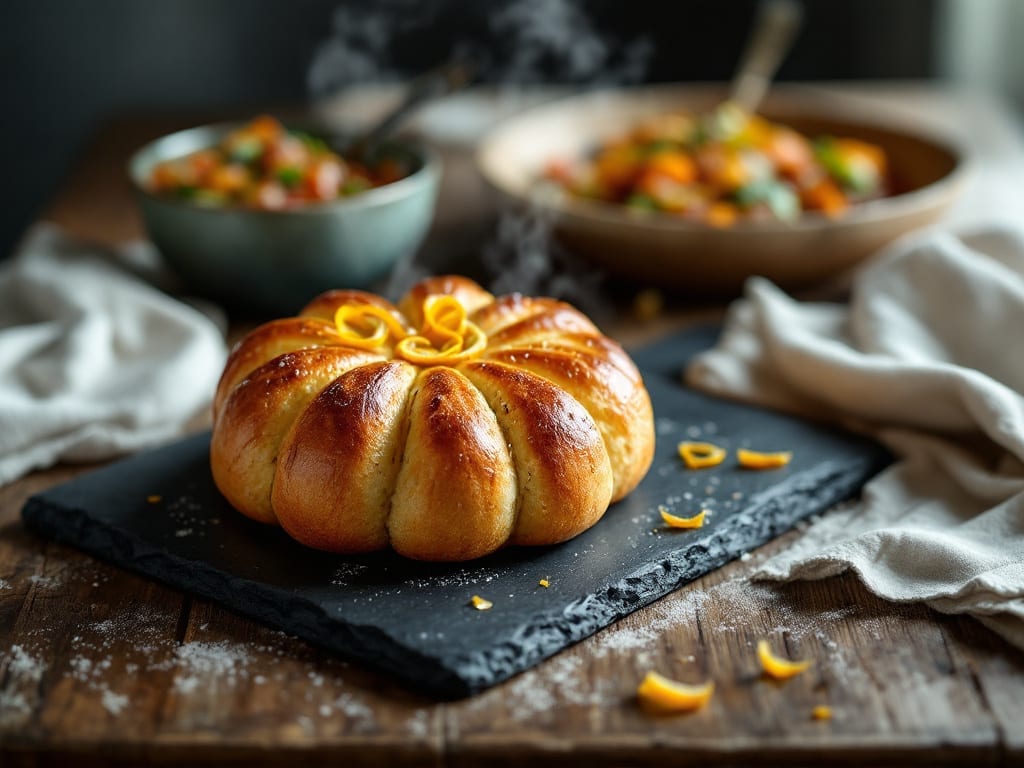
This Patti’s Flower Pot Bread recipe delivers a rustic, pull-apart loaf with a golden crust and tender interior—just like Grandma used to make. The secret lies in baking the dough inside a clay flower pot, creating that signature crispy exterior while keeping the center soft and buttery.
I first discovered this recipe during a family reunion when my grandmother pulled out her well-worn flower pot and transformed a simple dough into something magical.
The beauty of this recipe is its simplicity—just a few basic ingredients, a little patience for proofing, and the right pot to achieve that perfect crust. The dough rises slowly, developing deep flavor, while the flower pot traps steam for an irresistible golden-brown exterior.
This bread pairs perfectly with soups, butter, or even as a side for holiday meals, making it a staple in many homes.
What you’ll end up with is a loaf that’s impossible to resist—crispy on the outside, soft and fluffy inside, with that buttery aroma filling your kitchen. The pull-apart texture makes it ideal for sharing, and the rustic charm of baking in a flower pot adds a touch of nostalgia.
Let’s get started on creating this classic family favorite.
Whether you’re baking for a special occasion or just craving a taste of tradition, this recipe delivers. The key is using the right pot and letting the dough rise properly—two simple steps that make all the difference.
Once you try it, you’ll understand why this bread has been a beloved family recipe for generations.
Ingredients for patti’s flower pot bread
Simple pantry staples transform into a nostalgic loaf when baked in a flower pot.
| Ingredient | Amount | Notes |
|---|---|---|
| All-Purpose Flour 🌾 | 5 cups | Spooned and leveled, not scooped |
| Granulated Sugar 🍚 | ¼ cup | For dough sweetness |
| Active Dry Yeast 🍞 | 2 ¼ tsp | Or 1 packet (7g) |
| Warm Water 💧 | 1 ¼ cups | 110°F (43°C) for yeast |
| Unsalted Butter 🧈 | ½ cup | Cold, cubed (full-fat preferred) |
| Salt 🧂 | 1 tsp | Kosher or sea salt |
| Milk 🥛 | ¼ cup | Whole milk for richness |
| Large Eggs 🥚 | 1 whole | Room temperature |
| Clay Flower Pot 🪴 | 1 whole | 6-8 inch diameter |
| Coarse Sugar 🍚 | ¼ cup | For topping (turbinado or sanding) |
| Cornmeal 🌽 | ¼ cup | For pot preparation |
| Butter (for greasing) 🧈 | 2 tbsp | Melted, for pot |
The yeast is non-negotiable here—Bob’s Red Mill or Saf-Instant work best, but any active dry yeast will do. Warm the water to 110°F (43°C)—too hot and it kills the yeast, too cool and it won’t activate. For the butter, Land O’Lakes or Plugrá are my go-tos, but any unsalted works. The flower pot? Terracotta or ceramic is ideal—check your local garden section or Michaels for affordable options. If you don’t have one, a small cast-iron skillet in a pinch (though the crust won’t be as crisp).
No whole milk? 2% or skim with 1 tbsp powdered milk works, but you’ll lose that buttery richness. Short on cornmeal? Semolina or crushed graham crackers coat the pot just fine. The coarse sugar topping? Turbinado or sanding sugar gives the best caramelization, but regular granulated in a pinch (though it won’t be as pretty). The dough needs time to rise—don’t rush it. If your kitchen’s cold, give it an extra hour. And for the love of bread, measure your flour properly—spoon it into the cup and level it off.
This bread keeps for 3-4 days at room temperature, wrapped in a towel. The crust gets crunchier over time—toast slices for extra crunch. Freezes beautifully too—wrap the whole loaf in foil and freeze for up to 3 months. Thaw at room temp, then warm in a 200°F (95°C) oven for 10 minutes to revive that buttery aroma. Leftovers? Toss in a toaster or breadbox—never the fridge, or it’ll get gummy.
Why You’ll Love This Recipe
- No-Knead Magic: I swear by this—just mix the flour, yeast, sugar, and warm water, let it rise overnight, then shape it around a butter-filled flower pot. The dough does all the work while you sleep.
- Sweet Butter Bliss: That melted butter poured into the pot? It bakes into golden pockets of richness, turning every slice into a buttery, slightly sweet dream. My kids fight over the middle pieces.
- Weeknight Wonder: Pull it out of the oven, slice it warm, and serve it with soup or jam. It’s the kind of bread that makes lazy nights feel like a celebration—no fuss, just flavor.
- Budget-Friendly Staple: Flour, sugar, yeast, butter—these are pantry basics that stretch into something impressive. One batch feeds my family for days, and I always have leftovers for toast or French toast.
Step-by-step instructions for patti’s flower pot bread recipe
Here’s how to make a golden, buttery loaf that pulls apart perfectly every time.
Mix the Dough and Let It Rise
In a large bowl, combine the 5 cups all-purpose flour, 1 tsp salt, and 2.25 tsp active dry yeast. Stir to distribute evenly. Make a well in the center and add the 0.5 cup unsalted butter (cold, cubed), 0.25 cup granulated sugar, 1 whole large egg, and 0.25 cup milk. Mix with a wooden spoon until a shaggy dough forms.
Turn the dough onto a lightly floured surface and knead for 8-10 minutes until smooth and elastic. The dough should be slightly tacky but not sticky. If it’s too wet, add 1-2 tablespoons more flour. Shape into a ball, place back in the bowl, cover with a damp towel, and let rise in a warm place for 1-1.5 hours or until doubled in size. You’ll know it’s ready when it springs back slowly when poked gently.
Prepare the Flower Pot
While the dough rises, preheat your oven to 350°F. Grease the clay flower pot thoroughly with the 2 tbsp melted butter (for greasing), then sprinkle the bottom with 0.25 cup cornmeal to prevent sticking. Tap the pot gently on the counter to ensure the cornmeal sticks evenly.
This step is crucial—if the pot isn’t properly greased, the bread will stick and tear when you try to remove it. A well-prepped pot means a perfect pull-apart texture. Keep the pot nearby while you shape the dough to avoid overworking it.
Shape and Bake the Bread
Once the dough has risen, punch it down to deflate, then divide it into 8 equal pieces. Roll each piece into a ball and arrange them in a circle in the prepared flower pot, leaving a small gap between each piece. Cover loosely with a towel and let rise for 30-45 minutes until the dough puffs up slightly.
Bake the bread in the preheated oven for 25-30 minutes until the crust is golden brown and the top springs back when pressed lightly. If the edges brown too quickly, tent the pot with aluminum foil to prevent over-browning. The bread is done when it sounds hollow when tapped on the bottom.
Add the Coarse Sugar Topping
Remove the bread from the oven and immediately sprinkle the 0.25 cup coarse sugar evenly over the top. Let it cool in the pot for 5 minutes before carefully inverting it onto a wire rack. The sugar will caramelize slightly, adding a sweet, crunchy contrast to the soft, buttery bread.
Let the bread cool completely before slicing—this ensures clean, pull-apart pieces. Serve warm for the best texture, and enjoy the buttery, flaky layers with every bite. This bread keeps well at room temperature for 2-3 days or can be frozen for up to 3 months.
Pro Tips For Making Patti’S Flower Pot Bread
- Bloom the Yeast First: DESCRIPTION:
- Butter Matters: DESCRIPTION:
- Don’t Overmix: DESCRIPTION:
- Steam the First 15: DESCRIPTION:
Flavor customization for these flavors
Sweet & Buttery Variations
For a richer flavor, replace the ½ cup unsalted butter with ½ cup brown butter—the nutty notes add depth. Brown the butter in a pan until golden, then let it cool before mixing into the dough.
I also love adding 1 tsp vanilla extract to the milk for a subtle sweetness that pairs beautifully with the coarse sugar topping.
Herb & Cheese Twists
Incorporate 2 tbsp fresh rosemary or thyme leaves into the dough for an aromatic twist. For a savory version, fold in ½ cup shredded sharp cheddar or Parmesan cheese after the first rise. The cheese melts slightly during baking, creating pockets of gooey goodness that contrast the crispy crust.
Whole Grain Boost
Swap 1 cup all-purpose flour for whole wheat flour or spelt flour to add fiber and nuttiness. The texture will be slightly denser but still tender. I recommend using King Arthur whole wheat flour for the best rise.
For extra crunch, sprinkle ½ cup chopped walnuts or pecans into the dough before shaping.
Cinnamon Swirl Option
Create a cinnamon roll-inspired version by mixing 2 tbsp brown sugar with 1 tbsp cinnamon and spreading it between dough layers. Roll the dough into a log, shape it into the pot, and bake as directed. The caramelized sugar topping becomes a sticky glaze when combined with the cinnamon swirl.
Savory Garlic & Herb
Infuse the dough with 2 minced garlic cloves and 1 tbsp dried Italian seasoning for a savory profile. Brush the baked loaf with melted garlic butter (mix 2 tbsp softened butter with 1 tsp minced garlic) before serving. This version pairs perfectly with soups or roasted vegetables.
Gluten-Free Adaptation
For a gluten-free version, replace the all-purpose flour with a 1:1 gluten-free flour blend like King Arthur Measure for Measure. Add 1 tsp xanthan gum to improve elasticity.
The texture will be slightly denser, but the buttery flavor remains intact. Let the dough rise for 30-45 minutes longer to ensure proper development.
Nutrition facts
Frequently asked questions
Why does this bread need to bake in a flower pot?
The flower pot creates a unique steam environment that gives the bread its signature crispy crust while keeping the interior soft and buttery. The terracotta material helps regulate moisture, preventing the bread from drying out. This traditional method also creates that beautiful golden-brown color that makes it so appealing!
Can I use a regular loaf pan instead of a flower pot?
Technically yes, but you’ll lose the authentic texture and appearance. A loaf pan won’t create the same steam circulation, resulting in a less crispy crust. For best results, stick with the flower pot—if you don’t have one, a small cast-iron skillet works as a second choice. The pot’s shape also creates those perfect pull-apart sections!
How do I know when the dough has risen enough?
The dough is ready when it’s doubled in size and springs back slowly when gently poked. For the second rise (after shaping), it should puff up noticeably—about 30-45 minutes. Cold kitchens may require extra time. Use your finger to test: press gently, then remove—if the indentation stays, it needs more time.
What if my bread turns out too dense?
Over-kneading or underproofing usually causes dense bread. Make sure to knead just until smooth (8-10 minutes), and let the dough rise until fully doubled. Also check your yeast—it should foam when mixed with warm water. If all else fails, try adding 1 extra tablespoon flour next time to improve texture.
How should I store leftover flower pot bread?
Wrap the whole loaf in a clean kitchen towel and store at room temperature for 2-3 days in an airtight container. For longer storage, freeze the bread (up to 3 months) and thaw at room temperature. To revive stale bread, warm slices in a 350°F (175°C) oven for 5-10 minutes with a pat of butter.

- Baked Potatoes in Crock Pot Recipe: Buttery Interiors and Crispy Top Magic - November 1, 2026
- Braised Beef Short Ribs Recipe: Crock Pot Fall-Off-Bone Magic in 6 Hours - November 1, 2026
- Crock Pot Cocoa Recipe: Velvety Warmth With Hidden Spice Magic - November 1, 2026