
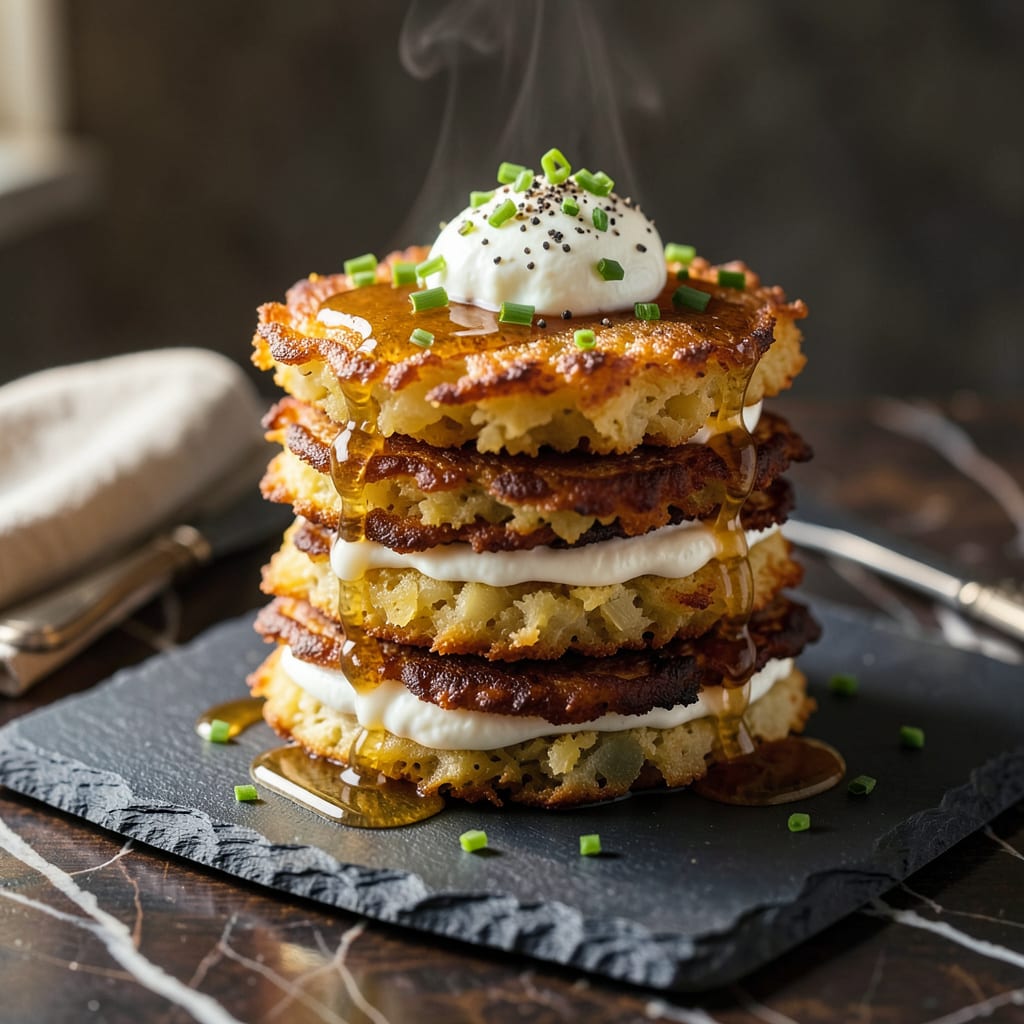
There’s something deeply satisfying about achieving the perfect balance between crispy edges and tender centers in potato pancakes. This recipe delivers the classic Perkins-style experience with a foolproof method that ensures consistent results every time. The secret lies in proper potato preparation and precise frying technique.
By removing excess moisture from the grated potatoes and frying at the right temperature, you’ll create pancakes with golden, crispy exteriors and fluffy interiors. These versatile pancakes pair beautifully with traditional applesauce or sour cream, making them ideal for breakfast or brunch. The process is straightforward, with professional-quality results that rival any restaurant version.
Ingredients for Perkins Potato Pancake
Achieving Perkins-style potato pancakes requires precise ingredients for optimal texture and crispness.
| Ingredient | Amount | Notes |
|---|---|---|
| Russet Potatoes 🥔 | 2 ½ lb | Peeled, grated, and drained thoroughly |
| Yellow Onion 🧅 | 1 whole | Finely grated, excess moisture removed |
| Large Eggs 🥚 | 2 whole | Lightly beaten for binding |
| All-Purpose Flour 🌾 | ¼ cup | For structural integrity |
| Kosher Salt 🧂 | 1 ½ tsp | Diamond Crystal preferred for precision |
| Freshly Ground Black Pepper 🌶️ | ½ tsp | Medium-coarse grind recommended |
| Vegetable Oil 🫒 | 1 cup | For frying, high smoke point required |
| Unsalted Butter 🧈 | 2 tbsp | Optional, for enhanced browning |
| Applesauce 🍎 | 1 cup | Unsweetened, for serving |
| Sour Cream 🥛 | ½ cup | Full-fat for optimal texture |
| Fresh Chives 🌿 | 2 tbsp | Finely chopped, for garnish |
The potatoes are the foundation—Russet variety provides the ideal starch-to-moisture ratio for crispy results. Optimal quality requires selecting firm, unblemished potatoes with minimal sprouting. The onion should be freshly grated (not pre-chopped) to ensure proper moisture distribution. Diamond Crystal kosher salt offers consistent seasoning without overpowering. For professional results, use a high-quality vegetable oil with a smoke point above 400°F—avocado oil or refined peanut oil are excellent choices available at Whole Foods or Costco.
For dietary adaptations, substitute the eggs with 2 tablespoons of cornstarch mixed with 3 tablespoons water for binding. The all-purpose flour can be replaced with gluten-free 1:1 baking flour if needed. While unsalted butter enhances browning, it can be omitted entirely for a dairy-free version. The applesauce and sour cream toppings are traditional but optional—consider Greek yogurt as a tangy alternative. When selecting potatoes, avoid waxy varieties like Yukon Gold, as they yield inferior crispness compared to Russets.
Prepared potato mixture should be fried immediately for best results, though it can be refrigerated in an airtight container for up to 2 hours before cooking. Cooked pancakes maintain quality when stored in a single layer on a wire rack (to preserve crispness) for 2-3 days refrigerated. For longer storage, freeze on a parchment-lined tray before transferring to bags—reheat in a 400°F oven to restore texture. The applesauce and sour cream toppings should be added fresh upon serving for optimal flavor contrast.
Why You’ll Love This Recipe
- No Grater Needed: Here’s what sold me—just peel, chop, and pulse the russets and onion in a food processor. No knuckle-grating, no tears (well, fewer onion tears), and you’re halfway done before the oil even heats.
- That Golden Crunch: Honestly, the first bite is all about contrast: shatteringly crisp edges from the flour-egg binder, giving way to soft, buttery potato centers. The kosher salt? Non-negotiable. It’s the difference between “good” and “I’ll eat four of these standing at the stove.”
- Breakfast or Midnight Snack: I’ve served these with applesauce at brunch and straight from the pan at 11 PM when the fridge was basically empty. They’re my secret weapon for picky eaters, last-minute guests, or that one person who always wants “something savory” at the holiday table.
- Penny-Pincher Approved: Five ingredients—two of which (flour, salt) you already have—and russets are dirt cheap year-round. One batch stretches to 12 pancakes, reheats like a dream in the toaster, and costs less than a fast-food burger. I’ll be real: this is how I feed my teen’s bottomless pit on a budget.
Step-by-Step Instructions for Perkins Potato Pancakes
Mastering the technique for crispy edges and tender centers requires attention to moisture control and frying temperature.
Step 1: Prepare and Drain the Potatoes and Onion
Begin by peeling the 2.5 lb Russet Potatoes and grating them using the large holes of a box grater. Immediately transfer the grated potatoes to a clean kitchen towel and squeeze out all excess moisture—this is critical for achieving crispy pancakes. The potatoes should feel dry to the touch when properly drained.
Finely grate the 1 whole Yellow Onion and combine it with the potatoes in a large mixing bowl. The onion adds sweetness and helps bind the mixture, but like the potatoes, it must be thoroughly drained to prevent soggy pancakes. I recommend pressing the grated onion against the sides of a fine-mesh strainer to remove all liquid.
Step 2: Create the Pancake Batter
To the potato-onion mixture, add the 2 whole Large Eggs, 0.25 cup All-Purpose Flour, 1.5 tsp Kosher Salt, and 0.5 tsp Freshly Ground Black Pepper. The eggs act as the primary binder, while the flour provides structural integrity without making the pancakes dense. Use a fork to gently combine the ingredients until just incorporated—overmixing can lead to tough pancakes.
The batter should hold together when pressed but remain slightly loose. If it feels too wet, the potatoes likely retained excess moisture; press the mixture against the sides of the bowl with a spatula to express any remaining liquid before proceeding.
Step 3: Fry to Golden Perfection
In a large, heavy skillet (cast iron works best), heat the 1 cup Vegetable Oil over medium-high heat until it reaches 350°F. To test the temperature, drop a small piece of potato into the oil—it should sizzle immediately and float to the surface within seconds. For enhanced browning, add the 2 tbsp Unsalted Butter to the oil just before frying; this creates a flavorful crust.
Using a ¼-cup measure, scoop portions of the batter into the hot oil, pressing them gently with the back of the measuring cup to form ½-inch thick pancakes. Avoid overcrowding the pan; fry in batches if necessary. Cook for 3-4 minutes per side until deeply golden brown and crispy. The edges should appear lacy and the centers should feel firm when pressed lightly with a spatula.
Step 4: Drain and Serve Immediately
Transfer the cooked pancakes to a wire rack set over a baking sheet or a paper towel-lined plate to drain excess oil. This step prevents them from becoming greasy while maintaining their crisp texture. Serve immediately while hot, as potato pancakes lose their crispness as they cool.
Accompany with 1 cup Applesauce and 0.5 cup Sour Cream for dipping, and garnish with 2 tbsp Fresh Chives for a bright, oniony contrast. The combination of sweet applesauce and tangy sour cream balances the savory richness of the pancakes, while the chives add a fresh finish.
Storing and Reheating This perkins potato pancake
Refrigerator Storage
After frying, let your pancakes cool completely on a wire rack—this prevents condensation from making them soggy. Once cooled, transfer them to an airtight container with parchment paper between layers. They’ll keep in the fridge for up to 3 days, though I find they’re best within 24 hours when the texture is still ideal. ❄️
Freezer Method
For longer storage, freeze pancakes in a single layer on a parchment-lined baking sheet until solid (1-2 hours). Then transfer to a freezer bag, squeezing out excess air. They’ll maintain quality for up to 2 months. I like to portion them into 2-pancake servings for easy reheating later.
Oven Reheating
Preheat your oven to 400°F and place pancakes on a wire rack set over a baking sheet. Heat for 8-10 minutes, flipping halfway through. This method restores crispness better than any other. For extra browning, brush lightly with melted butter before reheating.
Skillet Revival
Heat a nonstick skillet over medium heat with just 1 tsp oil. Add pancakes in a single layer and cook for 2-3 minutes per side until heated through and crispy. This works best for refrigerated pancakes—frozen ones may need an extra minute per side.
Microwave Shortcut
While not ideal for crispness, the microwave works in a pinch. Place pancakes on a paper towel-lined plate and heat on 50% power for 1-2 minutes. Finish under the broiler for 30 seconds to restore some texture. I only use this when I’m really pressed for time.
Serving Refresh
Reheated pancakes benefit from a quick garnish refresh. Sprinkle with extra chives and serve with fresh applesauce and sour cream. The contrast of warm pancakes with cold toppings makes them taste just-fried. A light dusting of flaky sea salt can also revive the flavors beautifully. ✨
Nutrition Facts
Frequently Asked Questions
Why do my pancakes turn out soggy instead of crispy?
Excess moisture is the most common culprit.
Can I make these ahead of time for a brunch party? Prepare the batter up to 2 hours ahead and refrigerate in an airtight container. For best results, fry them fresh when guests arrive. If you must cook ahead, reheat in a 400°F oven for 8-10 minutes to restore crispness.
What’s the best way to keep them warm while cooking batches?
Place cooked pancakes on a wire rack set over a baking sheet in a 200°F oven. This maintains crispness while you finish frying. Avoid stacking them or using a covered dish, as trapped steam will make them soggy.
Can I substitute sweet potatoes for regular potatoes?
While possible, sweet potatoes contain more moisture and sugar, which affects texture. If trying this, reduce the onion by half and add 1 extra tablespoon flour to help bind. Expect a slightly softer result with caramelized edges.

- 8 Bean Soup Recipe Crock Pot: Hearty Vegetable Medley in One Pot - September 25, 2026
- 4C Bread Crumbs Meatballs Recipe: Crispy Crust and Juicy Centers - September 25, 2026
- 6 Oz Chocolate Chip Cookie Recipe: Perfectly Balanced Crispy Edges and Chewy Hearts - September 25, 2026