
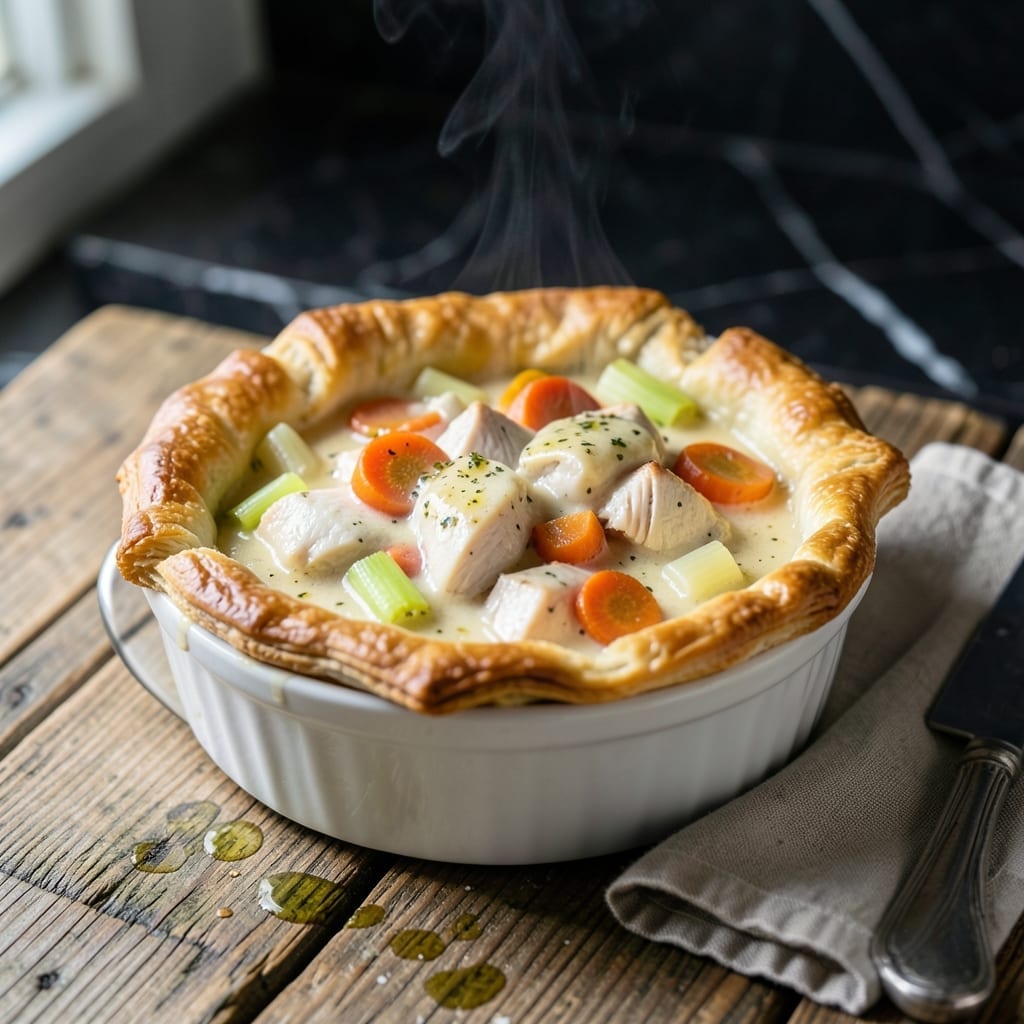
There’s something deeply satisfying about a savory hand pie that feels like a warm hug in every bite. This recipe delivers all the comfort of classic chicken pot pie in a convenient, individual-sized format.
I’ve streamlined the process to ensure a flaky crust and creamy filling without the fuss of a full pie. The key is pre-cooking the chicken and vegetables to prevent a soggy bottom while keeping the dough perfectly crisp.
Each bite offers tender chicken, hearty vegetables, and a rich, velvety sauce encased in golden pastry. The personal size makes it ideal for portion control and easy serving.
Perfect for a cozy dinner or impressive lunch. Here’s how to make them.
Ingredients for Personal Chicken Pot Pie
Flaky crust, creamy filling, and all the comfort of classic pot pie in hand-held form.
| Ingredient | Amount | Notes |
|---|---|---|
| Chicken Breast 🍗 | 1 ½ lb | Boneless, skinless, diced |
| All-Purpose Flour 🌾 | 2 ½ cups | Plus extra for dusting |
| Unsalted Butter 🧈 | 1 cup | Chilled, cubed for crust |
| Buttermilk 🥛 | ½ cup | Cold, for flaky layers |
| Carrots 🥕 | 2 whole | Medium, peeled and diced |
| Celery Stalks 🌿 | 2 whole | Diced small for texture |
| Yellow Onion 🧅 | 1 whole | Finely chopped for base |
| Frozen Peas 🌱 | 1 cup | No need to thaw |
| Garlic Cloves 🧄 | 3 cloves | Minced for depth |
| Chicken Stock 💧 | 1 ½ cups | Low-sodium preferred |
| Heavy Cream 🥛 | ½ cup | Full-fat for richness |
| Dijon Mustard 🟡 | 1 tbsp | For tangy depth |
| Fresh Thyme Leaves 🌿 | 2 tsp | Or 1 tsp dried |
| Salt 🧂 | 1 ½ tsp | Diamond Crystal preferred |
| Black Pepper 🌶️ | ½ tsp | Freshly ground for best flavor |
The chicken is the foundation—boneless, skinless breasts stay tender when diced and pre-cooked. For the crust, cold unsalted butter and buttermilk are non-negotiable for those flaky layers. I source my butter from Plugrá (European-style for higher fat content), and the chicken stock should be low-sodium to control seasoning. Fresh thyme is ideal, but dried works in a pinch (just halve the amount).
Out of buttermilk? Whole milk plus a tablespoon of lemon juice gets you close. No fresh thyme? Dried thyme at half the quantity. The peas can be swapped for diced green beans or corn if preferred. For a richer sauce, heavy cream can be swapped for half-and-half, but the texture won’t be quite as velvety. The Dijon mustard adds depth—don’t skip it (worth the extra minute).
Assembled hand pies freeze beautifully before baking—up to 3 months. Baked pies keep in the fridge for 3-4 days (reheat in the oven to crisp the crust). The filling thickens as it cools, so let it rest 10 minutes before serving for the cleanest slices.
Why You’ll Love This Recipe
- One Bowl Wonder: I mix the buttermilk and flour right in the same bowl I’ll bake in—no extra dishes, just easy cleanup.
- Buttery Crust Magic: The unsalted butter and buttermilk make the crust flaky on the outside, tender inside, with that rich, golden finish.
- Freezer Friend: I make a double batch, bake half now, and freeze the rest for those no-time-to-cook nights.
- Budget Stretcher: A single chicken breast and a handful of carrots feed my family for two meals, and honestly, it tastes like a million bucks.
Step-by-Step Instructions for Individual Chicken Pot Pies
Master the technique for flaky crusts and rich fillings with this precise approach.
Step 1: Prepare the Flaky Pastry Dough
In a food processor, pulse the 2.5 cups all-purpose flour with the 1.5 tsp salt until combined. Add the 1 cup unsalted butter, cubed and chilled, and pulse until the mixture resembles coarse crumbs with pea-sized butter pieces visible.
With the processor running, pour in the 0.5 cup buttermilk all at once. Process just until the dough begins to come together—overworking develops gluten and toughens the crust. Transfer the dough to a lightly floured surface, divide into four equal portions, and shape each into a disc. Wrap in plastic and refrigerate for 30 minutes.
Step 2: Cook the Savory Filling Base
In a large skillet over medium heat, melt 2 tablespoons of the chilled unsalted butter. Add the diced 1.5 lb chicken breast and cook for 6-7 minutes, stirring occasionally, until no longer pink and beginning to brown. Transfer to a plate and set aside.
In the same skillet, add the remaining butter. Once melted, sauté the finely chopped yellow onion, diced carrots, and diced celery stalks for 5-6 minutes until the onion is translucent and the vegetables begin to soften. Stir in the minced garlic cloves and cook for 30 seconds until fragrant.
Step 3: Create the Creamy Sauce and Finish Filling
Sprinkle 2 tablespoons of the all-purpose flour over the vegetables and stir to create a roux. Cook for 1 minute to eliminate the raw flour taste. Slowly pour in the 1.5 cups chicken stock, whisking constantly to prevent lumps.
Stir in the 0.5 cup heavy cream, 1 tbsp Dijon mustard, 2 tsp fresh thyme leaves, and 0.5 tsp black pepper. Return the chicken to the skillet along with the 1 cup frozen peas. Simmer for 3-4 minutes until the sauce thickens enough to coat the back of a spoon. Remove from heat and let cool completely.
Step 4: Assemble and Bake the Hand Pies
On a lightly floured surface, roll each dough disc into a 6-inch round. Place ¼ of the filling on one half of each round, leaving a ½-inch border. Fold the dough over the filling to create a half-moon shape. Crimp the edges with a fork to seal tightly.
Cut a small slit in the top of each pie to allow steam to escape. Place the pies on a parchment-lined baking sheet and refrigerate for 15 minutes to prevent shrinking. Bake at 375°F for 25-30 minutes until the crust is golden brown and the filling is bubbling. Serve warm.
Pro Tips For Making Personal Chicken Pot Pie
- Pre-Cook the Chicken: Poach or sauté the chicken breast first—raw chicken in the filling can dry out during baking, and pre-cooking guarantees juicy, tender meat every time.
- Chill the Dough: Let your flour-butter-buttermilk crust rest in the fridge for at least 30 minutes before rolling; it prevents shrinking and makes it way easier to handle.
- Dice Carrots Small: Cut the carrots into tiny, even pieces so they soften fully while baking—nothing’s worse than crunchy carrots in a creamy pot pie.
- Vent the Top: Poke a few small slits in the crust before baking, or steam builds up and turns your flaky top into a soggy mess.
Common Mistakes When Making Perfect Results
Overworking the Dough
Handling the pastry too much develops gluten, which makes the crust tough instead of flaky. I pulse the dough in the food processor just until it comes together—usually 8-10 seconds. If mixing by hand, stop as soon as the butter is incorporated. 💡
Skipping the Chill
Refrigerating the dough for 30 minutes is non-negotiable. This relaxes the gluten and keeps the butter cold, ensuring those coveted flaky layers. I’ve tried skipping this step—don’t. The results are noticeably less impressive.
Soggy Bottom Syndrome
Pre-cooking the filling is key to avoiding a wet crust. If you add raw ingredients, they’ll release moisture during baking, turning the bottom soggy. I always let the filling cool completely before assembling to prevent steam from softening the dough.
Sealing the Edges
A loose seal can cause filling to leak out, making a mess and wasting your hard work. Press the edges firmly with a fork—this creates a tight barrier. I also brush the edges with a bit of water before crimping for extra insurance.
Underbaking the Crust
These need to bake until golden brown, not just lightly tan. Underbaked crust tastes doughy and won’t hold its shape. I check the bottoms too—lift a pie gently with a spatula to ensure even browning. 🔥
Overfilling the Pies
It’s tempting to stuff them full, but too much filling can burst the seams. Stick to ¼ of the filling per pie and leave that ½-inch border. This ensures they bake evenly and hold their shape beautifully.
Nutrition Facts
Frequently Asked Questions
Can I make the dough ahead of time?
Yes! Prepare the dough, wrap it tightly, and refrigerate for up to 2 days. Alternatively, freeze for 1 month for future use.
What if my filling is too thin?
Simmer it longer until it coats the back of a spoon. If still too thin, mix 1 tablespoon cornstarch with 1 tablespoon water and stir in. Cook for 2 minutes to thicken.
Can I use store-bought pie crust?
Use 1 sheet per 2 hand pies. Thaw it first, then roll and cut as directed. The flavor will differ slightly, but it saves time.
How do I prevent the crust from browning too fast?
Cover the pies loosely with foil after 15 minutes of baking. This protects the crust while the filling finishes cooking.

- 4C Bread Crumbs Meatballs Recipe: Crispy Crust and Juicy Centers - September 25, 2026
- 6 Oz Chocolate Chip Cookie Recipe: Perfectly Balanced Crispy Edges and Chewy Hearts - September 25, 2026
- 6-Inch Coffee Cake Recipe: Vanilla Bean Swirls and Buttery Streusel Topping - September 25, 2026