
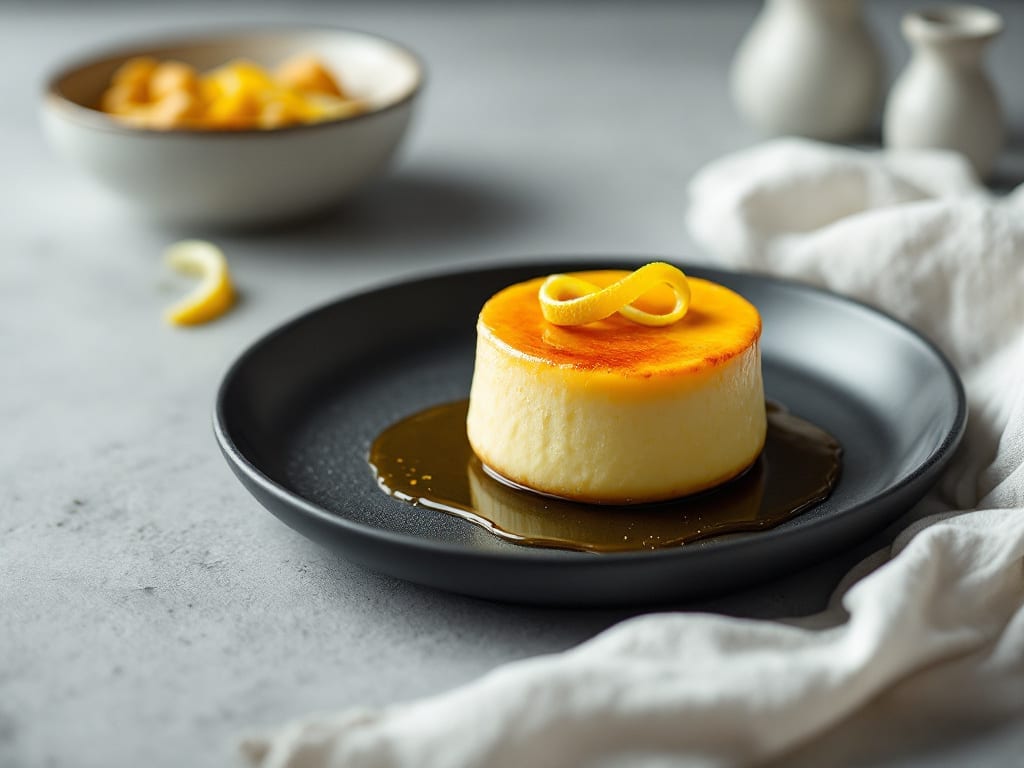
This petit pot pudding recipe delivers restaurant-quality vanilla custard in individual ramekins, with a silky texture and golden caramelized sugar topping that feels like a Parisian dessert.
After years of perfecting the technique, I’ve created a version that requires just 5 minutes of active prep and 30 minutes of baking—ideal for dinner parties or cozy weeknight treats. The secret lies in a precise egg-to-cream ratio and gentle heat to avoid curdling, ensuring every bite is velvety smooth.
The beauty of this recipe is its simplicity: no fancy equipment, no complicated steps, just a few pantry staples and a little patience. You’ll need heavy cream, vanilla extract, and a touch of sugar for that classic flavor, plus a sprinkle of turbinado sugar for the caramelized crust.
The custard sets beautifully in ramekins, creating elegant individual servings that look as impressive as they taste.
What you’ll end up with is a dessert that’s light yet indulgent, with a delicate vanilla aroma and a perfectly set custard that holds its shape when chilled. The caramelized sugar topping adds a satisfying crunch and a touch of sweetness that balances the creamy center.
It’s the kind of dessert that feels special without requiring hours in the kitchen.
Serve with fresh berries or a dusting of cocoa powder for extra flair, or enjoy it as-is for a classic vanilla experience. This recipe is foolproof, elegant, and perfect for any occasion—whether you’re hosting a dinner party or simply craving a decadent treat. Let’s get started!
Ingredients for petit pot pudding
Six simple ingredients transform into elegant Parisian-style custard with golden caramelized sugar topping.
| Ingredient | Amount | Notes |
|---|---|---|
| Heavy Cream 🥛 | 2 ½ cups | Full-fat for creaminess, cold |
| Vanilla Extract 🌿 | 2 tsp | Pure Madagascar bourbon preferred |
| Granulated Sugar 🍚 | ½ cup | White or light brown |
| Large Egg Yolks 🥚 | 6 whole | Fresh, room temperature |
| Turbinado Sugar 🍬 | ¼ cup | For caramelized topping |
| Unsalted Butter 🧈 | 2 tbsp | Cold, cubed for ramekins |
| Vanilla Bean Paste 🌿 | 1 tsp | Optional for intense flavor |
| Pinch of Salt 🧂 | ⅛ tsp | Fine sea salt |
| Ramekins 🍽️ | 6 whole | 4-6 oz capacity, oven-safe |
| Cocoa Powder 🍫 | 1 tbsp | For dusting, optional |
| Fresh Berries 🍓 | 1 cup | For garnish, optional |
The heavy cream is non-negotiable—full-fat only for that velvety texture. Trader Joe’s or Whole Foods carry the best quality, but any brand works if it’s cold and fresh. Egg yolks should be fresh and room temperature—this prevents curdling. I always buy organic eggs for better flavor, but regular works fine. The turbinado sugar? Williams Sonoma sells it in bulk, but any gourmet store has it. Look for coarse grains—it caramelizes beautifully.
No vanilla bean paste? Double the vanilla extract—it’s the same thing, just more concentrated. Short on ramekins? Use oven-safe mugs, but they’ll need a water bath. The butter should be cold and cubed—this creates pockets of flavor in each ramekin. For a quicker version, swap turbinado sugar for brown sugar, though the caramelization won’t be as golden. The cocoa powder dusting is optional, but it adds that Parisian bistro touch—Valrhona or Ghirardelli are my go-tos if you’re splurging.
This custard reheats beautifully—just a quick 30 seconds in the microwave. Keeps 4 days in the fridge, fully set and ready to serve. For make-ahead parties, assemble the ramekins a day ahead and refrigerate until ready to bake. The caramelized topping stays crisp for 2 hours after baking, so serve promptly if you’re going for that perfect crunch. Store leftovers covered with plastic wrap pressed directly on the surface to prevent drying.
Why You’ll Love This Recipe
- No Whisk Required: I swear by this—just crack yolks into warm cream, stir once with a fork, then bake. That’s it. No stand mixer, no tempering eggs, no stress.
- Velvet Crunch Magic: The caramelized turbinado sugar on top? Chef’s kiss. It turns crispy while the custard stays silky—like biting into a cloud with a crackly hug.
- Breakfast or Dessert: Honestly, I make this for both. Serve it cold with berries for brunch or warm with a drizzle of honey for an after-dinner treat. (My kids beg for it at 7 a.m. and 7 p.m.)
- Leftovers? More Like Neverovers: This stuff keeps for days in the fridge—if it lasts that long. I’ve reheated slices in the microwave for 10 seconds, and no one ever knows they’re not fresh-baked. Budget win.
Step-by-step instructions for petit pot pudding
Here’s how to make these silky, individual desserts with perfect texture every time.
Whisk Cream and Sugar Together
In a large mixing bowl, combine the 2.5 cups heavy cream and 0.5 cup granulated sugar. Whisk until the sugar dissolves completely and the mixture becomes smooth and homogenous. This step is crucial for even sweetness distribution throughout the pudding.
I like to use a whisk for this part because it incorporates air gently, which helps create that signature light, airy texture. Avoid using an electric mixer here—you want to introduce air, not over-incorporate it. The mixture should be at room temperature now, so if your cream was cold, let it sit for about 10 minutes before proceeding.
Incorporate Egg Yolks and Vanilla
In a separate bowl, whisk together the 6 whole large egg yolks, 2 tsp vanilla extract, and 1 tsp vanilla bean paste until smooth and slightly thickened. This is where the real flavor development happens, so don’t rush this step.
Here’s the thing—temper the egg yolks by slowly pouring about ½ cup of the cream mixture into the yolks while whisking constantly. This prevents the eggs from scrambling when they hit the hot cream later. Once fully combined, gradually pour the tempered yolks back into the remaining cream mixture, whisking continuously until everything is perfectly blended.
Season and Prepare Ramekins
Add the 0.125 tsp pinch of salt to the mixture and whisk once more to distribute evenly. This subtle salt enhances all the sweet flavors. Divide the custard evenly among the 6 ramekins, filling each about ¾ full. Place the ramekins in a deep baking dish.
Here’s a pro tip: Tap the ramekins gently on the counter after filling to remove any air bubbles that might have formed. This ensures smooth, bubble-free pudding when they’re done. Cover the baking dish loosely with plastic wrap and refrigerate for at least 1 hour, or until well chilled.
Bake the Pudding
Preheat your oven to 325°F. Carefully pour hot water into the baking dish until it comes about ¾ of the way up the sides of the ramekins. This water bath ensures gentle, even cooking. Bake for 35-40 minutes until the puddings are set but still slightly jiggly in the center.
You’ll know they’re done when the edges are set but the center still has a slight wobble—this is the perfect texture. If you’re unsure, insert a toothpick into the center of one pudding; it should come out clean but slightly moist. Let the puddings cool in the water bath for 10 minutes, then carefully remove them and let them cool completely at room temperature.
Caramelize and Serve
While the puddings cool, melt the 2 tbsp unsalted butter in a small saucepan over medium-low heat. Stir in the 0.25 cup turbinado sugar and cook for 2-3 minutes until the sugar dissolves and the mixture turns a deep amber color. This caramelized topping adds a beautiful contrast to the silky pudding.
Once the puddings are completely cool, spoon a generous dollop of the caramelized sugar mixture over each one. Dust lightly with 1 tbsp cocoa powder if desired, and garnish with 1 cup fresh berries. Serve immediately for the best texture, or refrigerate for up to 2 hours before serving.
Pro Tips For Making Petit Pot Pudding
- Whisk yolks cold: Grab those egg yolks straight from the fridge—room temperature makes them clump like overworked dough. I learned this the hard way when my first batch split like a bad soufflé.
- Temper the cream: Heat the heavy cream just until it’s steaming, then let it cool for 2 minutes before mixing with yolks. Too hot and you’ll scramble them; too cold and the sugar won’t dissolve properly.
- Toast the sugar: Spread that turbinado sugar in a dry skillet over medium-low heat for 30 seconds—just until it smells toasty. It adds depth without burning, and yes, it’s worth the extra minute.
- Chill the ramekins: Pop your ramekins in the fridge for 10 minutes before baking. Cold dishes set faster and avoid the sad, watery center that ruins all the effort. (Trust me, I’ve made that mistake.)
Make-ahead tips for this dish
Prep Ahead Timeline
Assemble your ramekins with custard and refrigerate them up to 24 hours before baking. This makes them ideal for last-minute dinner parties—just pop them in the oven when guests arrive.
I always prep mine the night before so the custard is perfectly chilled and ready for baking. The flavors deepen during this time, too! 📅
Baking in Advance
Bake the puddings 2 hours ahead of time and store them at room temperature. The custard will firm up slightly but still maintain its silky texture.
Just reheat in a 325°F oven for 10-15 minutes before serving. The caramelized topping will soften a bit but still add that delicious crunch. 💫
Freezer-Friendly
For longer storage, bake the puddings completely, let them cool, and then freeze them in their ramekins. Wrap each one tightly with plastic wrap and aluminum foil to prevent freezer burn. Thaw in the refrigerator overnight before serving. The texture remains creamy, though the caramelized topping may soften slightly. 🍦
Make-Ahead Garnishes
Prep your garnishes separately and store them in airtight containers. Fresh berries can be refrigerated for 3-4 days, while cocoa powder and turbinado sugar stay fresh indefinitely.
Assemble the garnishes just before serving to keep everything looking fresh and vibrant. This saves time and ensures your presentation stays elegant. ✨
Reheating Leftovers
If you have leftovers, reheat them in the microwave for 20-30 seconds on medium power. Cover with a damp paper towel to prevent drying. Alternatively, warm them in a 325°F oven for 8-10 minutes for a more even texture.
The custard reheats beautifully, though the caramelized topping may lose some of its crunch. 🔥
Party Prep Kit
For stress-free entertaining, create a “party prep kit” with all your ingredients and ramekins ready to go. Pre-measure everything and store it in labeled containers. This way, you can assemble and bake the puddings whenever you’re ready. It’s like having a dessert chef on standby! 🎉
Nutrition facts
Frequently asked questions
Can I make this custard without ramekins?
Yes! Use oven-safe mugs or small ceramic bowls instead. For even cooking, place them in a baking dish and add a water bath (hot water up to ¾ the way up the sides). The texture will be the same, though ramekins give that classic petit pot presentation.
Why did my custard turn grainy?
Graininess usually happens from overheating or scrambling the eggs. Always temper the yolks by slowly adding warm cream while whisking, and never let the custard boil. Bake at 325°F and remove when just set (edges firm, center jiggly). Cool completely before refrigerating.
Can I substitute vanilla extract with vanilla sugar?
Not directly—vanilla sugar lacks the alcohol content that helps carry flavor. If you must substitute, use 1 tsp vanilla sugar + ½ tsp vanilla extract to mimic the depth. For best results, stick with pure extract or scrape seeds from a vanilla bean.
How do I fix a cracked custard topping?
Cracks happen when the custard cools too quickly. To salvage it, gently reheat the ramekins in a 300°F oven for 5 minutes to soften the edges, then chill again. For presentation, dust with extra cocoa powder or add fresh berries to distract from the imperfection.
Is this recipe suitable for vegan diets?
No, this classic custard requires eggs and dairy. For a vegan version, use coconut cream, agar-agar, and flax eggs. The texture will differ (less silky), but it’s a great alternative for plant-based diets. Look for vegan petit pot recipes with cornstarch or arrowroot powder as thickeners.

- Crock Pot Round Steak Recipe: Slow-Sear Crust With Juicy Center - November 6, 2026
- Candied Sweet Potatoes Crock Pot Recipe: Caramelized Sweetness With Zero Effort - November 6, 2026
- Steak Recipe Crock Pot: Juicy, Caramelized Crust in 4 Hours - November 6, 2026