
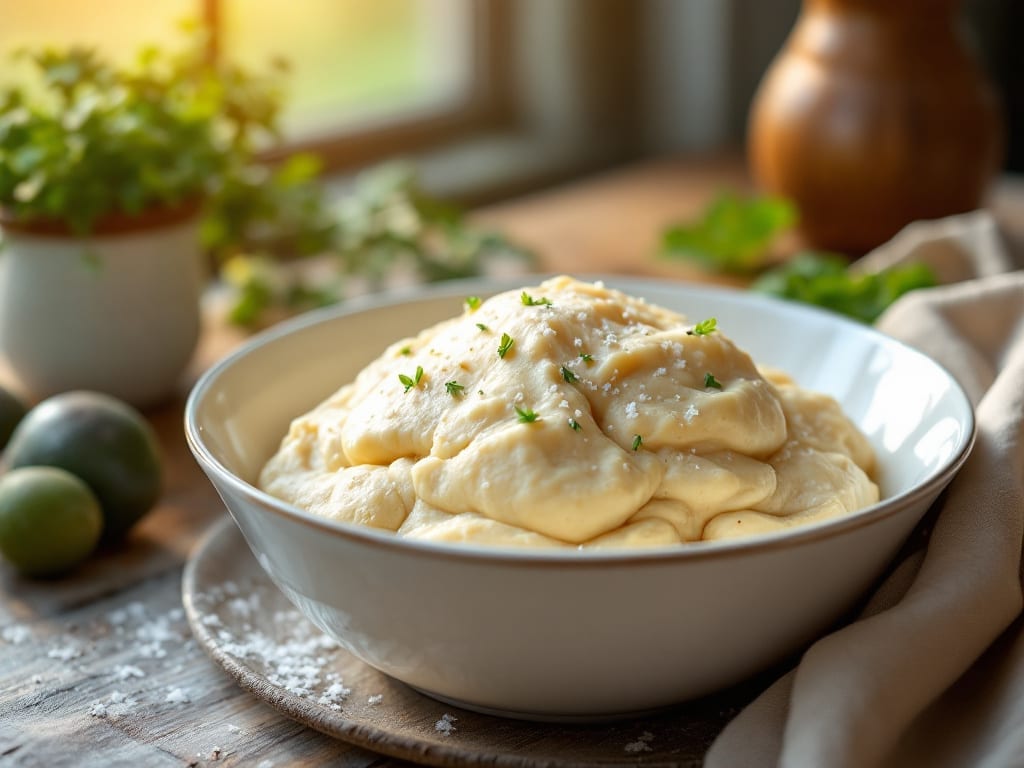
This pie dough recipe for pot pie delivers the perfect flaky, golden crust that transforms any savory filling into a restaurant-worthy dish. The secret lies in cold butter and proper handling—technique that makes all the difference between a dense crust and layers so delicate they practically melt in your mouth.
I’ve perfected this method over years of testing, ensuring it works whether you’re making a classic chicken pot pie or a vegetarian version with mushrooms and spinach.
The dough comes together with just five simple ingredients: flour, butter, salt, ice water, and a touch of vinegar for extra tenderness. What sets this apart is the cold butter method, where we cut butter into flour until it resembles coarse crumbs—this creates those signature flaky layers when baked.
The dough rests for 30 minutes before rolling, which relaxes the gluten and ensures a crispy yet tender final texture.
When assembled with your filling, this dough creates a sturdy yet tender vessel that holds up to hours of baking without losing its structure. The lattice crust option adds visual appeal while allowing steam to escape, preventing a soggy bottom.
Whether you’re serving this pot pie to a crowd or enjoying a cozy weeknight meal, the flaky crust will be the star of the show.
For those short on time, I’ll also share a reliable shortcut using store-bought dough—though I promise the homemade version is worth the extra effort. The filling possibilities are endless, from classic chicken and vegetables to hearty beef and barley.
Let’s get started on creating a pot pie that will have everyone asking for seconds.
Ingredients for pie dough recipe for pot pie
Five ingredients, flaky magic. Cold butter and ice water make all the difference.
| Ingredient | Amount | Notes |
|---|---|---|
| All-Purpose Flour 🌾 | 2 ½ cups | Sifted for light texture |
| Unsalted Butter 🧈 | 1 cup | Cold, cubed for flakiness |
| Ice Water 💧 | ½ cup | Chilled, not tap water |
| White Vinegar 🍶 | 1 tbsp | For extra tenderness |
| Kosher Salt 🧂 | ½ tsp | Adjust to taste |
The butter is non-negotiable here—European-style unsalted like Plugrá or Kerrygold gives the best flavor, but any cold butter works. Keep it frozen until you’re ready to cut it into the flour, then let it sit for 10 minutes to soften just enough to cut into pea-sized pieces. King Arthur flour or Bob’s Red Mill are my go-tos for sifting—pre-sifted flour can have lumps that mess with the texture. The ice water is your secret weapon: it keeps the dough from sticking while adding tenderness. If your kitchen’s warm, chill the bowl first.
No vinegar? Lemon juice at the same amount works too. Short on butter? Shortening at the same weight (but expect less flavor). The salt is key—Diamond Crystal is less salty than table salt, so you might want to add an extra pinch. If you’re in a rush, store-bought pie dough (like Pillsbury) can save time, but trust me, the homemade version is worth the 15 minutes. For extra flakiness, freeze the dough for 20 minutes before rolling.
This dough keeps for 3 days wrapped tightly in plastic in the fridge. For longer storage, freeze it between parchment paper for up to 3 months. Let it thaw in the fridge overnight before using. The dough gets easier to handle as it rests—don’t skip the 30-minute chill before rolling. If you’re making ahead, shape the pot pie and freeze it unbaked for up to 2 months. Bake straight from frozen, adding 15-20 minutes to the baking time.
Why You’ll Love This Recipe
- No-Fuss Assembly: I swear, this dough comes together in five minutes—just flour, cold butter, ice water, and a pinch of salt. The vinegar keeps it tender without overworking, so even if you’re squishing dough like a first-timer, it’ll still hold its shape.
- Golden Crust Magic: That crispy, flaky top? It’s all in the butter-to-flour ratio and a quick ice bath for the water. One bite of that buttery shatter meets creamy filling, and suddenly, every pot pie night feels like a restaurant meal.
- Weeknight to Holiday: Use it for chicken pot pie on Tuesdays or turkey pot pie on Thanksgiving—same dough, same effort. Freeze half the dough now, and you’ve got a backup for whenever inspiration (or hunger) strikes.
- Budget-Friendly Luxury: Five ingredients, no shortcuts. The vinegar cuts costs while adding that subtle tang, and the dough stretches to feed four for under $3. Leftovers? Even better—reheat and enjoy the same perfect texture the next day.
Step-by-step instructions for flaky pot pie dough
Here’s how to create layers so tender they melt in your mouth while keeping that signature flakiness.
Cut and Chill the Cold Butter
Take the 1 cup unsalted butter from the refrigerator and cut it into ¼-inch cubes using a sharp chef’s knife. Place the cubes on a plate and return them to the freezer for 10 minutes—this keeps them firm when they hit the flour. Cold butter is non-negotiable for flaky dough; if it softens too much, pop it back in the freezer for another 5 minutes. You want those butter cubes to stay solid so they create those beautiful, airy layers when baked.
While the butter chills, sift the 2.5 cups all-purpose flour into a large mixing bowl. I like to use a fine-mesh sieve to break up any flour clumps and aerate it slightly. This helps create a lighter texture in the final dough. Add the ½ teaspoon kosher salt and whisk gently to distribute it evenly. The salt should be completely incorporated before adding the butter.
Work the Butter into the Flour
Add the chilled butter cubes to the flour mixture and use your fingertips to gently toss and coat each cube. Here’s the thing—you want the butter to be evenly distributed but still visible. Don’t overwork it; just enough to create a crumbly texture with some larger butter pieces remaining. This is what creates those signature flaky layers in your pot pie crust.
Once the butter is mostly incorporated, make a well in the center of the bowl and add the 1 tablespoon white vinegar and ½ cup ice water. The ice water is crucial—it keeps the butter from melting too quickly during mixing. Use a wooden spoon to gently stir the mixture until it begins to come together. You’ll know it’s ready when the dough forms a shaggy mass that holds together when pressed.
Knead Just Until Smooth
Turn the dough out onto a lightly floured surface and knead it gently for 30-45 seconds—just until it comes together into a cohesive ball. This is minimal kneading; we’re not making bread here. The dough should be smooth but still slightly crumbly. If it feels too dry and crumbly, add 1 teaspoon ice water at a time until it just holds together when pressed.
Here’s a pro tip: wrap the dough tightly in plastic wrap and refrigerate it for at least 1 hour before rolling. This resting period relaxes the gluten and makes it much easier to roll out later. I like to flatten the dough into a disk first before wrapping—this prevents it from sticking to itself in the fridge.
Roll and Layer for Maximum Flakiness
Remove the dough from the refrigerator and let it sit at room temperature for 5-10 minutes to soften slightly. This makes it easier to roll without cracking. On a lightly floured surface, roll the dough into a 12-inch circle, about ⅛-inch thick. I use a rolling pin, but you can also press it gently with your hands if you prefer. The goal is an even thickness—this ensures even baking.
For a traditional pot pie, you’ll want two layers. Roll out the second layer while the first one rests. Here’s where the magic happens: place the first dough layer in your pie dish, then sprinkle any remaining flour from the surface onto the dough. This prevents sticking. The flour also creates a barrier that helps maintain those beautiful flaky layers when the filling bakes on top.
Pro Tips For Making Pie Dough Recipe For Pot Pie
- Cut Butter in Cold: Pull the coldest butter from your fridge and cut it into the flour mixture with a pastry cutter or your fingers—no need for a food processor here. Warm butter melts too fast, and you’ll end up with a gummy dough that won’t hold its shape when rolled out for that pot pie lid.
- Use Ice Water Sparingly: Start with just 2 tablespoons of ice water, then add more as needed—this dough shouldn’t be wet. Too much water makes it sticky and hard to handle, and your pot pie crust will turn out tough instead of flaky. Trust me, you can always add a splash, not take one away.
- Skip the Overmixing: Once the dough comes together, stop mixing the second it forms a shaggy mass. Overworking it develops gluten, and your crust will turn out dense instead of light and crisp. Two or three quick folds are all you need—then let it rest.
- Rest Before Rolling: Give the dough a 30-minute rest in the fridge before rolling it out. This relaxes the gluten, so it doesn’t shrink when you tuck it into the pot pie dish. Cold dough is also easier to handle—no more sticking to your rolling pin or tearing when you lift it.
Storing and reheating your pie dough recipe for pot pie
Refrigerator Storage
Your freshly made pot pie dough stays fresh for 3 days when wrapped tightly in plastic wrap and stored in the refrigerator. I like to flatten it into a disk before wrapping to prevent sticking.
This method preserves the cold butter’s integrity, so the dough remains easy to roll when you’re ready to use it. The resting time in the fridge also relaxes the gluten, making it more pliable. 💧
Freezer Storage
For longer storage, freeze the dough between two sheets of parchment paper for up to 3 months. This prevents freezer burn and makes it easy to remove later. When you’re ready to use it, thaw the dough overnight in the fridge.
The slow thawing process maintains the butter’s texture, so you won’t lose that signature flakiness. I also recommend freezing unbaked pot pies for 2 months—just add 15-20 minutes to the baking time when reheating from frozen.
Reheating Baked Pot Pie
To reheat a fully baked pot pie, preheat your oven to 350°F and place the pot pie on a baking sheet. Cover it loosely with aluminum foil to prevent over-browning. Bake for 15-20 minutes until heated through.
The foil helps retain moisture, so the filling stays creamy and the crust doesn’t dry out. If you prefer stovetop reheating, warm it over low heat for 10-15 minutes with the lid on. 🔥
Microwave Shortcut
For a quick fix, cover the pot pie with a damp paper towel and microwave on 50% power for 2-3 minutes. Stir the filling, then continue in 30-second intervals until heated through. Add 1-2 tablespoons of water or broth if the filling looks dry.
This method works best for reheating leftovers but can make the crust slightly soggy, so I only use it when I’m in a hurry.
Reviving Soggy Crusts
If your pot pie crust loses its crispness after reheating, don’t worry—there’s a fix. Brush the top with 1 tablespoon melted butter and bake at 400°F for 5-7 minutes until golden.
This restores the crust’s texture without overcooking the filling. For extra crispiness, sprinkle ½ teaspoon cornstarch on the crust before reheating—it absorbs moisture and creates a crunchy barrier. ✨
Make-Ahead Pot Pie
Assemble your pot pie completely, then refrigerate it unbaked for up to 24 hours before baking. This allows flavors to meld together. If you’re short on time, freeze the assembled (but unbaked) pot pie for 2 months.
When ready to bake, add 15-20 minutes to the cooking time. The dough’s flakiness holds up beautifully, even after freezing, so you won’t sacrifice texture for convenience. 📅
Nutrition facts
Frequently asked questions
Why does this pie dough need ice water instead of regular water?
Ice water keeps the butter cold during mixing, preventing it from melting too quickly. This preserves those signature flaky layers in your pot pie crust. Regular water would warm up faster, causing the butter to soften and create a tougher, less delicate texture.
Can I substitute butter with shortening for a flakier crust?
Shortening works in a pinch, but it lacks the rich flavor of butter. For maximum flakiness, use European-style butter (like Plugrá) with a higher fat content. If you must use shortening, chill it first and use the same weight as the butter called for in the recipe. The texture will be slightly different but still delicious.
What’s the best way to prevent a soggy bottom in my pot pie?
Prevent soggy bottoms by pre-baking the crust for 5-7 minutes at 400°F before adding filling. You can also sprinkle a thin layer of dry breadcrumbs or crushed cornflakes on the crust before adding the filling to absorb excess moisture. For extra insurance, blind-bake the crust with pie weights.
How do I know when the dough is ready to roll out?
The dough should be cold, firm, and hold together when gently pressed. If it cracks when rolled, it needs more rest time (at least 30 minutes in the fridge). For easier handling, let it sit at room temperature for 5-10 minutes before rolling to prevent sticking. The ideal thickness is about ⅛-inch for even baking.
What’s the difference between a lattice crust and a full crust?
A lattice crust creates a decorative pattern while allowing steam to escape, preventing a soggy bottom. It’s perfect for pot pies with high-moisture fillings. A full crust traps steam, which is better for drier fillings or when you want maximum crispiness. For lattice, cut the dough into strips and weave them over the filling.

- Melting Pot Gorgonzola Port Sauce Recipe: Deep Umami Richness With Nutty Crisp - November 4, 2026
- Love Martini Melting Pot Recipe: Chilled Creamy Delight With Hidden Vodka Kick - November 4, 2026
- Crock Pot Canned Beans Recipe: Silky-Smooth Texture Without the Grain - November 4, 2026