
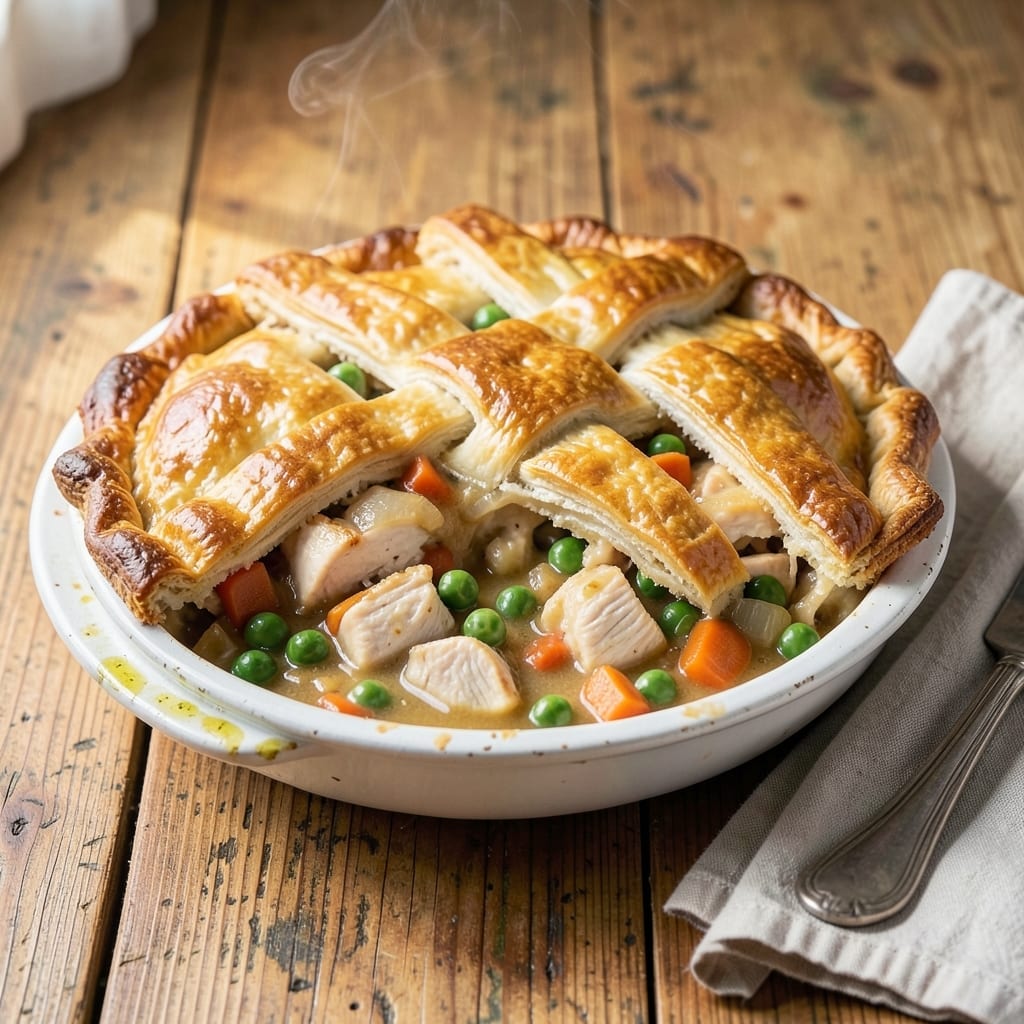
There’s nothing quite like the satisfaction of a homemade pot pie, and this version captures that classic comfort in every bite. The secret lies in the balance between a rich, savory filling and a golden, flaky crust that shatters with each spoonful.
Using Pillsbury dough ensures that effortless yet professional result we all crave. The filling comes together with tender vegetables and a creamy sauce that clings perfectly to every ingredient. It’s a timeless dish made simple.
What you’ll love most is how the top crust bakes to a perfect golden brown, sealing in all the hearty flavors below. The contrast between the crisp, buttery pastry and the warm, velvety filling is what makes this dish unforgettable.
Ideal for family dinners or cozy nights in, this pot pie delivers restaurant-quality taste with minimal fuss.
Ingredients for Pillsbury Classic Pot Pie
Flaky crust, hearty filling, and a few simple ingredients make this dish pure comfort.
| Ingredient | Amount | Notes |
|---|---|---|
| Pillsbury Pie Crust 🥧 | 2 sheets | Refrigerated, from 14.1 oz package |
| Boneless Skinless Chicken Breast 🍗 | 1 ½ lb | Diced into 1-inch pieces |
| Carrots 🥕 | 2 whole | Peeled and sliced into rounds |
| Frozen Peas 🌱 | 1 cup | No need to thaw |
| Yellow Onion 🧅 | 1 whole | Medium, finely diced |
| Celery Stalks 🌿 | 2 whole | Diced, leaves included |
| Garlic Cloves 🧄 | 3 cloves | Minced for depth of flavor |
| Butter 🧈 | ½ cup | Unsalted, for the roux |
| All-Purpose Flour 🌾 | ⅓ cup | For thickening the sauce |
| Chicken Broth 💧 | 1 ½ cups | Low-sodium preferred |
| Whole Milk 🥛 | ½ cup | Full-fat for creaminess |
| Salt 🧂 | 1 tsp | Kosher or sea salt |
| Black Pepper 🌶️ | ½ tsp | Freshly ground preferred |
| Dried Thyme 🍃 | ½ tsp | Crushed between fingers |
| Large Egg 🥚 | 1 whole | For egg wash on crust |
The Pillsbury dough is non-negotiable here—grab the refrigerated kind from your grocery store’s dairy aisle. It’s consistent, flaky, and takes all the guesswork out of pie crust. For the chicken, thighs work too if you prefer darker meat (they stay juicier). I snag mine from Costco in bulk and freeze what I don’t use right away. The veggies? Fresh is ideal, but frozen mixed vegetables (the kind with peas, carrots, and corn) work in a pinch.
No chicken on hand? Rotisserie chicken shreds into this perfectly—saves cooking time. Out of thyme? Poultry seasoning at half the amount covers it. Milk can be swapped for cream (richer) or half-and-half (lighter). If you’re avoiding dairy, unsweetened almond milk works though the sauce won’t be as velvety. The peas? Swap in green beans or corn if that’s what you’ve got.
Assemble and bake right away, or prep the filling a day ahead—just cool it completely before topping with crust. Leftovers keep 3-4 days in the fridge, reheat in the oven to keep the crust crisp. Freezes beautifully for 2-3 months if wrapped tight.
Why You’ll Love This Recipe
- I’ll be real: the filling actually tastes better the next day for lunch.
- One Pan Wonder: I love that the Pillsbury crust and pre-cut veggies mean I only dirty one sheet pan.
- That First Bite: The flaky crust with creamy chicken and sweet carrots is pure comfort.
- Weeknight Hero: Honestly, it’s my go-to for busy evenings when I need dinner fast.
Step-by-Step Instructions for Classic Pot Pie
Here’s the method I use to get that golden crust and creamy filling every time.
Step 1: Prepare the Filling Base
Heat a large skillet over medium heat and melt the 0.5 cup Butter. Add the diced yellow onion, celery stalks, and 2 whole Carrots. Cook for 8-10 minutes until the vegetables soften and the onion turns translucent.
Stir in the minced 3 cloves Garlic Cloves and cook for 30 seconds until fragrant. This builds the flavor foundation for your filling. Watch closely to prevent the garlic from burning, which would add bitterness to the dish.
Step 2: Create the Creamy Sauce
Sprinkle the 0.33 cup All-Purpose Flour over the vegetables and stir to coat. Cook for 1-2 minutes to remove the raw flour taste. Slowly whisk in the 1.5 cups Chicken Broth and 0.5 cup Whole Milk until smooth.
Bring the mixture to a simmer and cook for 3-4 minutes until it thickens enough to coat the back of a spoon. Season with 1 tsp Salt, 0.5 tsp Black Pepper, and 0.5 tsp Dried Thyme. The sauce should be rich and velvety at this point.
Step 3: Add Chicken and Vegetables
Stir in the diced 1.5 lb Boneless Skinless Chicken Breast and 1 cup Frozen Peas. Cook for 8-10 minutes until the chicken is no longer pink and the peas are heated through. The chicken should be tender and the peas bright green.
Taste and adjust seasoning if needed. The filling should be creamy but not watery—if it’s too thin, simmer for another 2-3 minutes. Remove from heat and let cool slightly while you prepare the crust.
Step 4: Assemble and Bake the Pot Pie
Preheat your oven to 375°F. Unroll 1 sheet Pillsbury Pie Crust and place it in a 9-inch pie dish, pressing it gently against the bottom and sides. Pour the filling into the crust-lined dish.
Unroll the second Pillsbury Pie Crust and place it over the filling. Crimp the edges to seal and cut several slits in the top to allow steam to escape. Whisk the 1 whole Large Egg with 1 tablespoon water and brush it over the top crust for a golden finish.
Step 5: Bake to Golden Perfection
Bake for 30-35 minutes until the crust is golden brown and the filling is bubbly. If the edges start to brown too quickly, cover them with foil or a pie shield.
Let the pot pie rest for 10 minutes before serving. This allows the filling to set slightly, making it easier to slice. Each serving should have a flaky, golden crust and a creamy, hearty filling beneath.
Pro Tips For Making Pillsbury Classic Pot Pie
- Precook the Chicken: Poach the boneless skinless chicken breast in broth for 12-15 minutes before dicing—this guarantees it stays juicy and avoids the rubbery texture I learned to dread from undercooking it in the pie filling.
- Thaw the Peas: Rinse the frozen peas under cold water for 30 seconds to thaw slightly, or they’ll turn mushy in the oven while the crust bakes.
- Dock the Crust: Poke the bottom Pillsbury crust all over with a fork before adding filling—skipping this step means a soggy base, and I ruined two pot pies before figuring out why.
- Chill Before Baking: Pop the assembled pot pie in the fridge for 15 minutes before baking to firm up the crust, which keeps it from slumping or leaking filling during the first 20 minutes in the oven.
Common Mistakes When Making This Dish
Soggy Bottom Crust
Prevent a limp crust by pre-baking the bottom layer for 8-10 minutes at 375°F before adding filling. I also brush it with a thin layer of beaten egg white to create a moisture barrier. This simple step makes all the difference. 💡
Lumpy Sauce
Whisk your flour into cold broth first to create a slurry before adding to the pan. This eliminates lumps instantly. If you do get lumps, a quick blend with an immersion blender smooths everything out.
Undercooked Chicken
Cut chicken into uniform 1-inch pieces so they cook evenly. Test doneness by cutting into the thickest piece—it should reach 165°F internally. I use a ThermoWorks Thermapen for accuracy.
Overfilled Pie
Resist overfilling—your pie dish should only be ¾ full before adding the top crust. Excess filling bubbles over during baking, making a mess and potentially burning. Spoon out any extra to bake separately as a mini pot pie.
Pale Crust
For that golden finish, always use an egg wash made with 1 egg + 1 tbsp water. Brush it evenly over the top crust just before baking. If your oven runs cool, increase temperature to 385°F for the last 10 minutes. 🔥
Vegetable Texture
To avoid mushy veggies, blanch the carrots and celery in boiling water for 2 minutes before adding to the filling. This preserves their crispness. For peas, add them frozen directly to the sauce to prevent overcooking.
Nutrition Facts
Frequently Asked Questions
Can I use turkey instead of chicken?
Swap in an equal amount of diced turkey breast. The cooking time remains the same at 8-10 minutes. Turkey works especially well with the creamy herb sauce.
How do I know when the crust is done?
The top should be deep golden brown and pull away slightly from the edges. Bake for 30-35 minutes total, checking at the 25-minute mark to prevent over-browning.
Can I make this ahead of time?
Yes! Assemble the pie, cover tightly, and refrigerate up to 24 hours. Bake as directed, adding 5-10 minutes if cold. Freeze unbaked pies for up to 1 month.

- 6 Oz Chocolate Chip Cookie Recipe: Perfectly Balanced Crispy Edges and Chewy Hearts - September 25, 2026
- 6-Inch Coffee Cake Recipe: Vanilla Bean Swirls and Buttery Streusel Topping - September 25, 2026
- 1 Hour Soup Recipe: Velvety Richness Without the Wait - September 25, 2026