
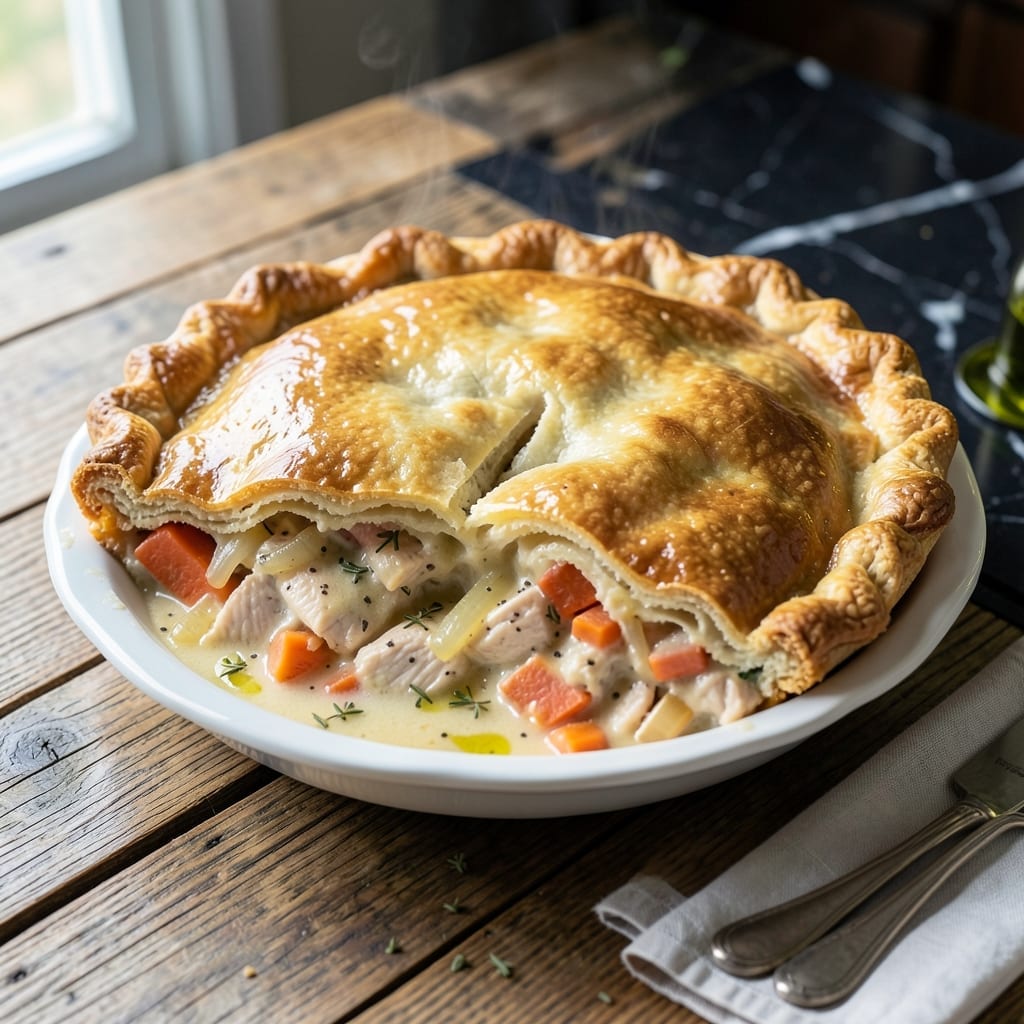
There’s nothing quite like a homemade chicken pot pie with flaky layers that shatter at the touch. This version uses Pillsbury crust for effortless results without sacrificing quality.
The filling is rich and hearty, packed with tender chicken, vegetables, and a creamy sauce that bubbles beneath the golden crust. It’s comfort food at its finest, ready to impress.
Baking at the right temperature ensures the crust pales to a perfect golden brown while the filling cooks through. Every bite delivers that satisfying crunch followed by savory goodness.
Serve it fresh from the oven for a meal that feels like a warm hug. Here’s how to make it.
Ingredients for Pillsbury Crust Chicken Pot Pie
Pillsbury crust plus pantry staples create this comforting classic with minimal effort.
| Ingredient | Amount | Notes |
|---|---|---|
| Pillsbury Refrigerated Pie Crust 🥧 | 2 sheets | Thawed according to package |
| Boneless Skinless Chicken Breast 🍗 | 1 ½ lb | Diced into bite-sized pieces |
| Unsalted Butter 🧈 | ½ cup | Divided for cooking and sauce |
| All-Purpose Flour 🌾 | ⅓ cup | For thickening sauce |
| Yellow Onion 🧅 | 1 whole | Medium, finely diced |
| Carrots 🥕 | 2 whole | Peeled and diced |
| Celery Stalks 🌿 | 2 whole | Diced for texture |
| Frozen Peas 🌱 | 1 cup | Thawed before adding |
| Chicken Broth 🥣 | 1 ½ cups | Low-sodium preferred |
| Whole Milk 🥛 | ½ cup | For creamy sauce |
| Garlic Cloves 🧄 | 2 cloves | Minced for depth |
| Dried Thyme 🌿 | 1 tsp | For savory warmth |
| Salt 🧂 | 1 tsp | To taste for seasoning |
| Black Pepper 🌶️ | ½ tsp | Freshly ground preferred |
| Large Egg 🥚 | 1 whole | For egg wash on crust |
The crust is the foundation here. Pillsbury refrigerated pie crust delivers the promised flakiness without the fuss—find it in the dairy section at any Kroger or Walmart. For the chicken, boneless skinless breasts stay tender and cook evenly. Look for good color and no added solutions. The vegetables add texture and sweetness—fresh is ideal, but frozen works too.
No Pillsbury? Store-brand refrigerated crust is an acceptable substitute. Chicken thighs can replace breasts for richer flavor (adjust cooking time slightly). Vegetable broth instead of chicken keeps it vegetarian-friendly. For extra depth, swap dried thyme for fresh at triple the amount. The peas can be swapped for corn or green beans if preferred.
Assemble and bake immediately, or chill the pie for up to 2 hours before baking. Leftovers keep 3-4 days in the fridge, reheat in the oven for best texture. The unbaked pie freezes for 2 months—wrap tightly in foil.
Why You’ll Love This Recipe
- No-Fuss Assembly: I just roll out the Pillsbury crust, dump in the chicken and onion filling, and seal—no pie dough stress here.
- Buttery Comfort: That flaky crust with the rich, creamy chicken filling? Honestly, it’s like a warm hug on a plate.
- Feeds the Crew: One pie serves my whole family, and between us, leftovers taste even better the next day.
- Pantry Friendly: I always have these ingredients on hand, and the crust saves me from making dough from scratch.
Step-by-Step Instructions for Pillsbury Crust Chicken Pot Pie
Execute these precise steps to create a dish with the promised flaky crust and rich filling.
Step 1: Prepare and Cook the Chicken and Vegetables
Dice the 1.5 lb boneless skinless chicken breast into bite-sized pieces. In a large skillet over medium-high heat, melt 2 tablespoons of the 0.5 cup unsalted butter. Add the chicken and cook for 5-6 minutes until no longer pink inside.
Remove the chicken from the skillet and set aside. In the same skillet, add the finely diced yellow onion, diced carrots, and diced celery stalks. Cook for 5 minutes until the vegetables begin to soften. Stir in the minced garlic cloves and cook for an additional 30 seconds until fragrant.
Step 2: Create the Creamy Filling
Reduce heat to medium and add the remaining 0.5 cup unsalted butter to the skillet. Once melted, sprinkle the 0.33 cup all-purpose flour over the vegetables and stir to combine. Cook for 1-2 minutes to remove the raw flour taste.
Gradually pour in the 1.5 cups chicken broth and 0.5 cup whole milk, whisking constantly to prevent lumps. Stir in the dried thyme, salt, and black pepper. Add the cooked chicken back to the skillet along with the thawed frozen peas. Simmer for 5-7 minutes until the filling thickens enough to coat the back of a spoon.
Step 3: Assemble the Pot Pie
Preheat your oven to 425°F. Unfold the 2 sheets Pillsbury Refrigerated Pie Crust according to package instructions. Place one sheet in a 9-inch pie dish, pressing it gently against the bottom and sides. Trim any excess crust hanging over the edge.
Pour the chicken and vegetable filling into the crust-lined dish, spreading it evenly. Place the second sheet of pie crust over the filling. Trim the top crust to leave a ½-inch overhang, then fold the edges under and crimp with a fork to seal. Cut 4-5 slits in the top crust to allow steam to escape.
Step 4: Bake to Golden Perfection
In a small bowl, beat the large egg and brush it evenly over the top crust. This egg wash ensures a golden brown, flaky finish. Place the pie dish on a baking sheet to catch any spills and bake in the preheated oven for 30-35 minutes.
Bake until the crust is deep golden brown and the filling is bubbling. If the edges begin to brown too quickly, cover them with a strip of foil. Remove from the oven and let rest for 10 minutes before serving to allow the filling to set.
Pro Tips For Making Pillsbury Crust Chicken Pot Pie
- Chill the Crust: Let the Pillsbury crust sit in the fridge for 15-20 minutes before rolling it out—this keeps it from shrinking or tearing when you transfer it to the pie dish. I learned this the hard way after my first three attempts looked like abstract art.
- Cube the Chicken: Cut the boneless skinless chicken breast into ½-inch cubes before cooking. It cooks faster and more evenly, and you’ll avoid that weird rubbery texture that happens with bigger pieces.
- Pre-Cook the Onions: Sauté the yellow onions in the unsalted butter until they’re soft and translucent before adding flour. Raw onions in the filling can leave a harsh bite, and this step actually changes the outcome of your pot pie.
- Vent the Top: Cut 4-5 small slits in the top crust before baking. Without this, the steam builds up and you’ll end up with a soggy mess instead of that golden, flaky finish everyone wants.
Make-Ahead Tips for Leftovers
Prep Ahead Strategy
You can dice all vegetables and chicken the night before—store them in separate airtight containers in the fridge. This saves 20 minutes on cooking day. I often prep while dinner cooks the previous evening.
Assemble and Chill
Fully assemble your pot pie up to 2 hours before baking. Cover with plastic wrap and refrigerate. This lets the crust relax and prevents shrinking during baking. Just add 5 minutes to baking time if chilled. ❄️
Freeze for Later
For longer storage, wrap the unbaked pie tightly in heavy-duty foil and freeze for up to 2 months. Thaw overnight in the fridge before baking. I always label with the date to track freshness.
Bake from Frozen
No need to thaw! Add 10-15 minutes to baking time if going straight from freezer to oven. Cover edges with foil for the first 20 minutes to prevent over-browning. This method works perfectly in a pinch.
Sauce Separation Fix
If the filling thickens too much in the fridge, stir in 2-3 tablespoons of chicken broth before baking. This restores the creamy consistency without diluting flavor. I learned this trick after my first make-ahead attempt.
Crust Protection
To prevent soggy bottom crust, brush the first crust layer with a thin coat of melted butter before adding filling. This creates a barrier that keeps the crust crisp. It’s a small step with big impact. 💡
Nutrition Facts
Frequently Asked Questions
Can I use pre-cooked chicken?
Yes, rotisserie chicken works perfectly. Shred 2 cups of cooked meat and add it directly to the sauce in Step 2. Skip the initial cooking and just warm it through in the filling for 3-4 minutes.
Why is my crust soggy on the bottom?
This happens when filling moisture soaks the crust. To prevent it, brush the bottom crust with 1 tablespoon of melted butter before adding filling, and ensure the filling isn’t too runny before baking.
How do I know when it’s done?
The crust should be deep golden brown and the filling should bubble through the slits. Internal temperature should reach 165°F in the center. Let it rest for 10 minutes before slicing.

- 6 Oz Chocolate Chip Cookie Recipe: Perfectly Balanced Crispy Edges and Chewy Hearts - September 25, 2026
- 6-Inch Coffee Cake Recipe: Vanilla Bean Swirls and Buttery Streusel Topping - September 25, 2026
- 1 Hour Soup Recipe: Velvety Richness Without the Wait - September 25, 2026