
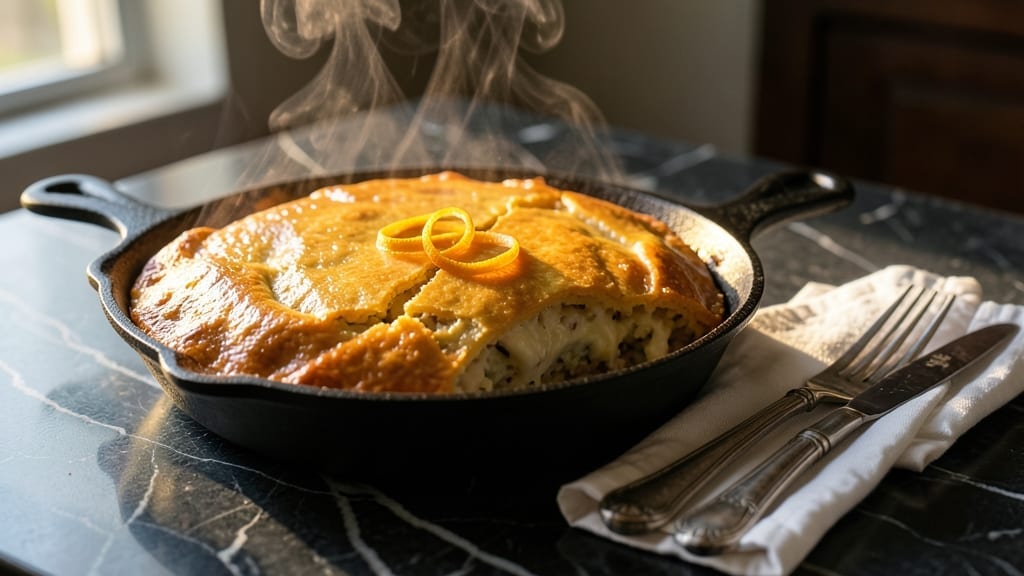
This Pillsbury pie crust chicken pot pie recipe delivers comfort food perfection with its signature flaky layers and rich, savory gravy. I’ve perfected this version over years of holiday gatherings, where it becomes the centerpiece of every meal.
The secret lies in using two pie crusts—one for the bottom, one for the top—to create that iconic, golden-brown finish that everyone craves.
The beauty of this recipe is its simplicity: you can assemble it in under 30 minutes, then let the oven work its magic while you enjoy the aromas filling your kitchen.
The filling combines tender chicken, creamy vegetables, and a velvety gravy that ties everything together. Even better, it’s a crowd-pleaser that works for family dinners or cozy weeknight meals.
What you’ll end up with is a pot pie that’s crispy at the edges, flaky in the layers, and packed with flavor in every bite. The gravy will be rich and smooth, coating the chicken and vegetables perfectly.
It’s the kind of dish that makes you feel like you’ve been cooking all day, even though the real work takes less than an hour.
Serve it with a side of mixed greens or crusty bread to soak up every last drop of that savory gravy. This is comfort food at its finest—warm, inviting, and impossible to resist. Let’s get started on making it!
Ingredients for pillsbury pie crust chicken pot pie
Two pie crusts, tender chicken, and creamy gravy—this crowd-pleaser comes together faster than you’d think.
| Ingredient | Amount | Notes |
|---|---|---|
| Pillsbury Pie Crusts 🥧 | 2 whole | One for bottom, one for top |
| Boneless Chicken Breast 🍗 | 2 lb | Cut into bite-sized pieces |
| Cream of Chicken Soup 🍲 | 10 ½ oz | One can, low-sodium preferred |
| Heavy Cream 🥛 | ½ cup | Full-fat for richness |
| Milk 🥛 | ½ cup | Whole milk preferred |
| Frozen Peas 🌱 | 1 cup | Thawed, no need to drain |
| Carrots 🥕 | 1 ½ cups | Diced small, fresh or frozen |
| Celery Stalk 🧅 | 1 whole | Diced, plus 1 tbsp leaves |
| Yellow Onion 🧅 | 1 whole | Diced, medium size |
| Garlic Cloves 🧄 | 3 cloves | Minced, fresh preferred |
| Chicken Broth 💧 | 1 cup | Low-sodium preferred |
| All-Purpose Flour 🌾 | 1 tbsp | For thickening gravy |
| Salt 🧂 | 1 tsp | Kosher or sea salt |
| Black Pepper 🌶️ | ½ tsp | Freshly ground preferred |
| Dried Thyme 🌿 | ½ tsp | Or 1 tsp fresh thyme |
The pie crusts are the star here. Pillsbury’s is perfect for this—no rolling required, and it gives that classic flaky texture. Grab the original crusts, not the pre-made ones with fillings. If you’re feeling fancy, brush the top crust with egg wash before baking for extra shine. The chicken should be bite-sized, but not too small—you want those tender pieces that fall apart. I usually cut the breasts into 1-inch cubes for even cooking. For the veggies, frozen peas and carrots work just as well as fresh—no need to peel the carrots unless they’re super dirty.
No cream of chicken soup? Homemade roux with chicken broth works just as well—just whisk 2 tbsp butter and 2 tbsp flour, then add 1 cup broth and 1 cup milk. Short on heavy cream? Half-and-half or whole milk stretches it further, though the texture will be slightly lighter. The celery leaves add a subtle flavor boost—don’t skip them if you’ve got them. For the garlic, jarred minced garlic is a time-saver, but fresh minced has way more flavor. If you’re using frozen veggies, no need to thaw them first—they’ll just melt into the gravy as they cook.
This pot pie reheats beautifully—just cover with foil and warm in the oven for 20-25 minutes. Keeps in the fridge for 4-5 days, and freezes perfectly for up to 3 months. I always make a double batch—one for dinner, one for leftovers. The gravy thickens as it sits, so you might need to add a splash of milk when reheating. For serving, a sprinkle of fresh parsley adds a pop of color, but it’s totally optional.
Why You’ll Love This Recipe
- No-Fuss Assembly: I swear by this recipe because it’s the closest thing to takeout without leaving my kitchen. Just brown the chicken, dump in the soup and cream, then slap on those Pillsbury crusts—no rolling, no fussing, no stress.
- Creamy Comfort: That mix of heavy cream and milk turns the soup into something rich and velvety, while the crispy top from the pie crust? Absolute perfection. It’s the kind of dish that makes me pause mid-bite.
- Leftovers for Days: Between us, this recipe makes way more than I can eat in one sitting. The filling stays luscious when reheated, and the crust stays flaky—perfect for lunches or freezing. My go-to for lazy Sundays.
- Budget-Friendly Feast: Boneless chicken and pantry staples stretch to feed four for under $15. Honestly, it’s my secret for making dinner feel special without breaking the bank. Plus, the kids never complain about the leftovers.
Step-by-step instructions for Pillsbury pie crust chicken pot pie
Here’s how to build layers of flaky crust and rich filling that’ll make this comfort classic your new go-to.
Prepare the Chicken and Vegetable Filling
Start by cutting the 2 lb boneless chicken breast into bite-sized pieces—about 1-inch cubes—so they cook evenly throughout the filling. In a large skillet over medium heat, add the chicken and cook until it’s no longer pink in the center, about 6-8 minutes. Remove the chicken and set it aside.
In the same skillet, add 1 tablespoon all-purpose flour and stir to coat the bottom. This helps thicken the gravy later. Add the diced 1 whole yellow onion, 1 whole celery stalk (diced), and 1.5 cups carrots (also diced). Cook for 5 minutes, stirring occasionally, until the vegetables begin to soften. Add the 3 cloves garlic cloves (minced) and cook for another 30 seconds until fragrant.
Pour in the 1 cup chicken broth and scrape up any browned bits from the bottom of the pan. Stir in the 10.5 oz cream of chicken soup, 0.5 cup heavy cream, 0.5 cup milk, 1 cup frozen peas, 1 tsp salt, 0.5 tsp black pepper, and 0.5 tsp dried thyme. Bring the mixture to a gentle simmer and cook for 5 minutes until slightly thickened. Return the cooked chicken to the skillet and stir to combine. Remove from heat and let cool for 10 minutes—this prevents the crust from getting soggy later.
Assemble the Pot Pie
Preheat your oven to 375°F. Unroll one of the Pillsbury pie crusts and place it in a 9-inch pie dish, pressing it gently into the bottom and up the sides. Trim any excess crust hanging over the edge. Pour the cooled chicken and vegetable filling into the crust, spreading it evenly. The filling should come about ¾ of the way up the sides of the dish.
Here’s the trick for flaky layers: brush the top edge of the bottom crust with a little water or milk using a pastry brush. This helps the top crust seal and creates that beautiful golden-brown finish. Unroll the second Pillsbury pie crust and place it over the filling. Seal the edges by pressing them together firmly, then crimp with a fork or your fingers to create a decorative border.
Cut a few small slits in the top crust to allow steam to escape—this prevents the pie from puffing up unevenly in the oven. Place the assembled pot pie on a baking sheet to catch any drips.
Bake to Golden Perfection
Bake the pot pie for 45-50 minutes until the top crust is golden brown and the filling is bubbling through the slits. The edges should look crisp and the crust should pull away slightly from the sides of the dish. If the top isn’t browning enough after 30 minutes, tent it loosely with aluminum foil to prevent over-browning while the filling finishes cooking.
Remove the pot pie from the oven and let it rest for 10 minutes** before serving. This resting time allows the filling to set slightly and makes it easier to slice without spilling. The crust should be crisp and flaky, and the gravy should coat the chicken and vegetables beautifully. Serve warm with a side of crusty bread or a simple green salad.
Pro Tips For Making Pillsbury Pie Crust Chicken Pot Pie
- Poach Chicken First: Skip the dry, rubbery chicken by simmering the breasts in water or broth for 10-12 minutes before shredding—it stays juicy even after baking. I used to just boil them whole, but this method guarantees tender bites that don’t turn to mush when mixed with the creamy filling.
- Pre-Bake the Crust: Brush the Pillsbury crust with egg wash and bake it for 8-10 minutes at 375°F before adding filling—this prevents a soggy bottom. I learned this after slopping filling into unbaked crusts and ending up with a sad, limp pie every time.
- Thicken the Filling: Mix 1 tablespoon cornstarch with cold water, stir it into the soup-cream-milk mixture, and simmer for 2 minutes—this keeps the filling from separating or getting watery. Trust me, your pot pie will hold together better than the version where you skipped this step.
- Vent the Top Crust: Cut a few small slits in the second Pillsbury crust before baking—steam needs an escape, or you’ll end up with a puffy, uneven mess. Sounds simple, but I’ve ruined more pot pies by forgetting this than I care to admit.
Wine and beer pairings for these flavors
Classic White Wine
For this rich, creamy pot pie, a Chardonnay from California or France is my go-to choice. Look for a buttery, full-bodied version like Kendall-Jackson Vintner’s Reserve—its vanilla and caramel notes complement the heavy cream and chicken beautifully.
If you prefer something lighter, a Sauvignon Blanc with citrus notes adds a refreshing contrast to the savory filling. 🍷
Crisp Lager Pairing
A German-style pilsner like Stella Artois or Heineken cuts through the richness of the gravy while balancing the flaky crust. The crisp, clean finish refreshes your palate between bites.
For a local option, try a Belgian witbier—the coriander and citrus notes add an unexpected twist that pairs surprisingly well with the classic flavors. 🍺
Red Wine Option
If you’re serving this pot pie with a red wine, go for a light-bodied Pinot Noir like Meiomi or Beringer Private Reserve. These wines have enough acidity to stand up to the cream sauce without overpowering the dish.
Avoid heavy Cabernets—they’ll clash with the delicate flavors of the filling. 🍇
Non-Alcoholic Choices
For a non-alcoholic pairing, try a sparkling apple cider like Martinelli’s—its effervescence cleanses the palate between bites. Alternatively, a ginger beer with a squeeze of lime adds a zesty contrast to the rich pot pie. I keep a bottle of Fever-Tree Ginger Beer on hand for these occasions. 🍎
Seasonal Variations
In summer, swap the white wine for a dry Riesling—its crisp acidity matches the lighter feel of the dish. For winter gatherings, a Champagne or Prosecco adds a festive touch that pairs beautifully with the warm, comforting flavors of the pot pie. 🥂
Cheese Pairing Tip
Serve with a wedge of sharp cheddar or Gruyère on the side. The cheese’s tanginess complements the pot pie’s richness, and it’s perfect for soaking up any extra gravy. I always keep a small block of Aged White Cheddar from Cabot on hand for this purpose. 🧀
Nutrition facts
Frequently asked questions
Can I use Pillsbury pie crust for a deep-dish pot pie?
Yes! For a deeper filling, use a 9×13-inch baking dish instead of a pie plate. Press the first crust into the bottom and up the sides, then fill with your mixture. The second crust may need to be cut to fit, but you can still create a sealed top. Bake at 375°F for 50-60 minutes, checking for golden-brown edges. The extra depth gives you more serving room for gatherings!
How do I make this pot pie without cream of chicken soup?
No problem! Make a simple roux by melting 2 tablespoons butter in a saucepan, whisking in 2 tablespoons flour, then gradually adding 1 cup chicken broth and 1 cup milk. Simmer for 5 minutes until thickened. Stir in your cooked chicken, veggies, and seasonings. This homemade version adds deeper flavor and lets you control the salt content.
Why is my Pillsbury pie crust getting soggy?
Soggy crust happens when steam escapes too quickly or the filling isn’t cooled enough. Always let your filling cool for 10 minutes before assembling, and brush the bottom crust edges with water before adding the top. If needed, bake the pie on a preheated baking sheet to absorb excess moisture. For extra insurance, sprinkle 1 tablespoon all-purpose flour over the filling before adding the top crust.
Can I freeze this pot pie before baking?
Assemble the pot pie as directed, then wrap it tightly in plastic wrap followed by aluminum foil. Freeze for up to 3 months. When ready to bake, thaw in the fridge overnight, then bake at 375°F for 50-60 minutes (add 10-15 minutes if thawed). The crust may need a few extra minutes to crisp up after being frozen. Perfect for meal prep!
What’s the best way to reheat leftovers?
Cover the pot pie with foil and reheat in a 350°F oven for 20-25 minutes until warmed through. For microwave reheating, cut a slice and heat for 1-2 minutes on 50% power. The gravy thickens when cooled, so add a splash of milk or broth if it seems too thick. Always reheat thoroughly to maintain food safety.

- Baked Potatoes in Crock Pot Recipe: Buttery Interiors and Crispy Top Magic - November 1, 2026
- Braised Beef Short Ribs Recipe: Crock Pot Fall-Off-Bone Magic in 6 Hours - November 1, 2026
- Crock Pot Cocoa Recipe: Velvety Warmth With Hidden Spice Magic - November 1, 2026