
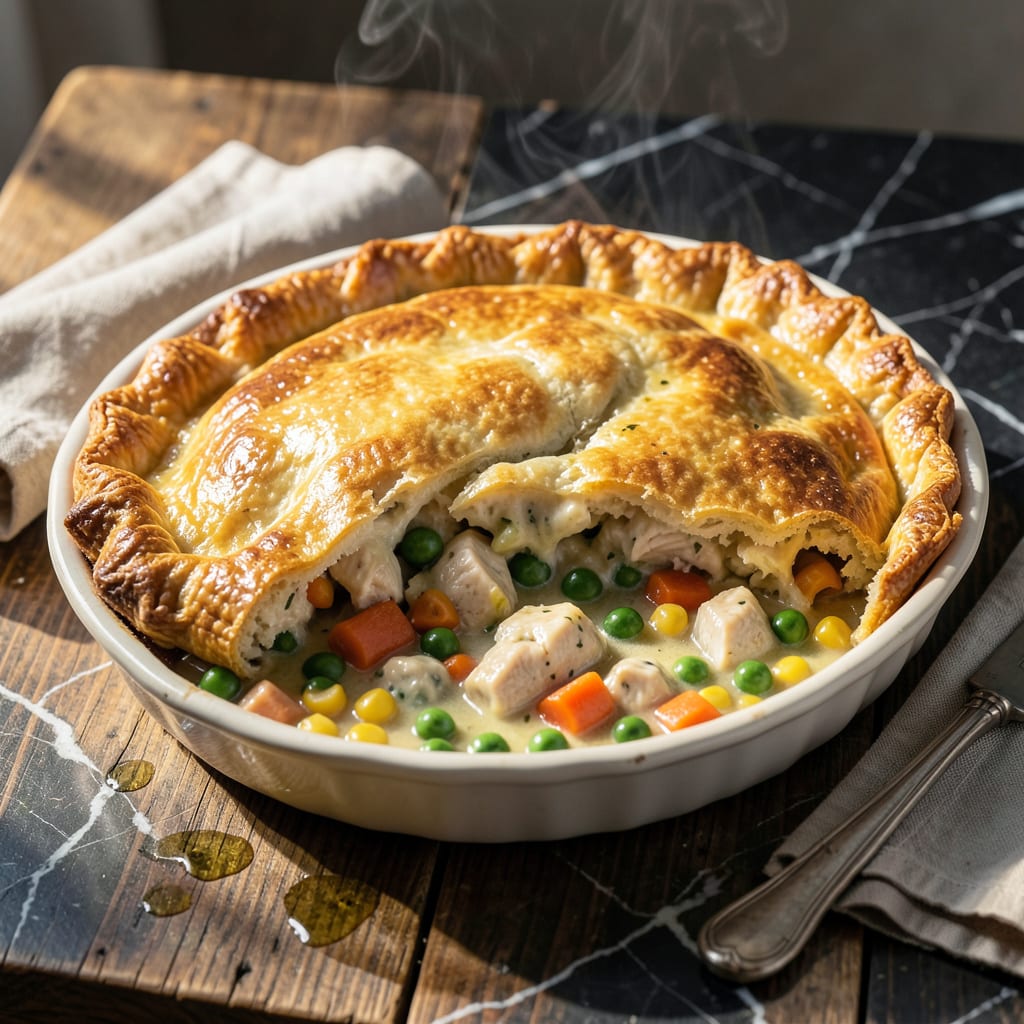
There’s something deeply satisfying about a pot pie with a flaky golden crust encasing a creamy, savory filling. This version uses Pillsbury biscuits for a shortcut that delivers professional results with minimal effort.
The filling combines tender chicken, mixed vegetables, and a rich sauce that bubbles up through the biscuit topping. It bakes to perfection in under an hour, making it ideal for a comforting weeknight meal.
Ingredients for Pillsbury Pot Pie
Professional results require quality ingredients plus the Pillsbury shortcut everyone loves.
| Ingredient | Amount | Notes |
|---|---|---|
| Pillsbury Grands Biscuits 🥖 | 1 can | 10-count, buttermilk variety preferred |
| Boneless Skinless Chicken Breasts 🍗 | 1 ½ lb | Cut into 1-inch cubes |
| Frozen Mixed Vegetables 🥕 | 2 cups | Peas, carrots, corn, green beans |
| Unsalted Butter 🧈 | ½ cup | 1 stick, for sauce roux |
| All-Purpose Flour 🌾 | ⅓ cup | For thickener, spoon and level |
| Chicken Broth 🍲 | 1 ½ cups | Low-sodium preferred for control |
| Whole Milk 🥛 | ¾ cup | Full-fat for creaminess |
| Yellow Onion 🧅 | 1 whole | Medium size, finely diced |
| Garlic Cloves 🧄 | 2 cloves | Minced for depth of flavor |
| Dried Thyme 🌿 | 1 tsp | Crushed between fingers |
| Dried Rosemary 🌿 | ½ tsp | Crushed for aroma release |
| Salt 🧂 | 1 tsp | Diamond Crystal kosher preferred |
| Black Pepper 🌶️ | ½ tsp | Freshly ground for best flavor |
| Olive Oil 🫒 | 1 tbsp | For sautéing aromatics |
[recipeingredientscaler]
The biscuits are non-negotiable—Pillsbury Grands Buttermilk deliver the promised flakiness. For the chicken, bone-in thighs add more flavor but breasts stay tender if cooked properly. Source your broth from Swanson or Kitchen Basics for consistent quality. The vegetables need no prep beyond thawing, but avoid brands with added sauces or seasonings.
No buttermilk biscuits? Pillsbury flaky layers work in a pinch but won’t have the same height. Chicken can be swapped for turkey breast with identical cook times. For a vegetarian version, mushrooms and chickpeas provide hearty texture. The herbs can be replaced with 1 tbsp Italian seasoning blend if that’s what’s in your pantry.
Assemble and refrigerate up to 24 hours before baking—ideal for prep-ahead meals. Leftovers keep 3-4 days refrigerated, though the crust softens. Reheat individual portions in a toaster oven to revive the flaky texture.
Why You’ll Love This Recipe
- Dinner in 30: I can have this on the table faster than takeout arrives—just brown the chicken, stir in veggies, and top with biscuits.
- That Buttery Crust: The Grands biscuits bake up golden and flaky, soaking up the creamy sauce in the best way.
- Feeds the Freezer: I always double the filling and stash one in the freezer for those no-plan nights.
- Stretches a Buck: Chicken, frozen veggies, and biscuits—this hearty meal costs less than a drive-thru run.
Step-by-Step Instructions for Pillsbury Pot Pie
Master the technique for a golden crust and rich, velvety filling that defines comfort food.
Step 1: Sauté Aromatics and Cook Chicken
Heat the 1 tbsp olive oil in a large skillet over medium-high heat. Add the finely diced 1 whole yellow onion and cook for 3-4 minutes until translucent and just beginning to caramelize at the edges.
Stir in the minced 2 cloves garlic cloves, 1 tsp dried thyme, and 0.5 tsp dried rosemary, cooking for 30 seconds until fragrant. Add the 1.5 lb boneless skinless chicken breasts (cut into 1-inch cubes) and cook for 6-8 minutes, stirring occasionally, until the pieces are no longer pink in the center.
This builds the flavor foundation. The onions should be soft and golden, and the chicken should release clear juices when pierced with a fork. Season with 1 tsp salt and 0.5 tsp black pepper as the chicken cooks.
Step 2: Create the Velouté Sauce
Reduce heat to medium and add the 0.5 cup unsalted butter to the skillet. Once melted, sprinkle in the 0.33 cup all-purpose flour and whisk constantly for 1-2 minutes to cook the roux—it should turn a light golden color but not brown.
Gradually pour in the 1.5 cups chicken broth, whisking vigorously to prevent lumps from forming. Then slowly add the 0.75 cup whole milk, continuing to whisk until the mixture is smooth and begins to thicken. This should take 3-4 minutes of constant stirring.
The sauce should coat the back of a spoon and leave a clear path when you run your finger through it. If it seems too thick, add a splash more broth. The key is patience—rushing this step results in a thin, watery filling.
Step 3: Incorporate Vegetables and Finalize Filling
Stir in the 2 cups frozen mixed vegetables and cook for 2-3 minutes until they are heated through and the sauce has thickened further. The vegetables should be tender but still retain some bite.
Taste and adjust seasoning if needed, though the chicken broth and previous seasoning should provide ample flavor. Remove the skillet from heat and let the filling cool slightly for 5 minutes—this prevents the biscuit topping from becoming soggy during baking.
Step 4: Assemble and Bake to Flaky Perfection
Transfer the chicken and vegetable filling to a 9×13-inch baking dish or deep pie dish. Open the 1 can Pillsbury Grands Biscuits and arrange the biscuits on top of the filling, slightly overlapping them to ensure full coverage. The biscuits will expand as they bake, so don’t press them down.
Bake in a preheated 375°F oven for 18-22 minutes, or until the biscuits are deep golden brown and the filling is bubbling at the edges. The crust should be flaky and rise significantly, creating a beautiful, rustic top. Let it rest for 5 minutes before serving to allow the filling to set slightly.
Pro Tips For Making Pillsbury Pot Pie
- Pre-cook the Chicken: Dice the chicken into 1-inch pieces and cook it fully before adding the veggies—raw chicken releases too much moisture and makes the filling watery. I learned this the hard way after my first pot pie turned into soup.
- Thaw the Veggies: Spread the frozen mixed vegetables on a paper towel to thaw and drain excess liquid. Skipping this step gives you a soggy crust, and nobody wants that.
- Seal the Edges: Press the biscuit edges together firmly before baking to prevent the filling from bubbling out. Sounds simple, but it actually changes the outcome—no more sad, flat biscuits.
- Use Cold Butter: Cut the unsalted butter straight from the fridge when making the roux—it blends better with the flour and thickens the filling without clumping. My grandmother swore by this, and she was right.
Essential Equipment for Perfect Results
Baking Dish Essentials
I always use a 9×13-inch glass baking dish for even heat distribution and easy serving. The Pyrex Basics line is my go-to—it handles temperature changes beautifully and lets you see the bubbling filling through the sides. Avoid metal pans, which can cause the bottom biscuits to over-brown. 💡
Skillet Selection
A 12-inch stainless steel skillet is perfect for cooking the filling. I recommend All-Clad D3 for its even heating and durable construction. The wide surface allows the chicken to brown properly rather than steam. Nonstick works too, but you’ll miss out on those flavorful browned bits.
Whisk for Sauce
Invest in a balloon whisk—the rounded shape helps you reach the skillet’s edges when making the roux. My OXO Good Grips 11-inch whisk has the ideal length and comfortable handle. A flat whisk won’t give you the same coverage, and you risk lumps in your sauce.
Measuring Tools
Precise measurements matter for the filling’s consistency. I use stainless steel measuring cups for dry ingredients and a Pyrex 2-cup liquid measure for the broth and milk. The spout on the liquid measure makes pouring into the skillet mess-free.
Thermometer Check
While not mandatory, an instant-read thermometer ensures the chicken reaches 165°F. I keep a ThermoWorks ThermaPen in my drawer for quick checks. It’s a small step that guarantees perfectly cooked chicken every time.
Serving Utensils
Use a large serving spoon to dish out generous portions. I love my Zyliss metal spoon—it’s sturdy enough to cut through the flaky biscuit topping. A spatula might crush the delicate crust, so opt for something with a smooth edge. 🍽️
Nutrition Facts
Frequently Asked Questions
Can I use a different type of biscuit?
Pillsbury Grands Buttermilk work best, but flaky layers can be substituted. Avoid cheap brands as they may not rise properly. The buttermilk variety adds tang that complements the savory filling perfectly.
How do I prevent a soggy bottom crust?
Let the filling cool for 5 minutes before adding biscuits. Also, don’t press them into the filling. This creates a steam barrier that keeps the topping flaky and crisp.
Can I make this ahead of time?
Assemble the dish completely, cover tightly, and refrigerate up to 24 hours. Bake as directed, adding 5-10 minutes if cold. Leftovers reheat well in a toaster oven to revive the crust.

- 4C Bread Crumbs Meatballs Recipe: Crispy Crust and Juicy Centers - September 25, 2026
- 6 Oz Chocolate Chip Cookie Recipe: Perfectly Balanced Crispy Edges and Chewy Hearts - September 25, 2026
- 6-Inch Coffee Cake Recipe: Vanilla Bean Swirls and Buttery Streusel Topping - September 25, 2026